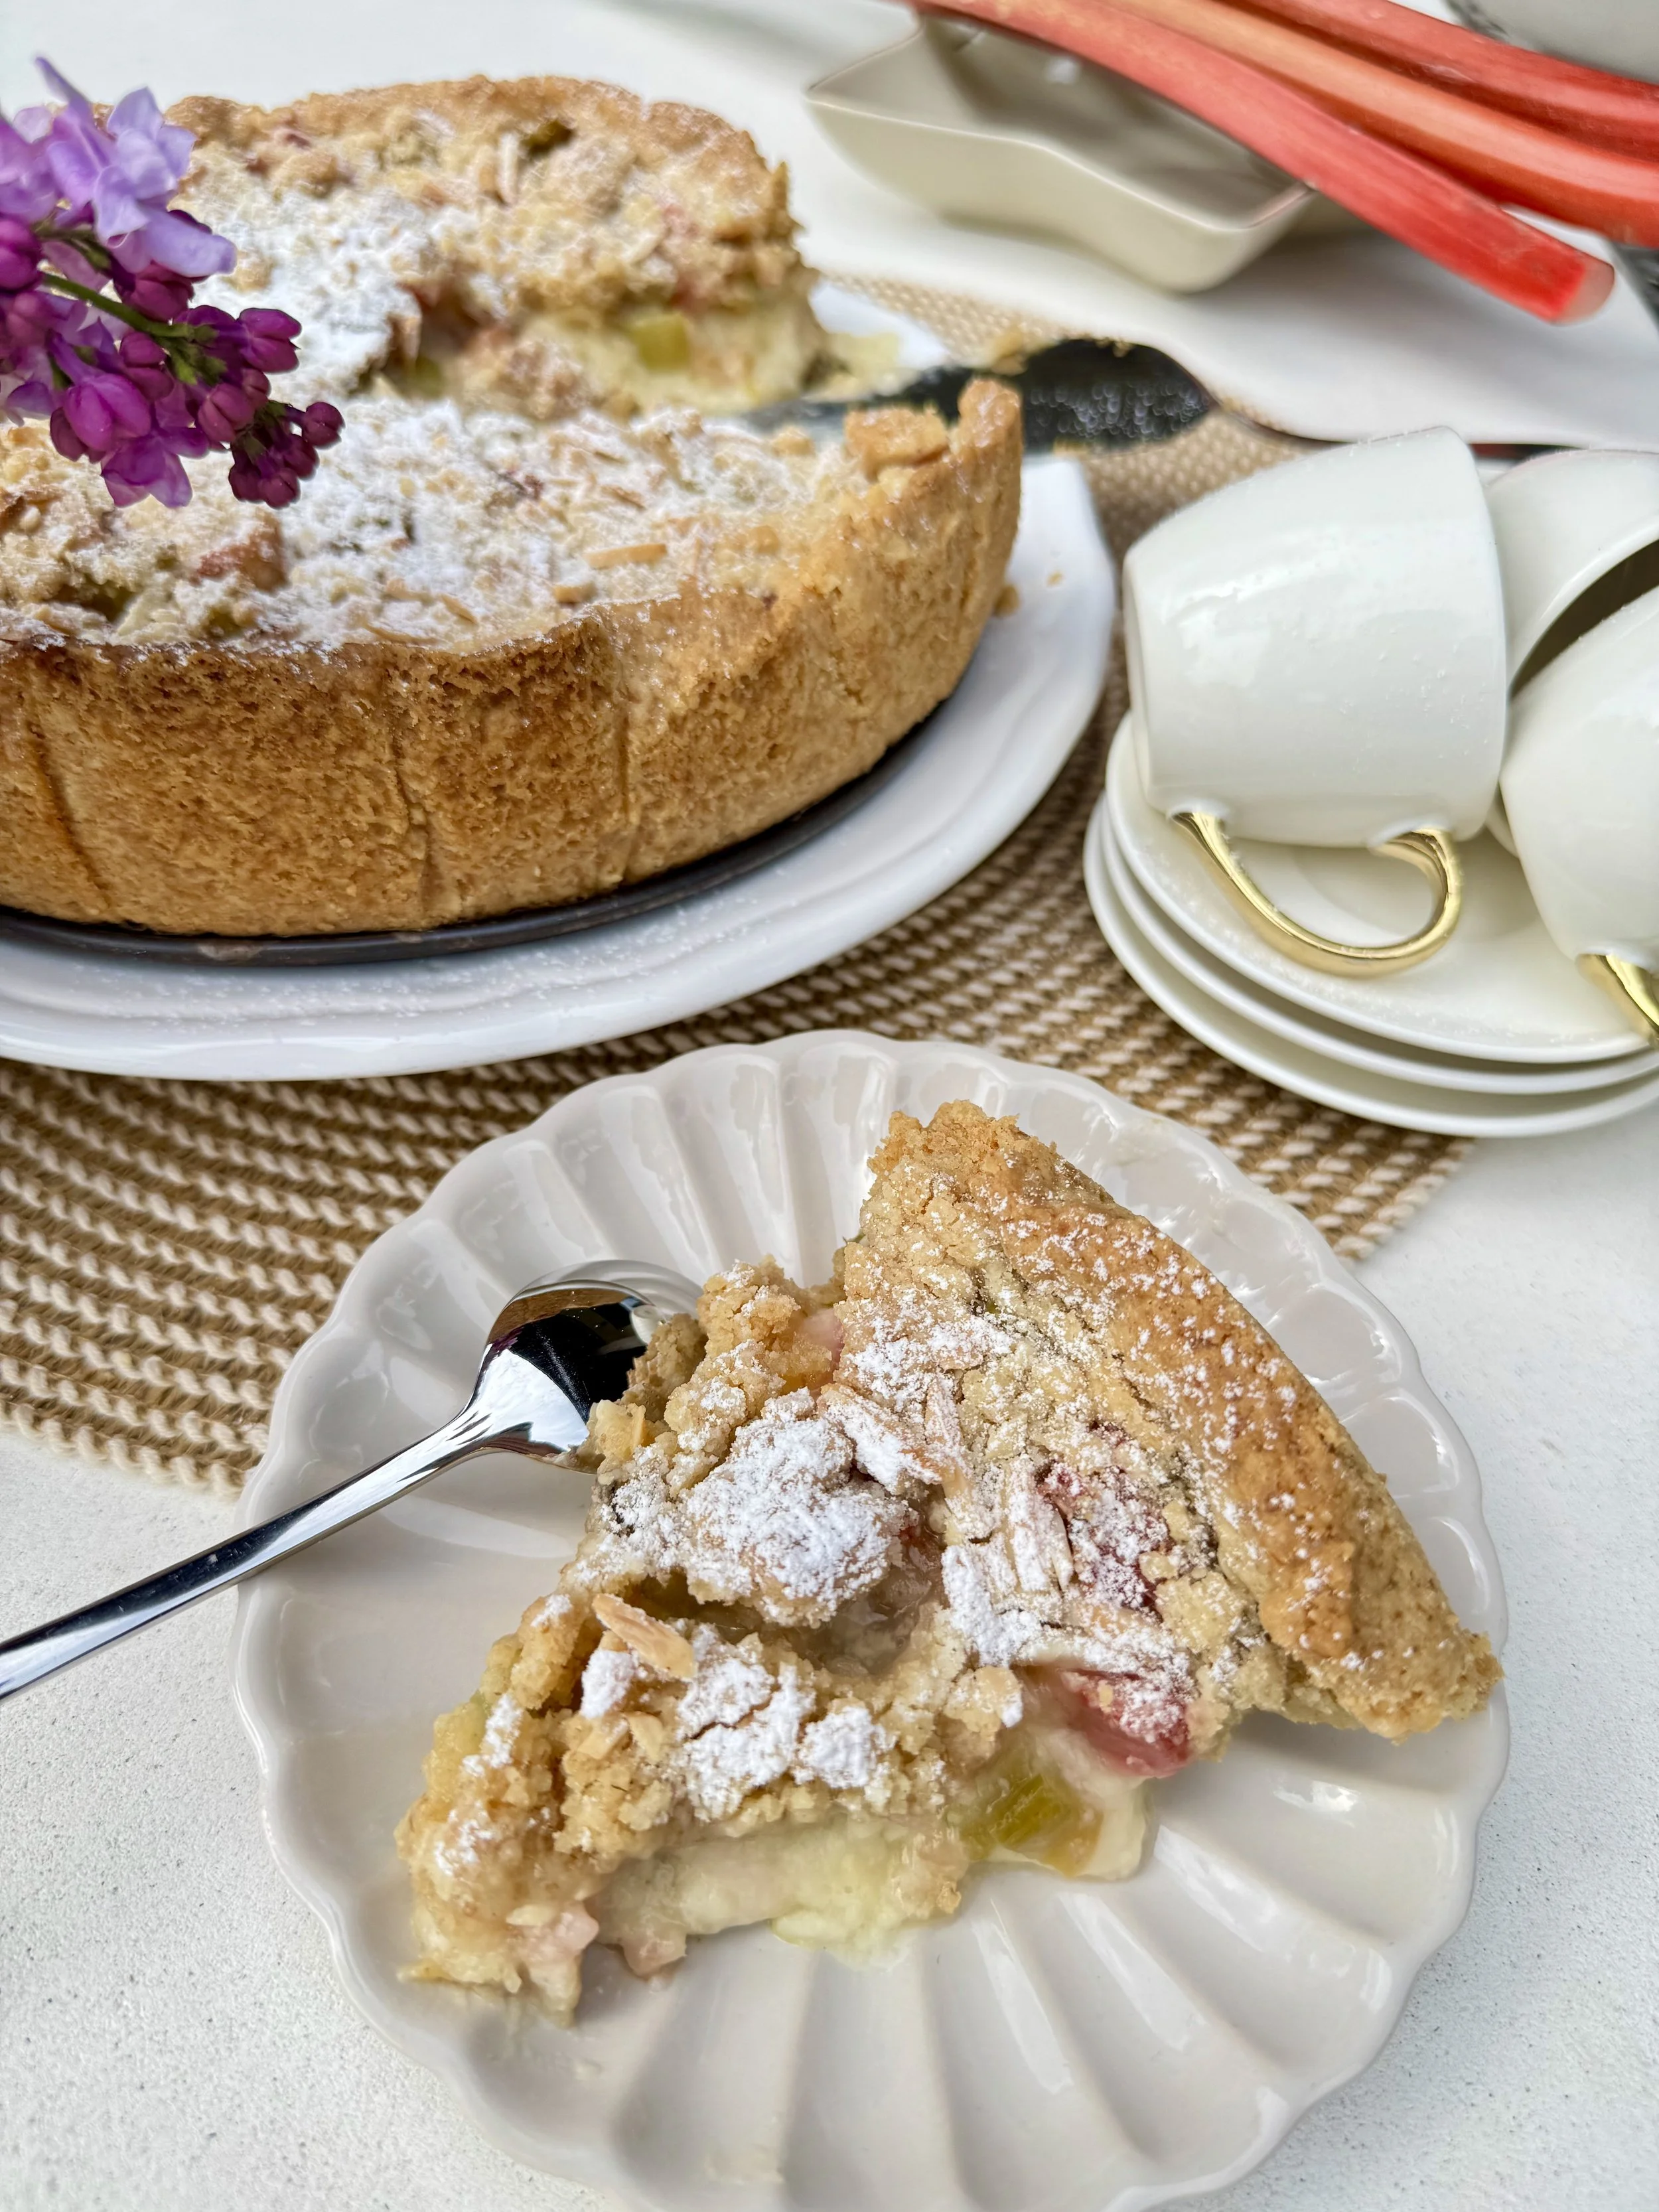
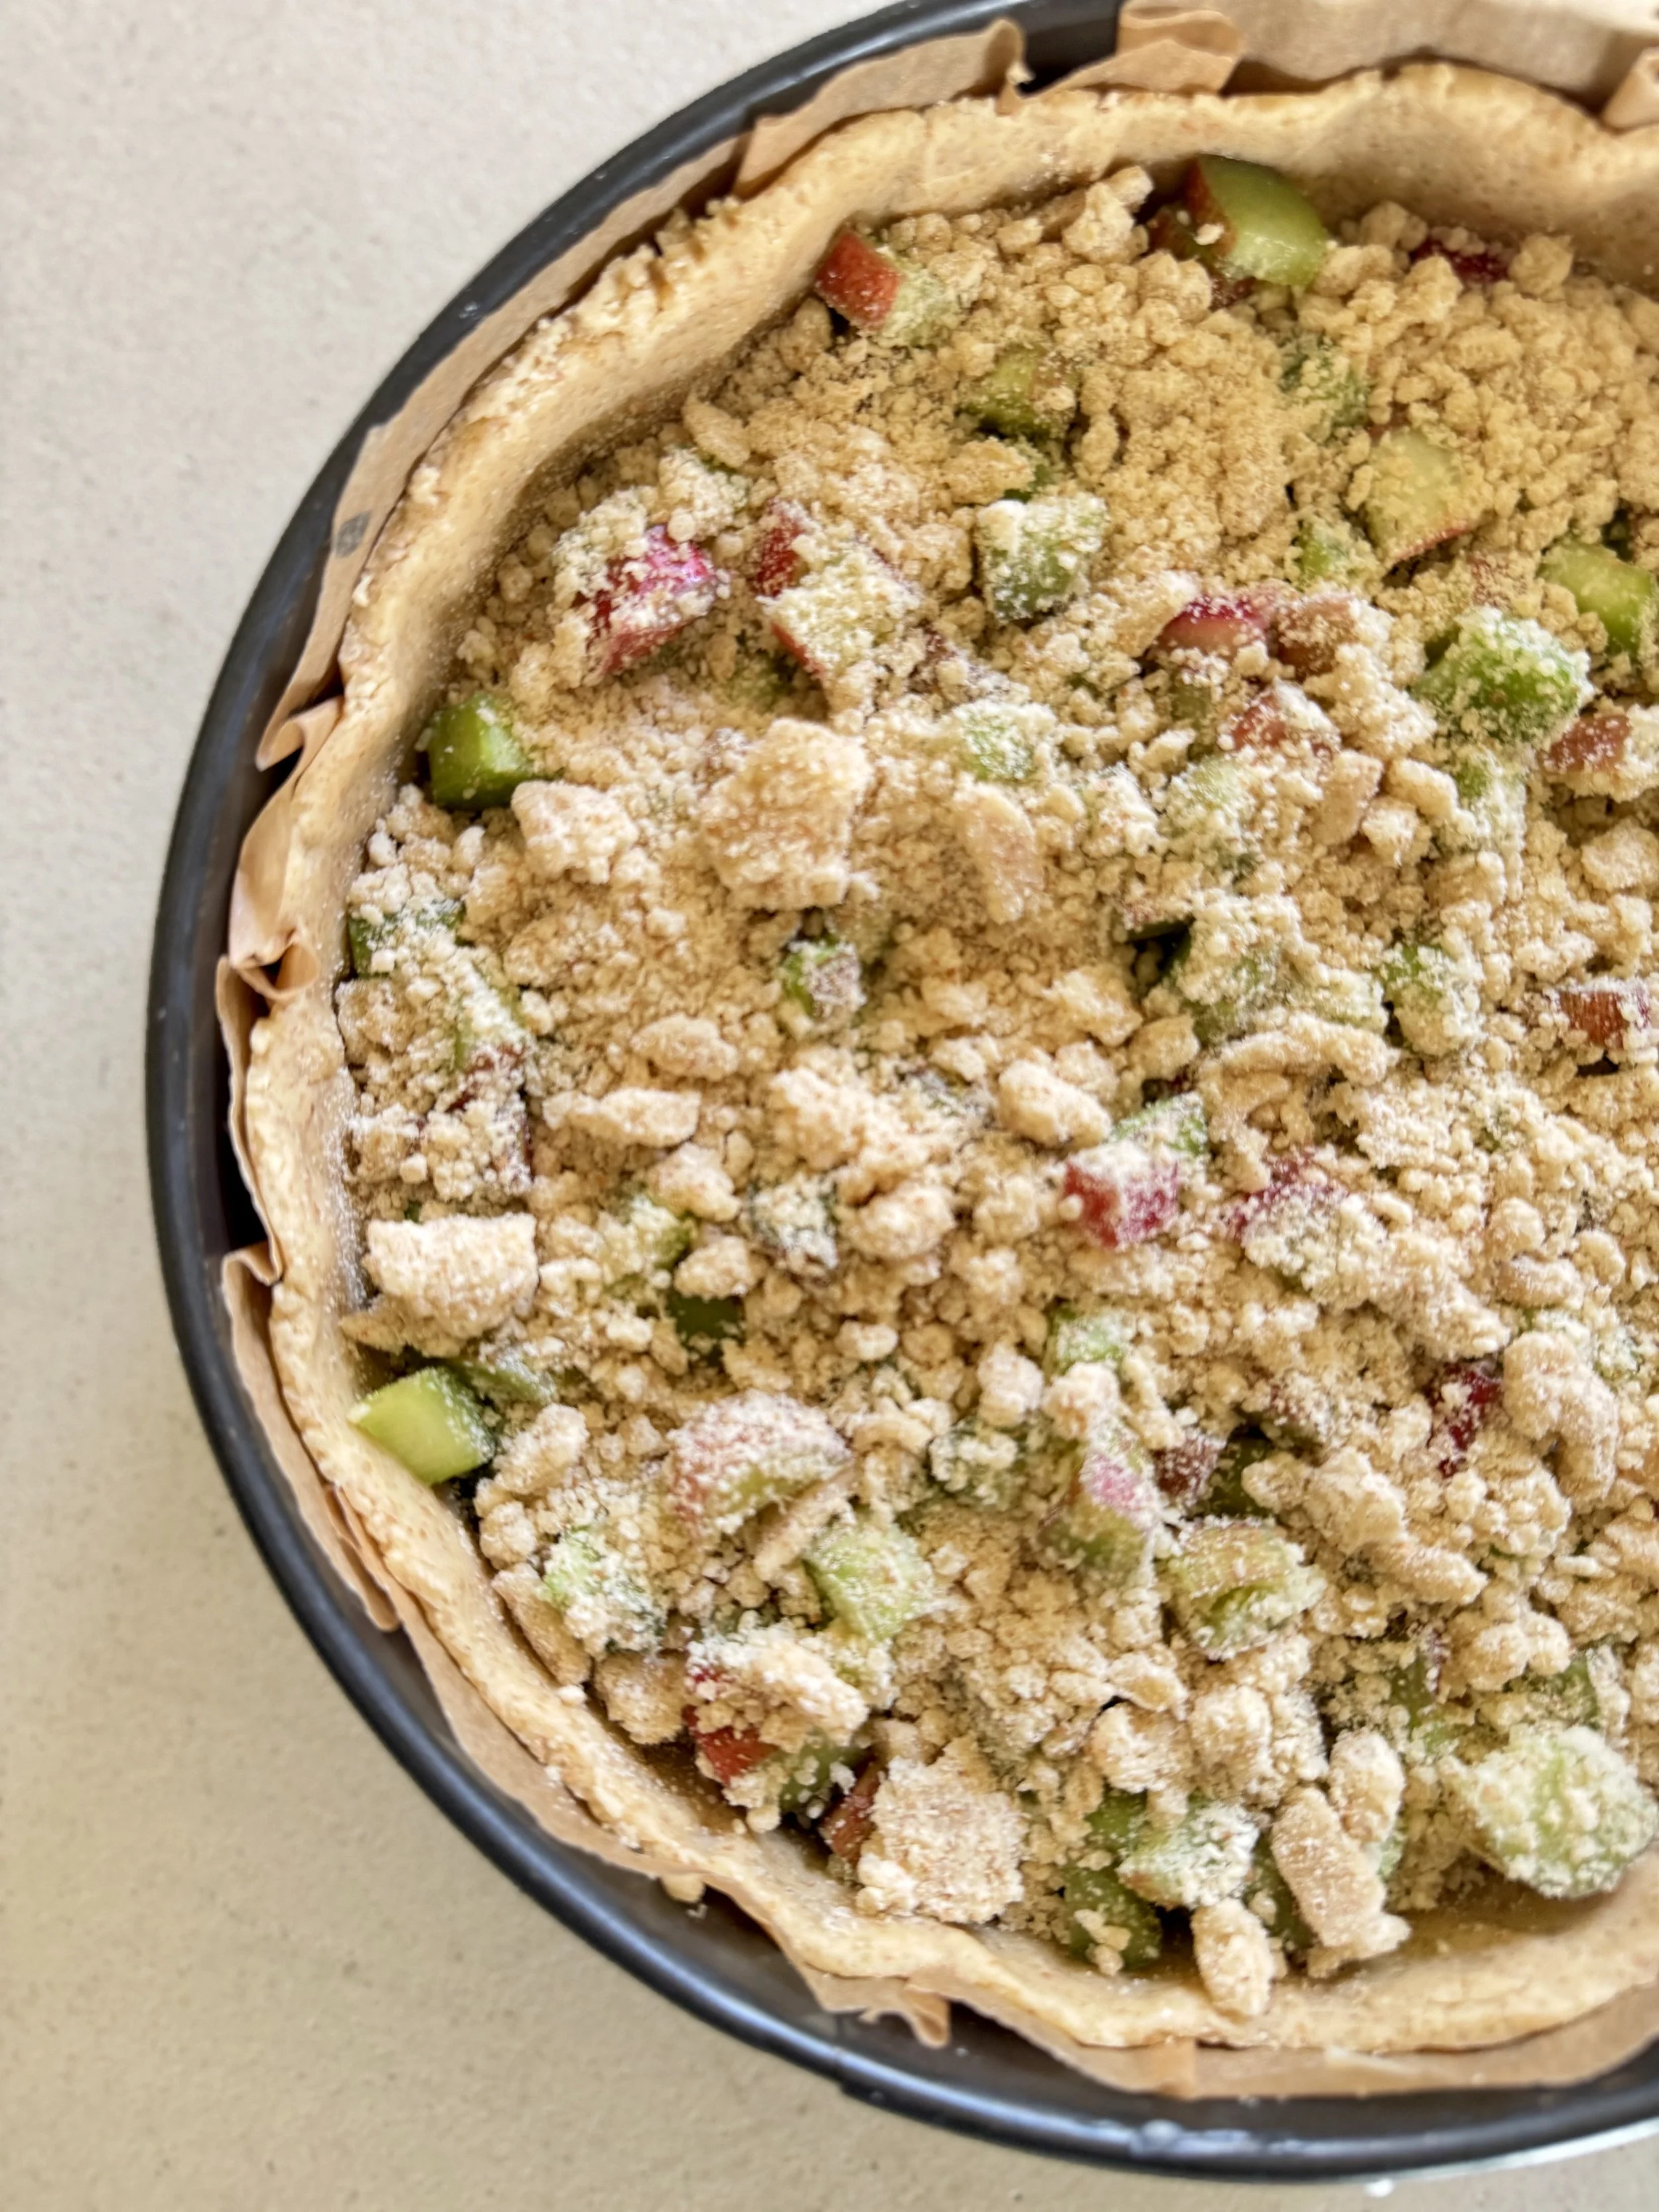
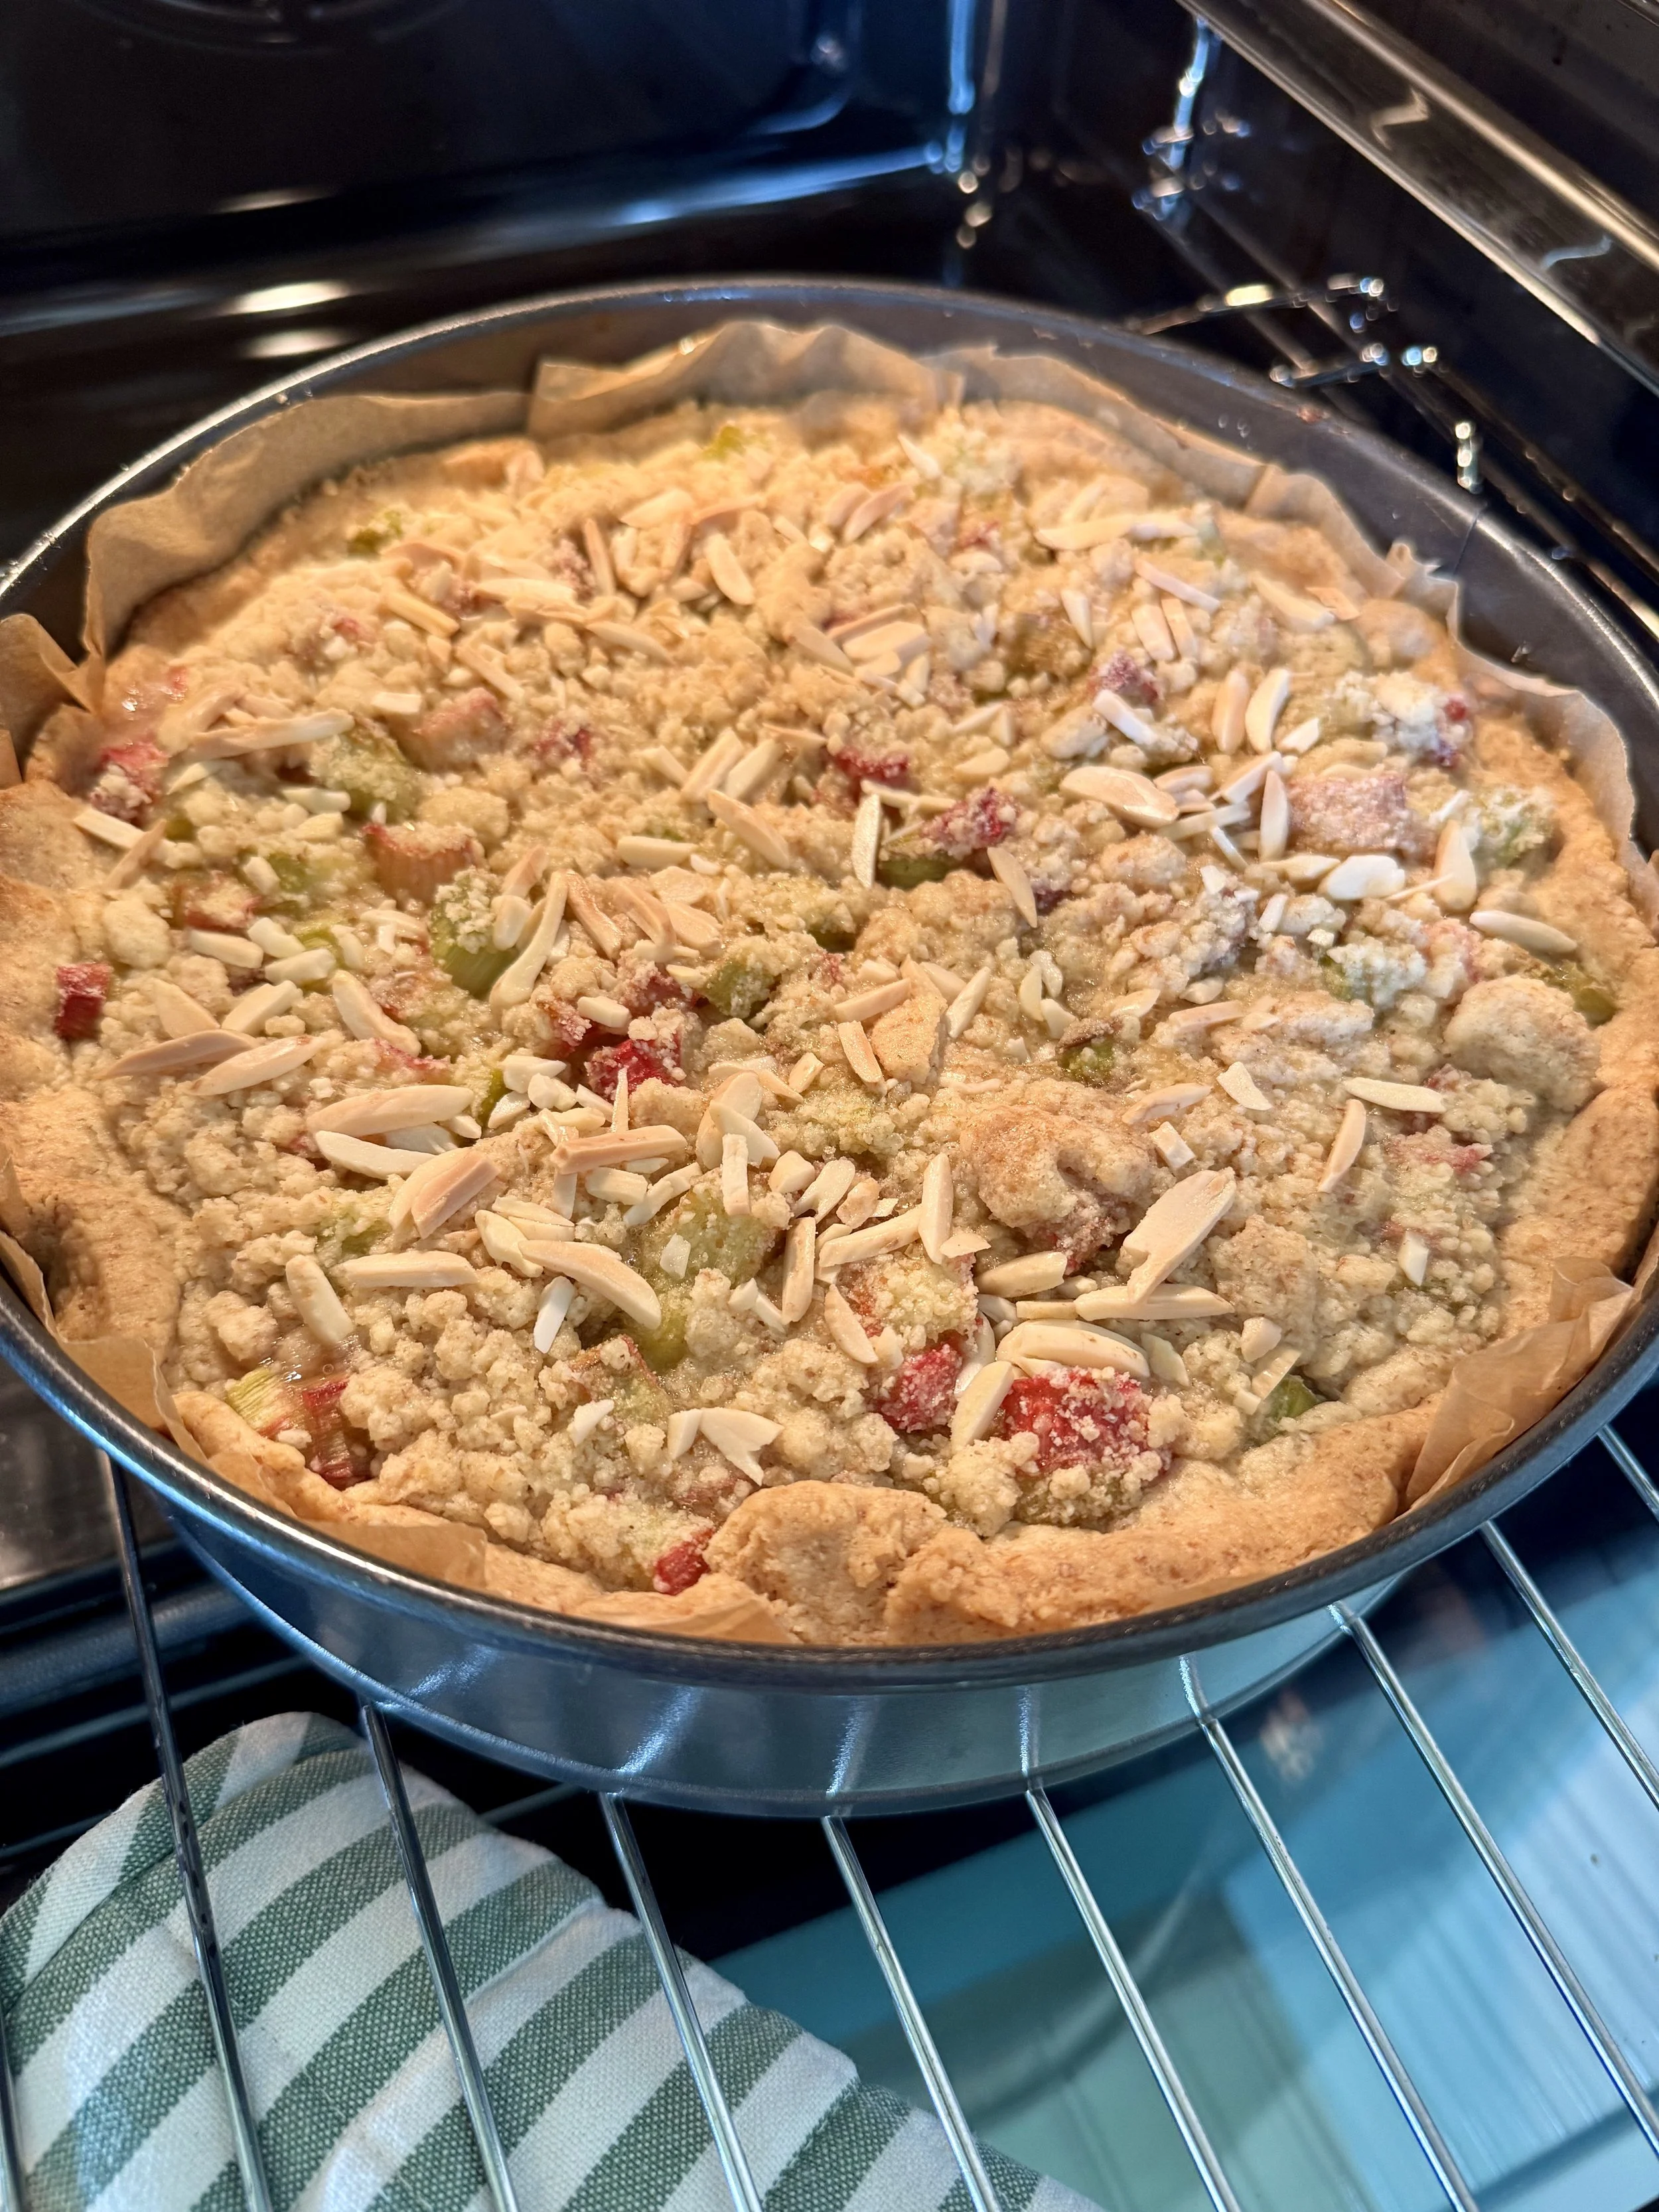
Rabarberu pudiņa kūka
Kūka ar rabarberu un vaniļas pudiņa pildījumu, kuru nosedz drumstalu garoziņa.
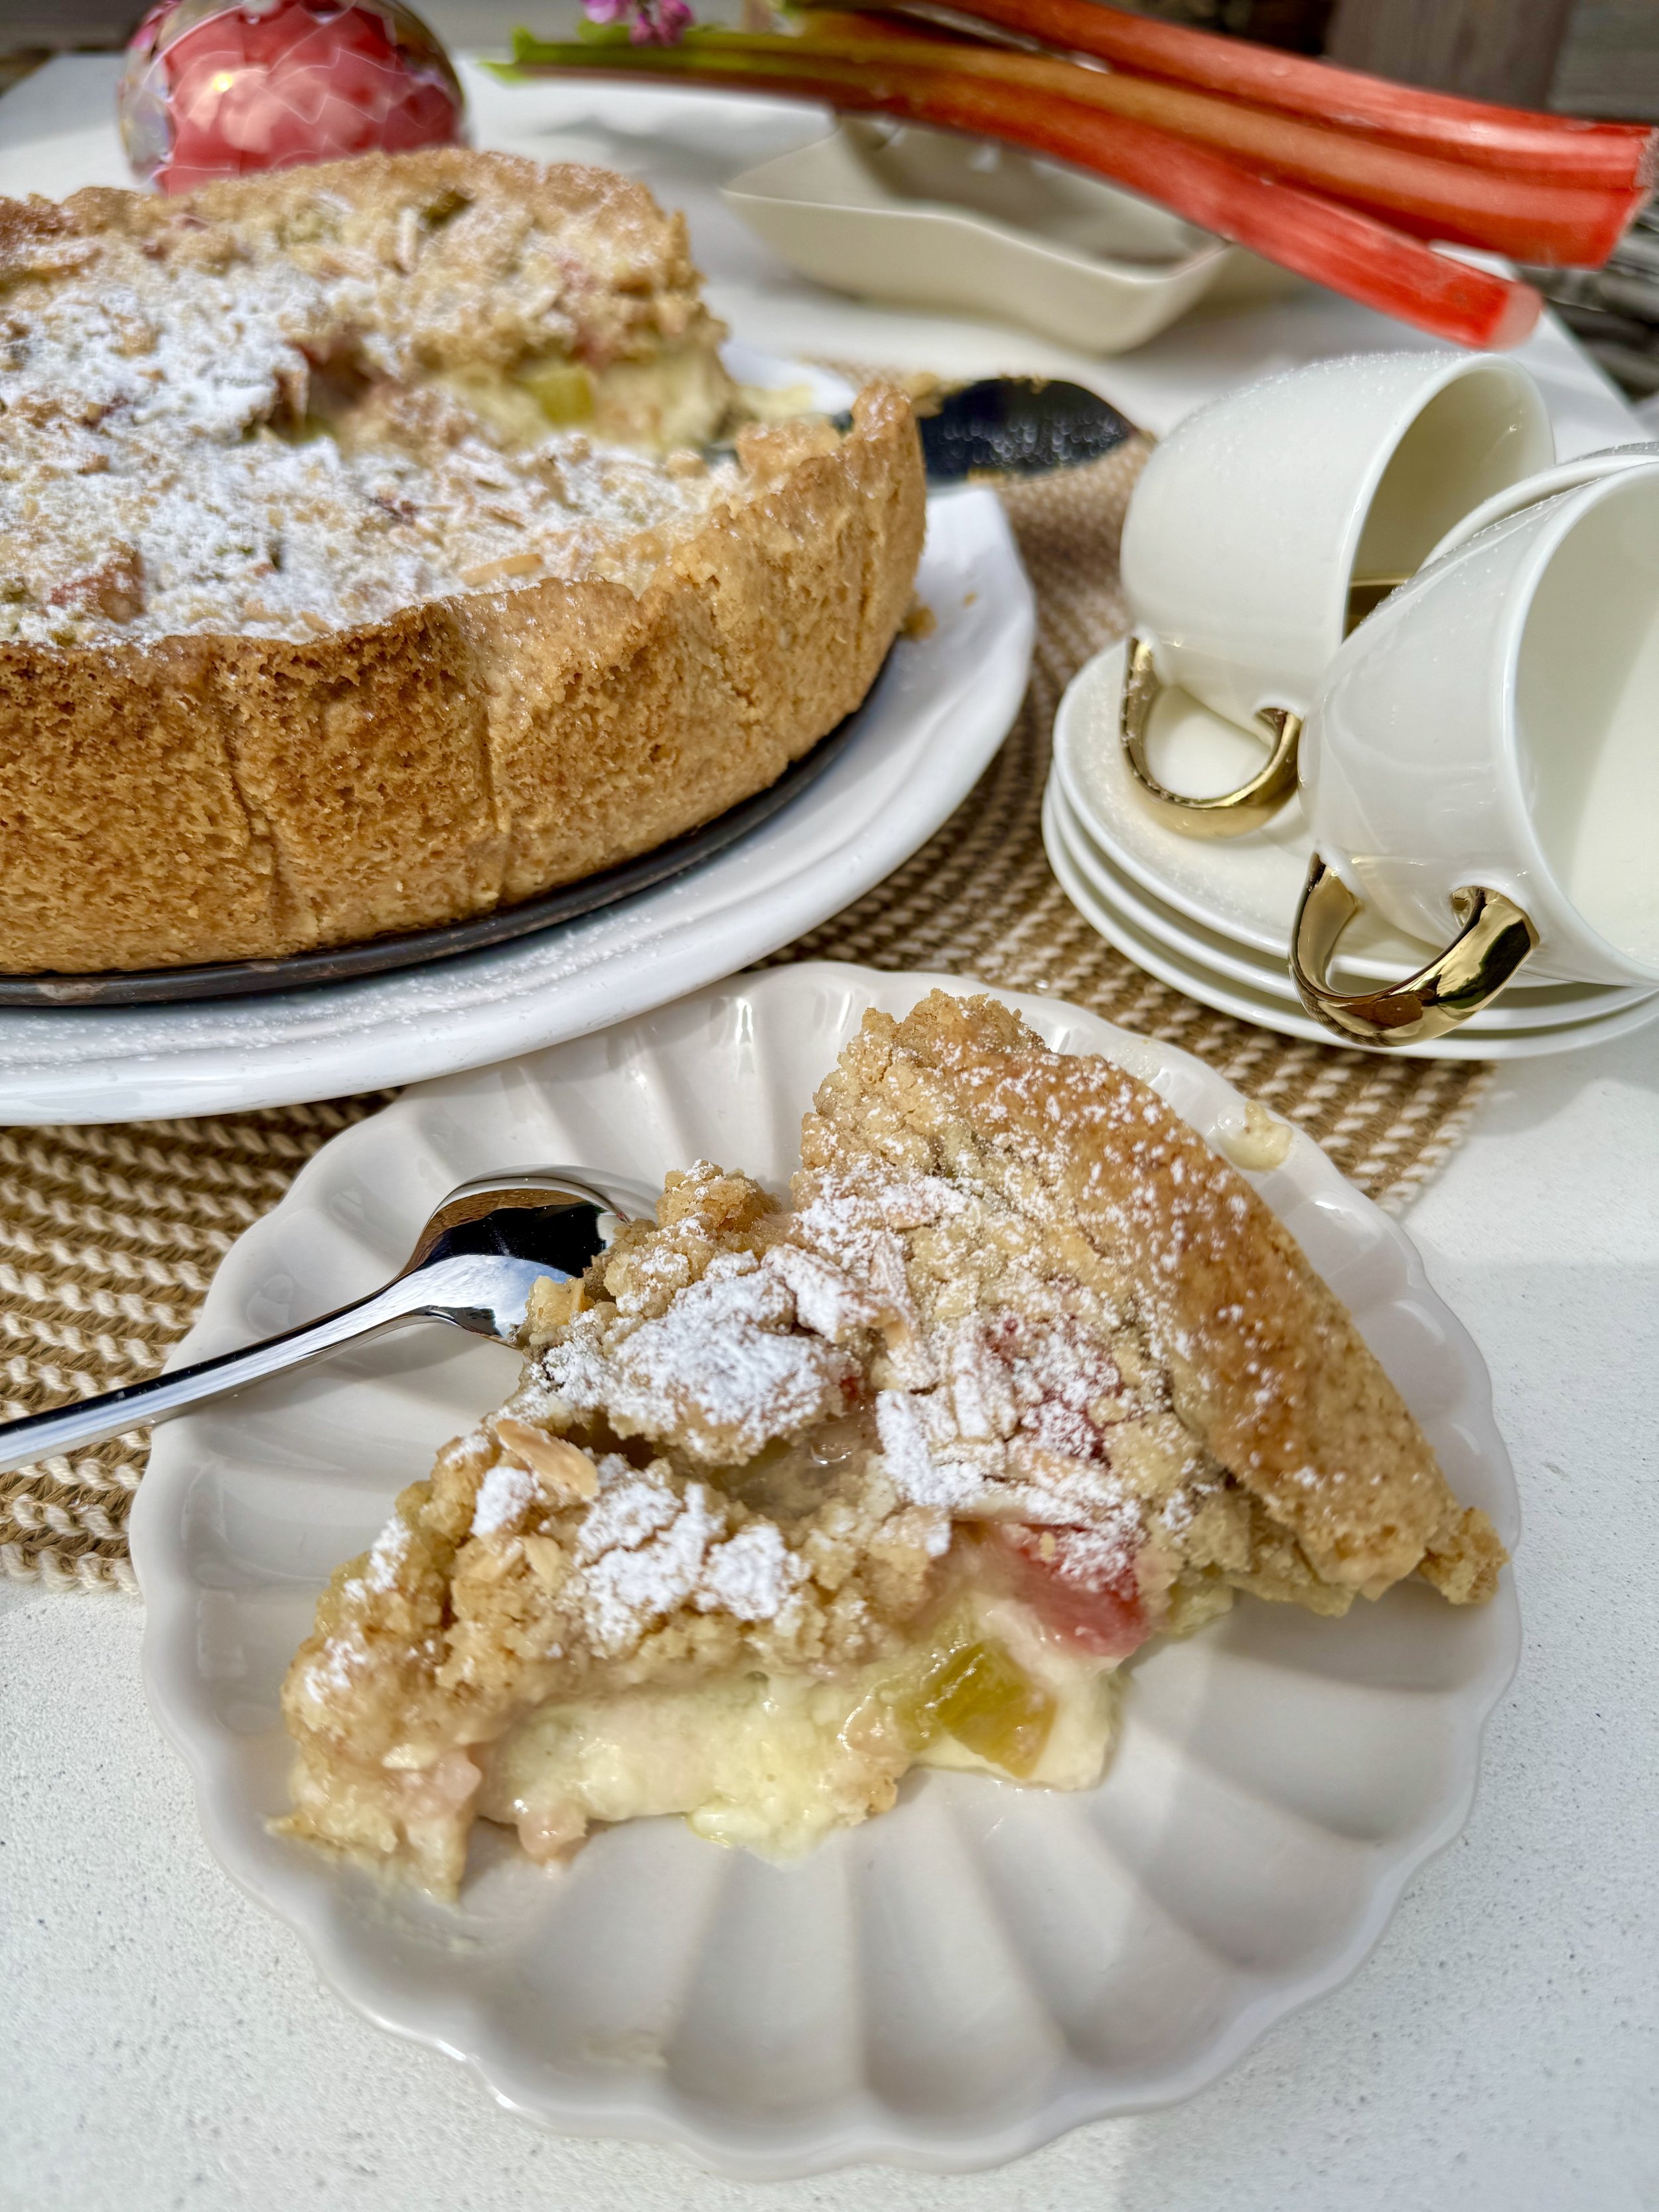
Pasakaini maiga un sulīga, atkal ar citādāku garšu salikumu un konsistenci.
Lai varētu nogriezt skaistu gabaliņu, tā jāatdzesē vismaz pusotru stundu. Savējo griezu siltu, tādēļ bildē nedaudz izplūdis pildījums.
Mīklai un drumstalām
270 g kviešu miltu (50 g var aizstāt ar pilngraudu vai mandeļu miltiem)
200 g saldkrējuma sviesta, auksta, tikko no ledusskapja
Šķipsniņa sāls
100 g cukura
1 ola
Pildījumam
450-500 g rabarberu (es nemizoju)
3 ēdamk cukura
Pudiņam
1 paciņa (38-40 g) sausā vaniļas pudiņa maisījuma (bildēs tas, kuru es izmantoju, pirku Rimi)
500 g piena (var saldo krējumu, būs vēl garšīgāk)
125 g cukura
2 tējk vaniļas
Nepieciešama 23 cm veidne ar noņemamām malām vai dziļāka tartes veidne
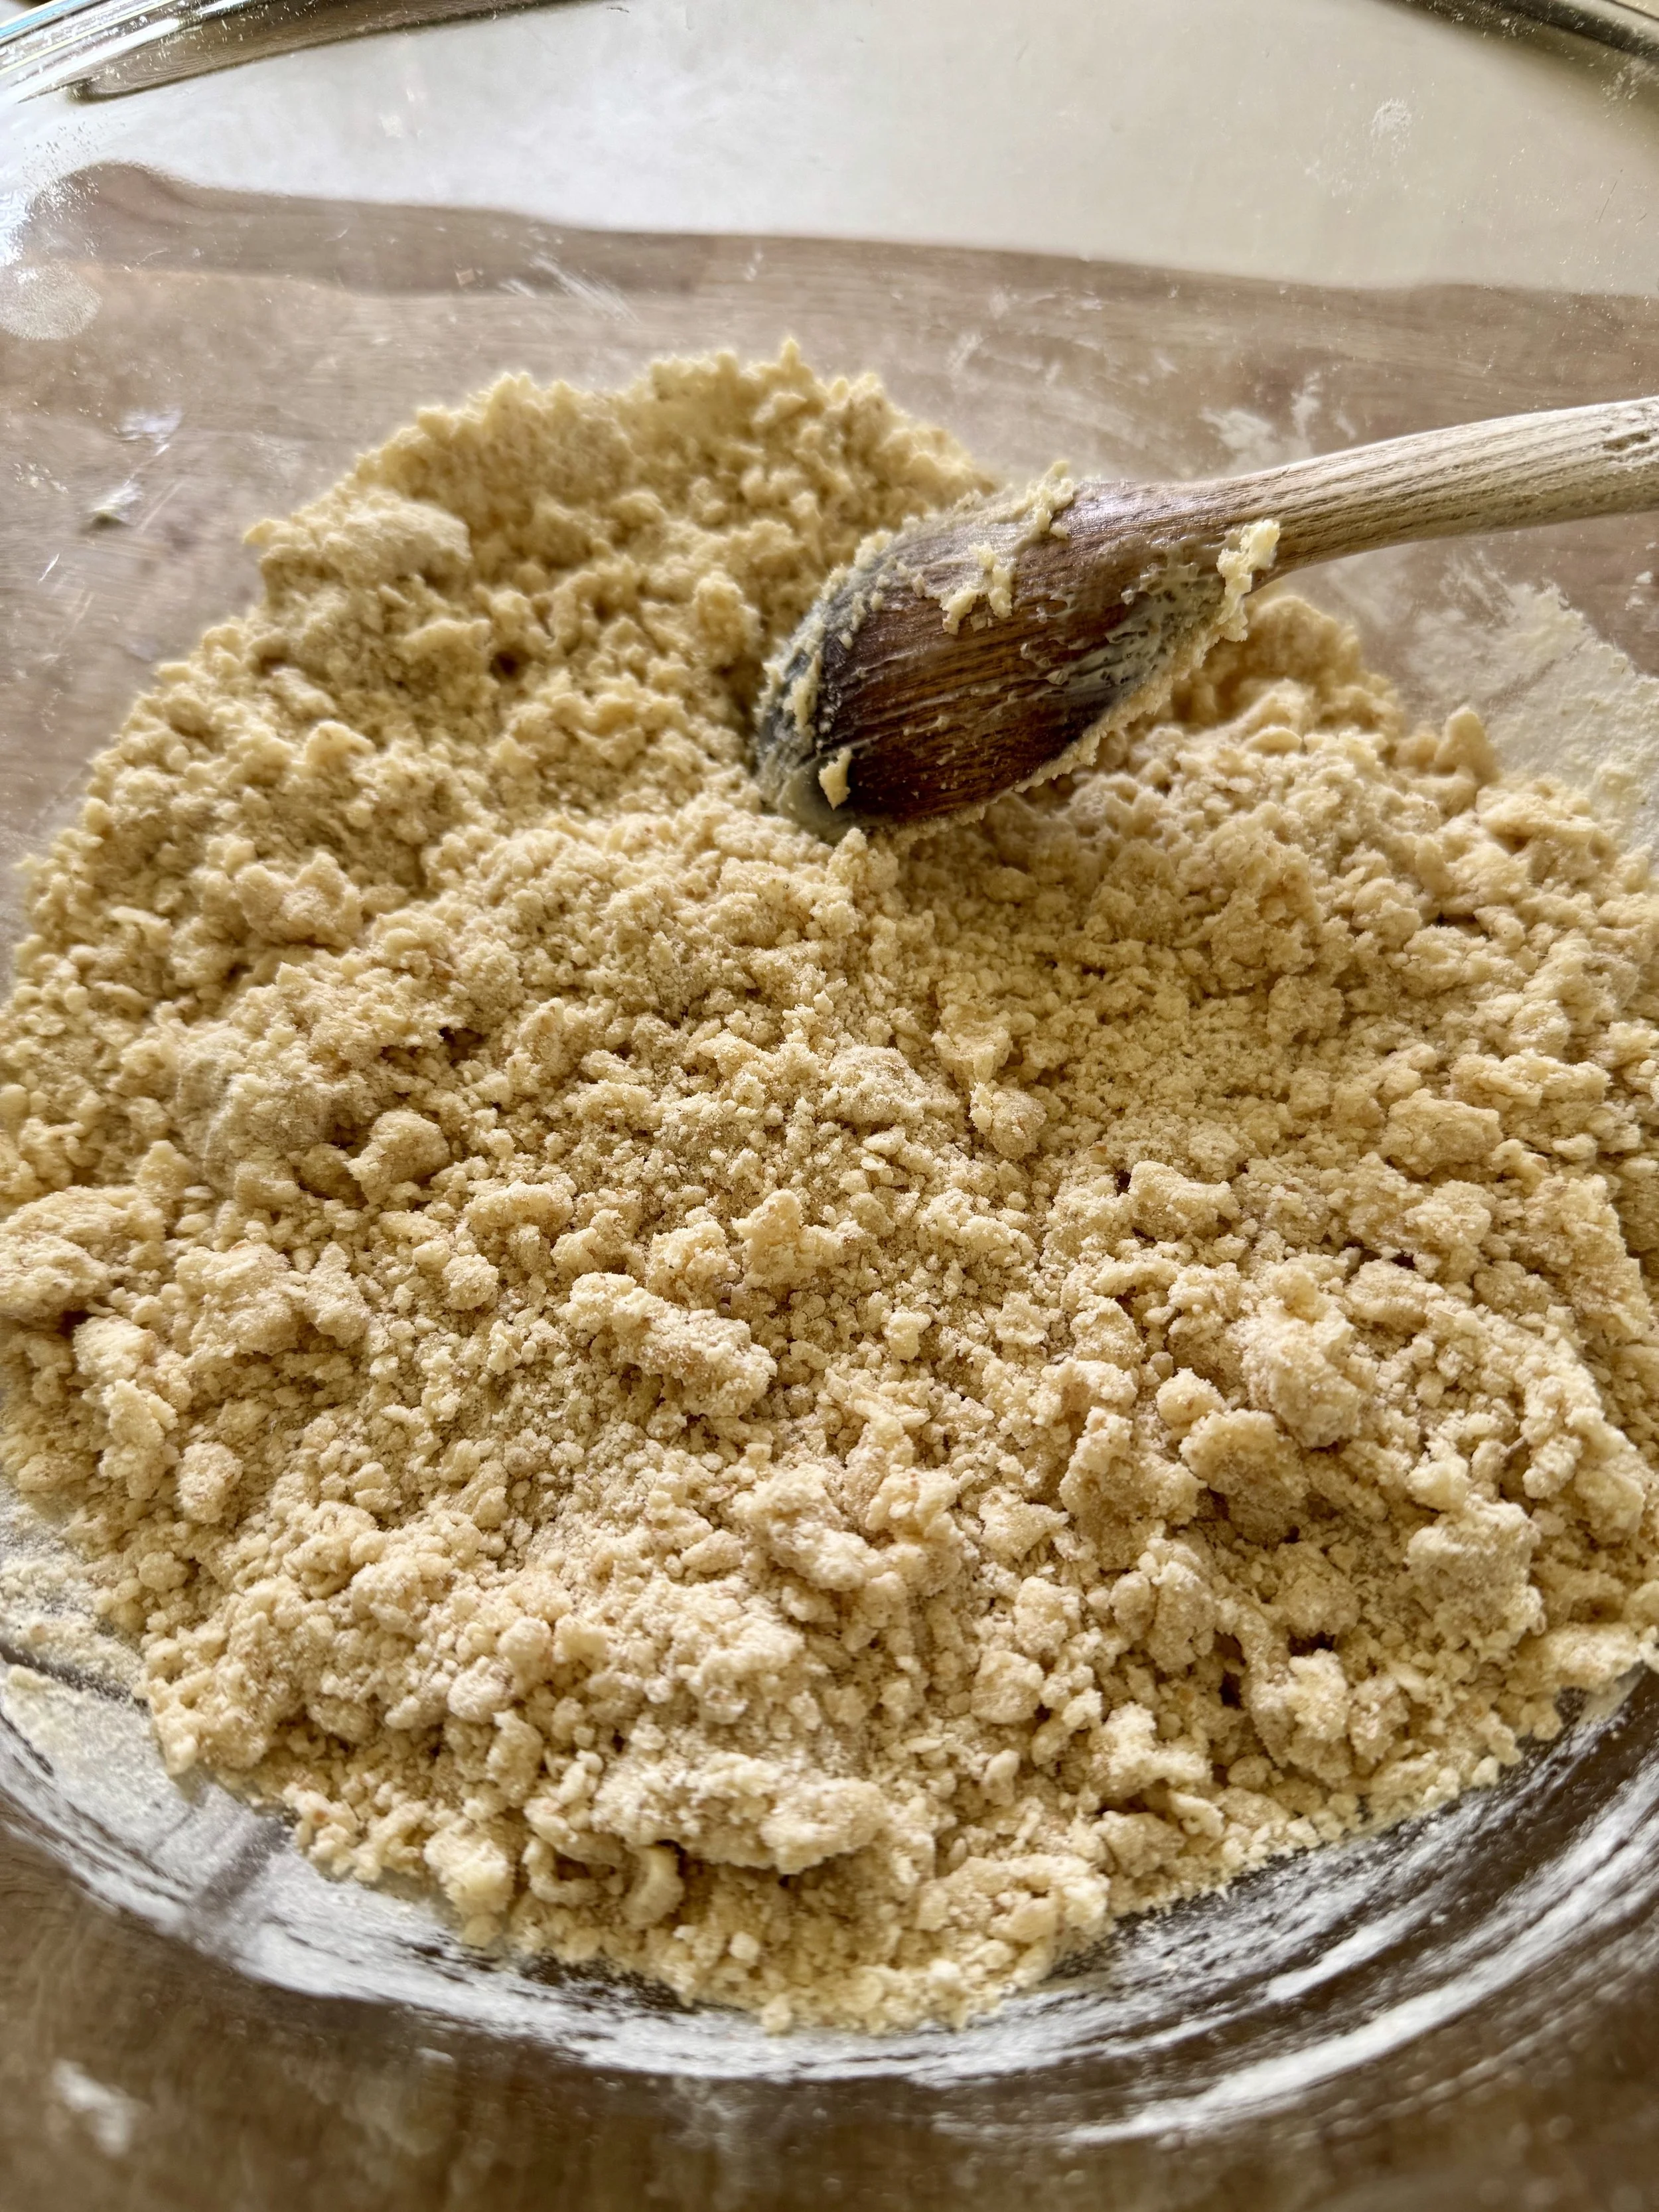
1. Gatavo mīklu. Lielā, platā bļodā vai uz gludas un tīras virsmas ber miltus, pievieno cukuru, sāli un ar dakšiņu samaisa.
2. Auksto sviestu sagriež apmēram 2-3cm lielos gabaliņos un liek miltos. Ar nazi sviestu vēl nedaudz sakapā. Tur sviesta gabaliņus ar dūri saplacina un ar rokām veido drumstalainu mīklu. 150 g drumstalu atliek pārkaisīšanai. Pārējām drumstalām pievieno olu un samīca mīklu. Nevajag pārmērīgi mīcīt.
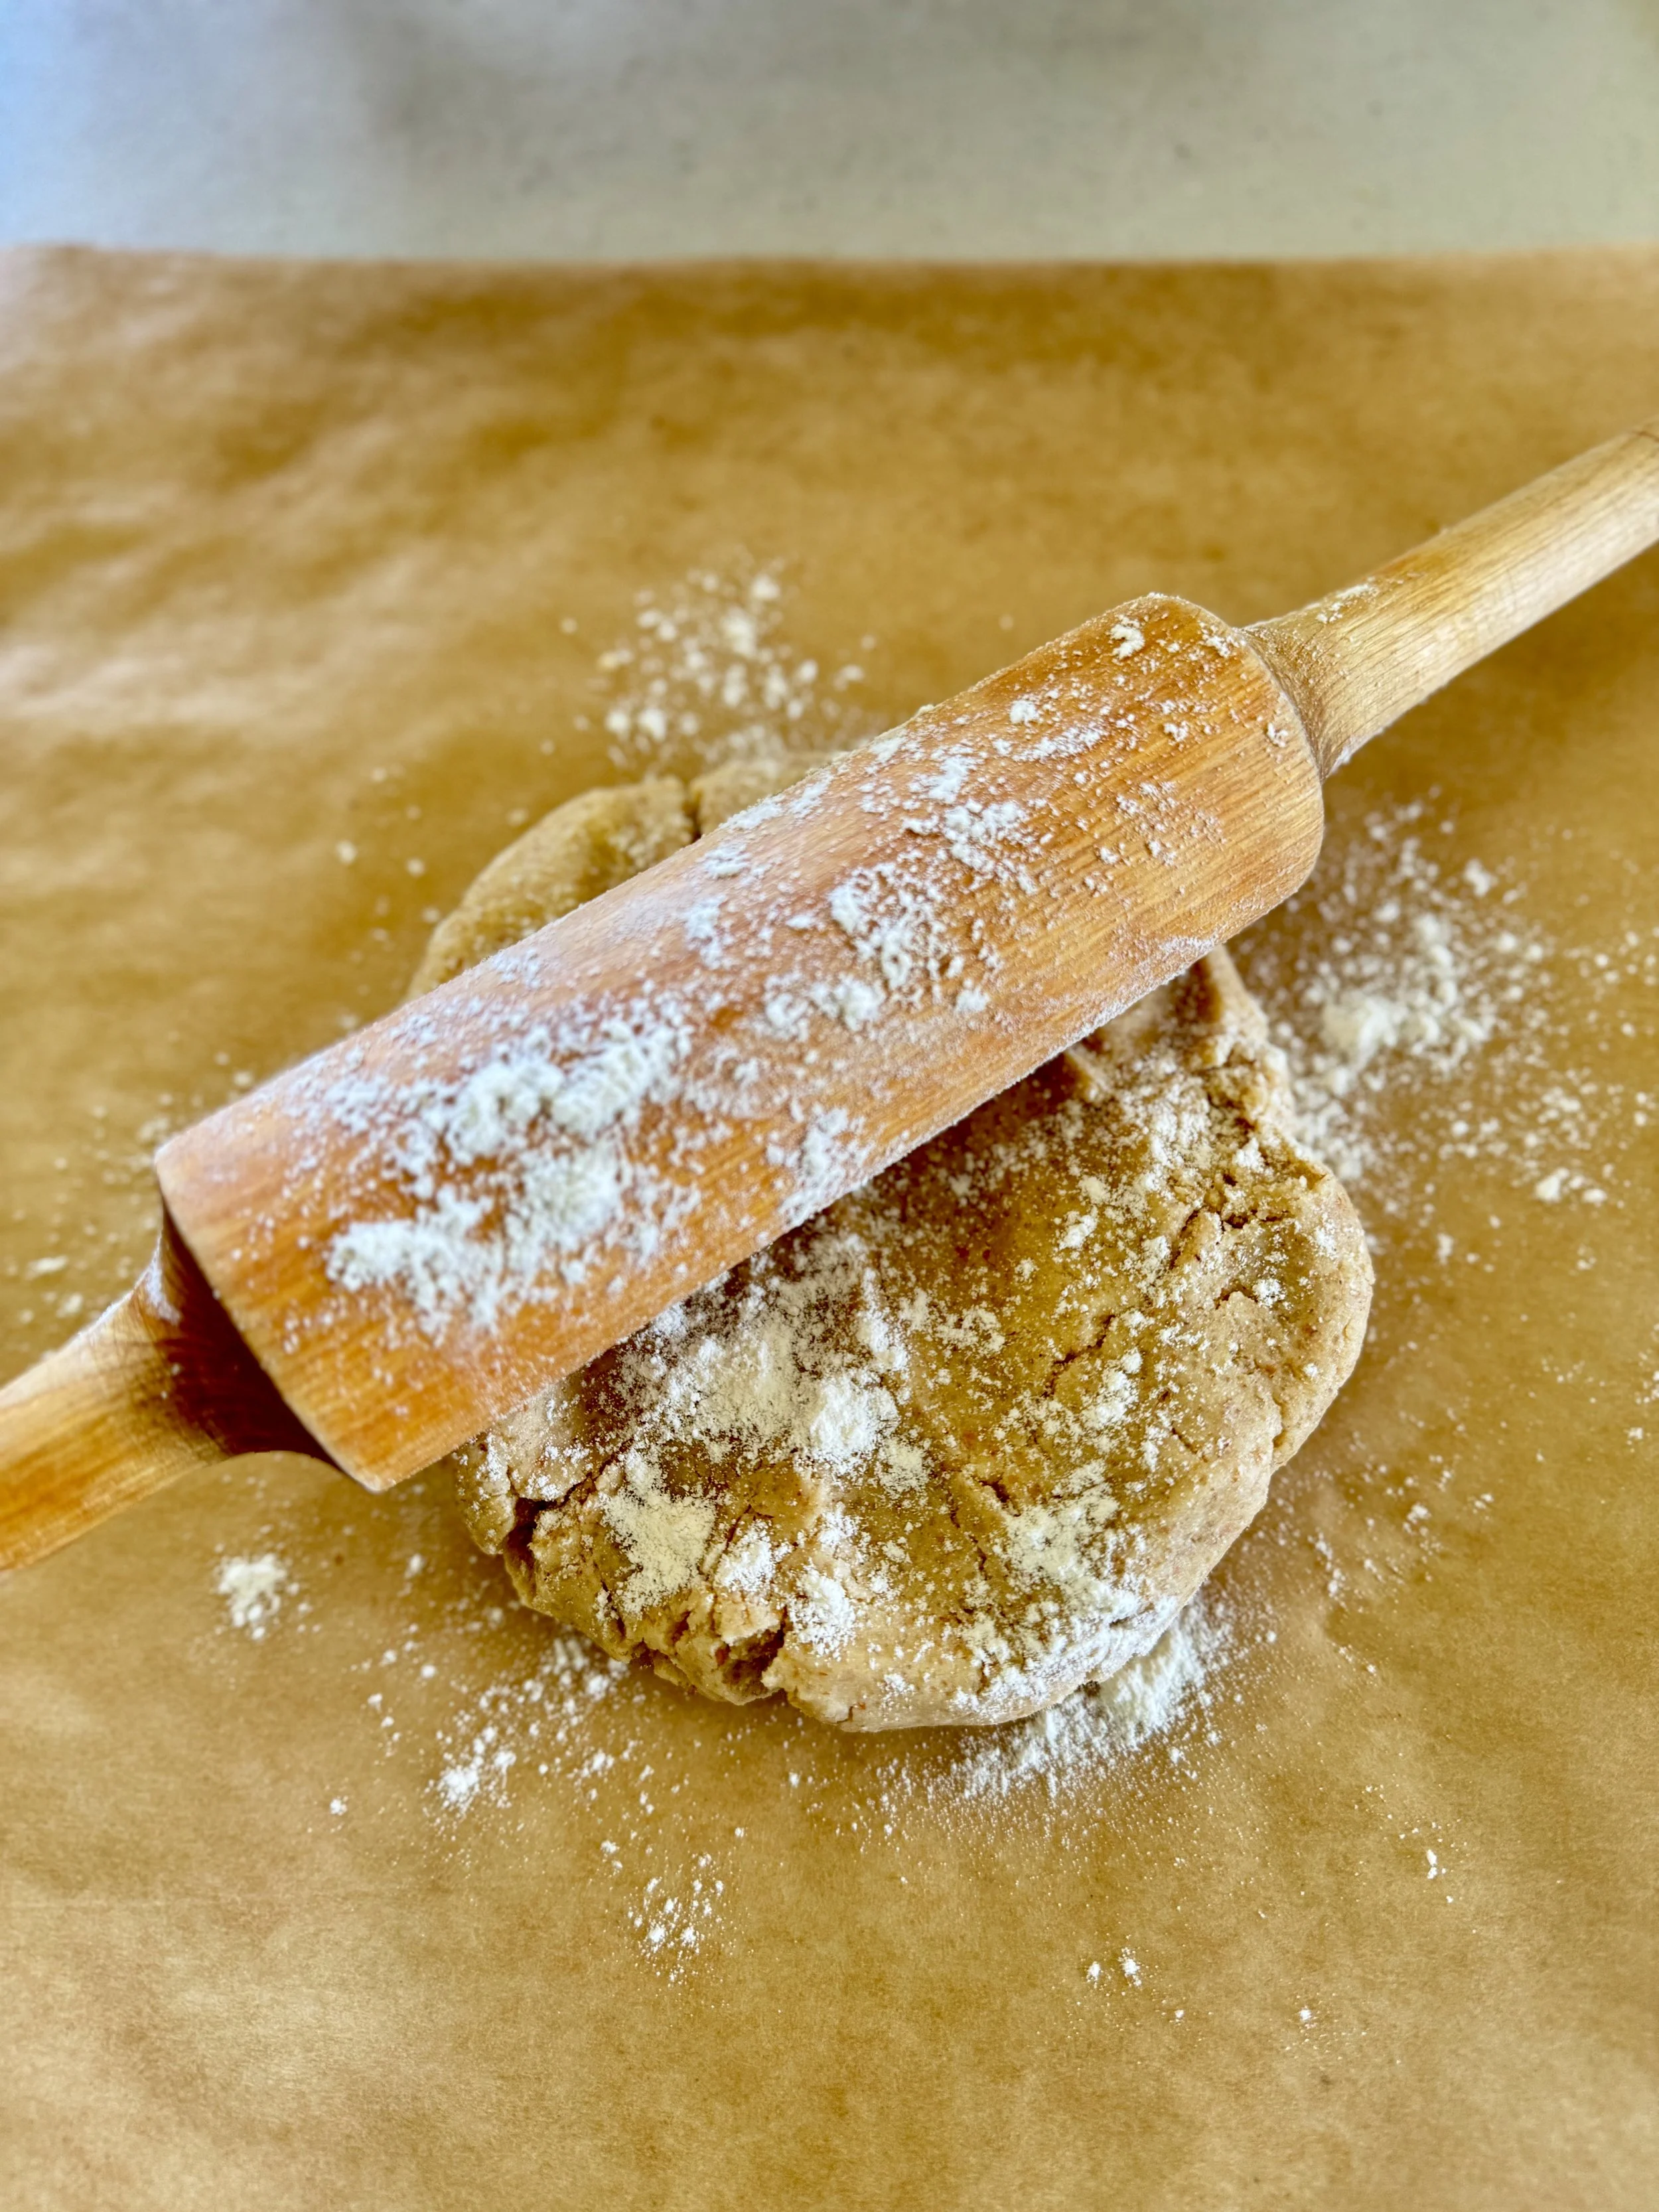
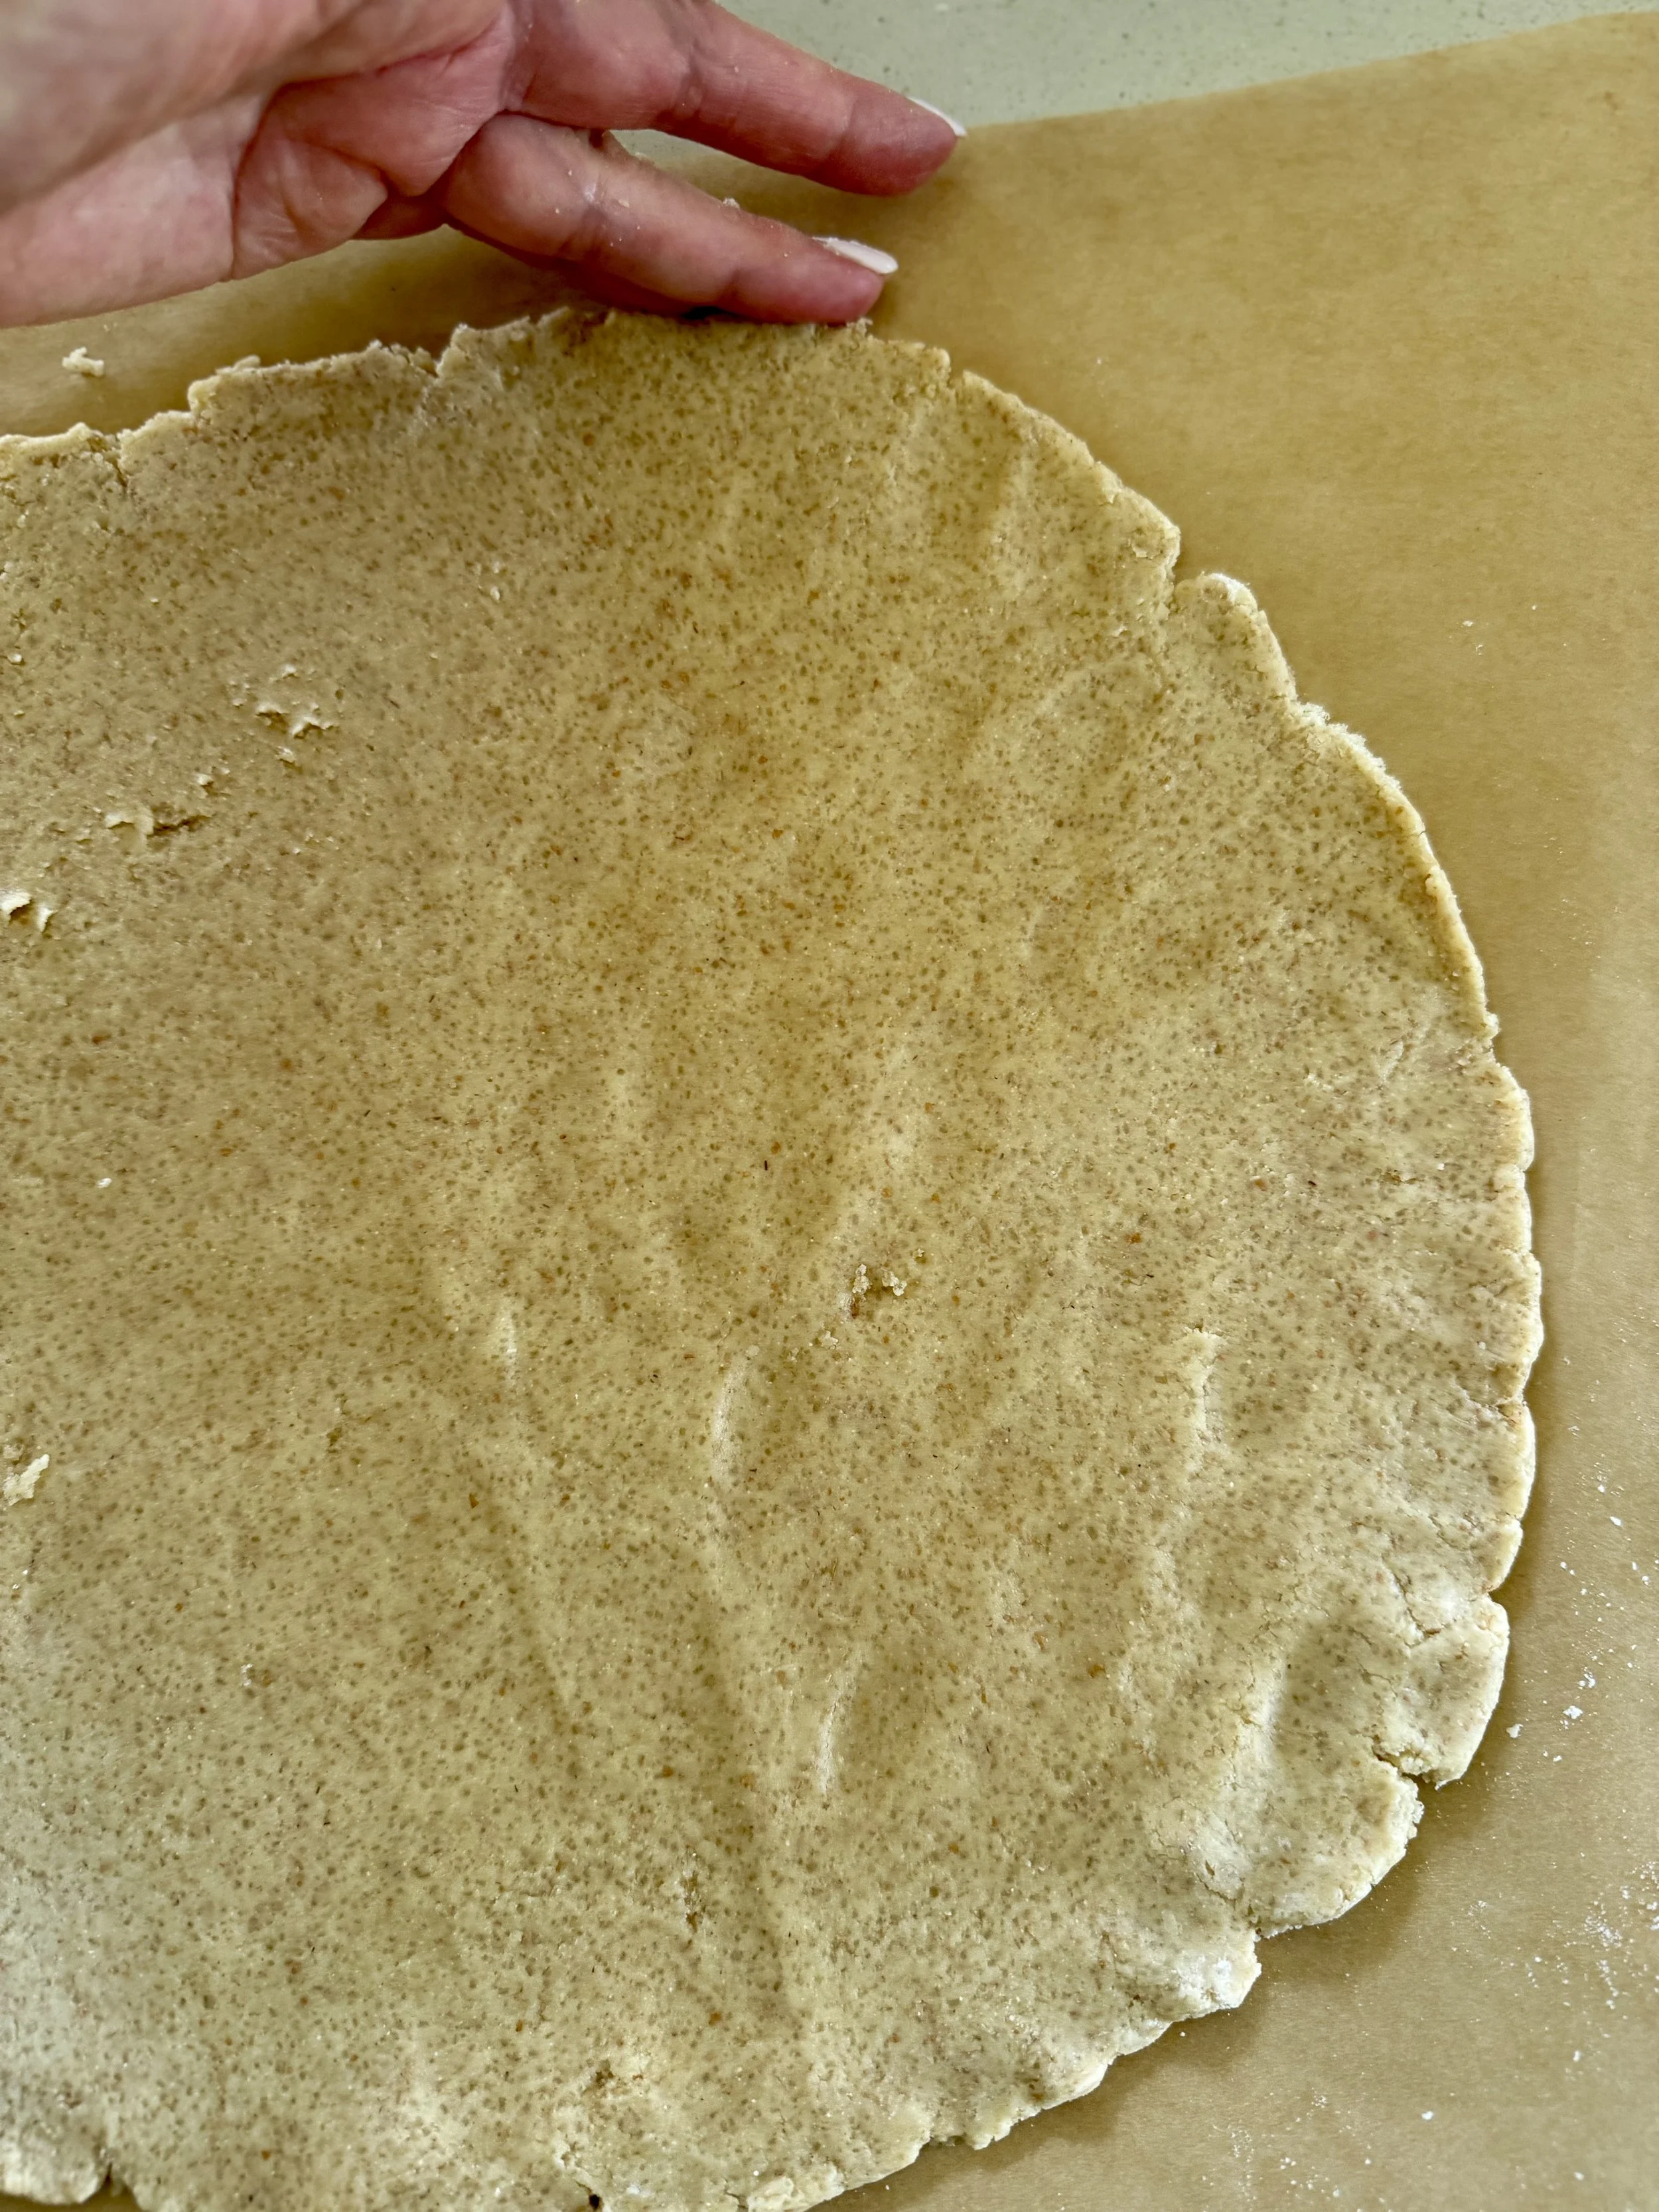
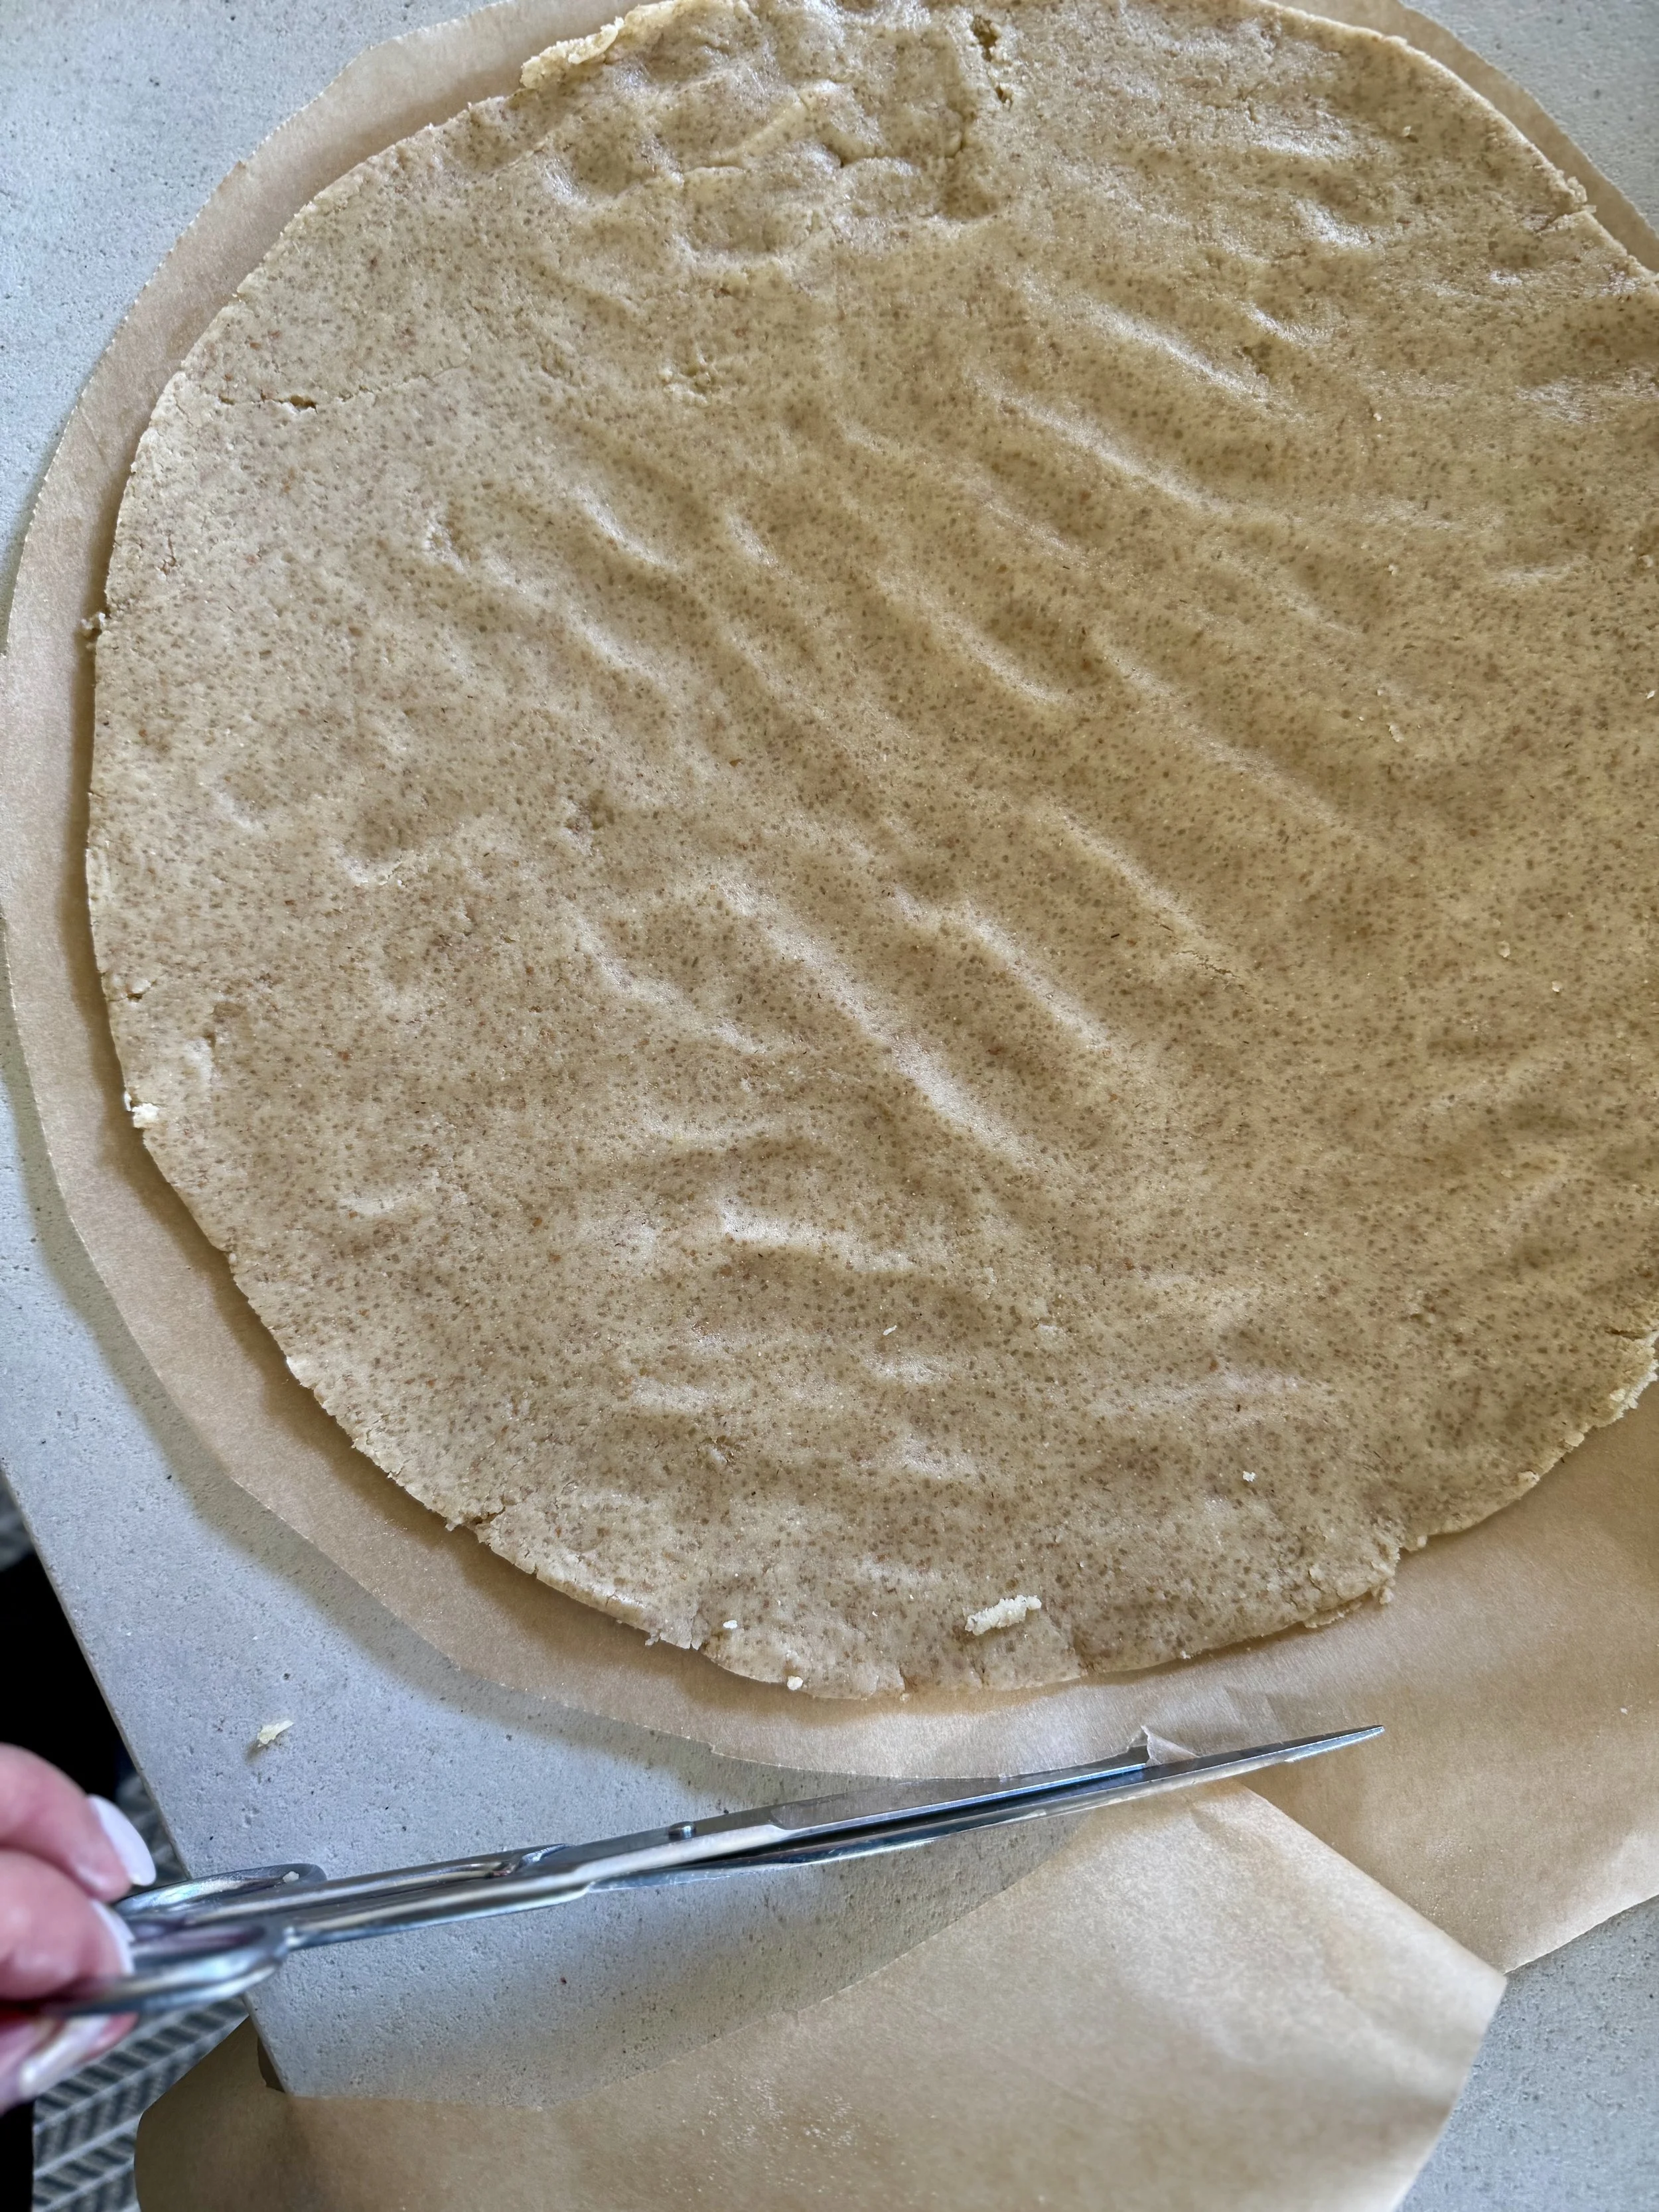
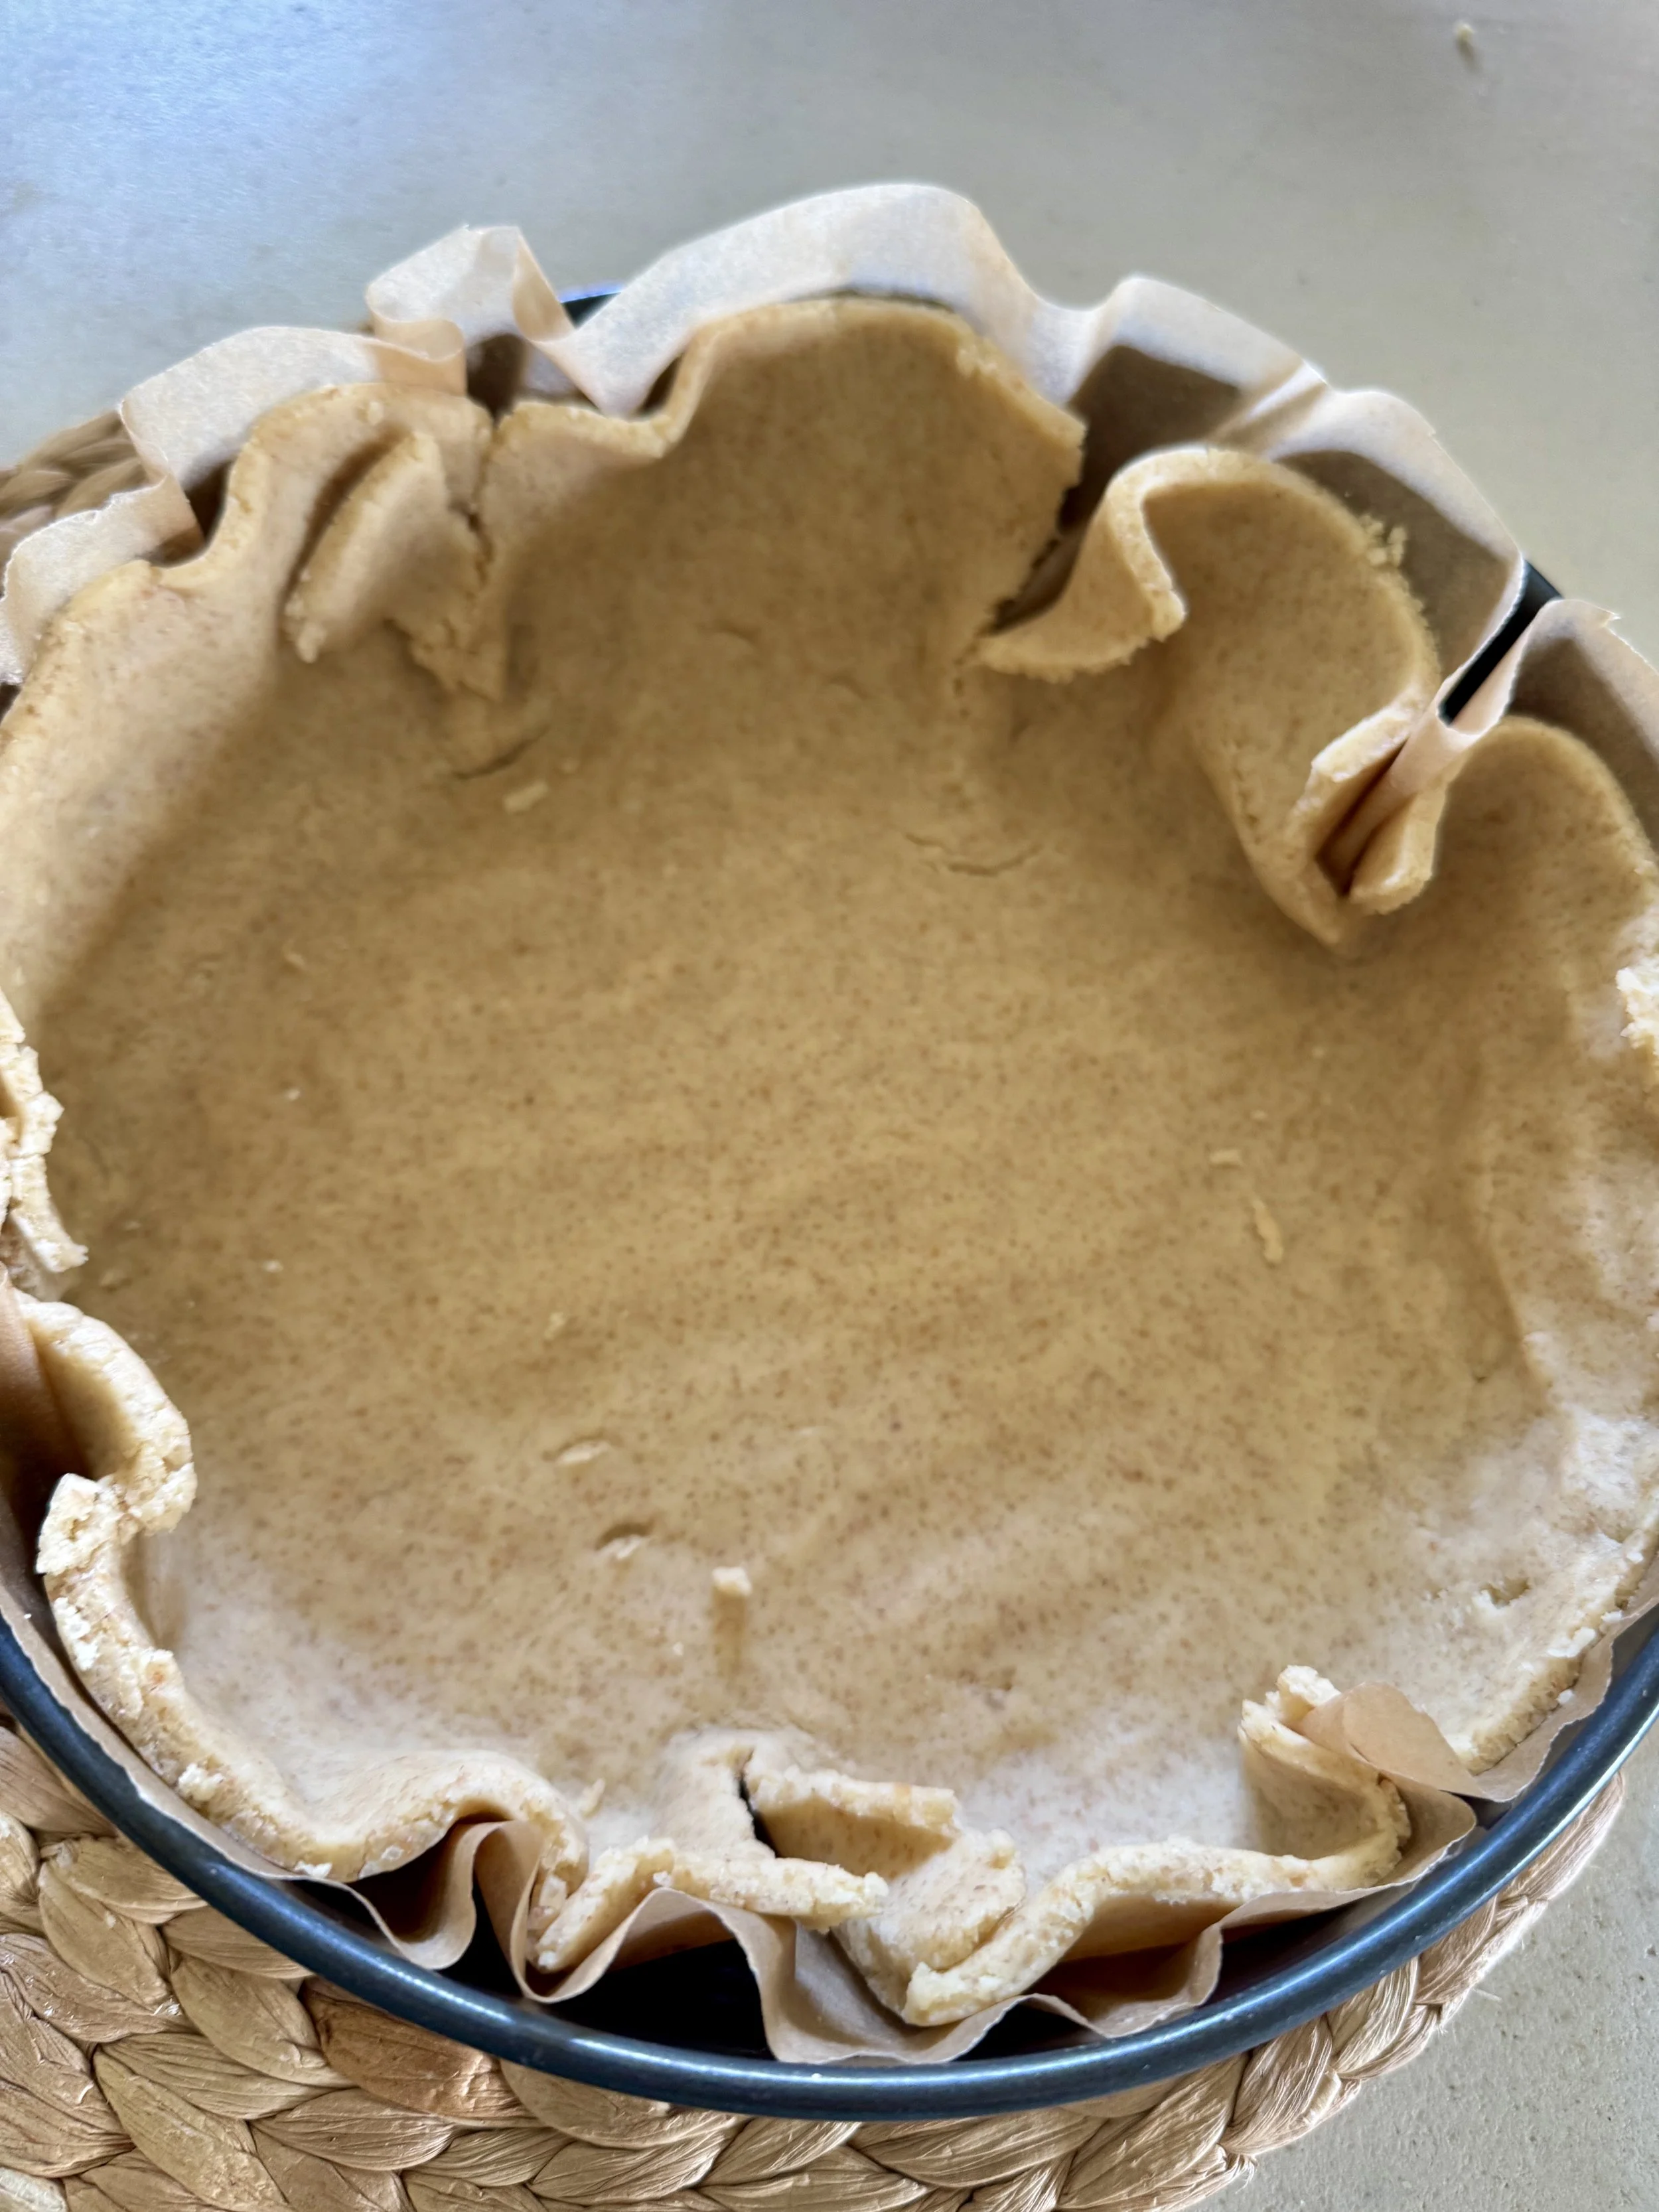
3. Mīklu apkaisa ar miltiem un uz cepampapīra izveltnē atbilstoši veidnes izmēram, paredzot 3 cm maliņu. Nelīdzenās malas nogriež vai ar pirkstiem pielīdzina. Cepampapīru ar 1 cm malu nogriež. Liek mīklu ar visu cepampapīru veidnē, cepampapīrs apakšā. Pavelk cepampapīru ārā no mīklas un mīklu ar pirkstiem izlīdzina.
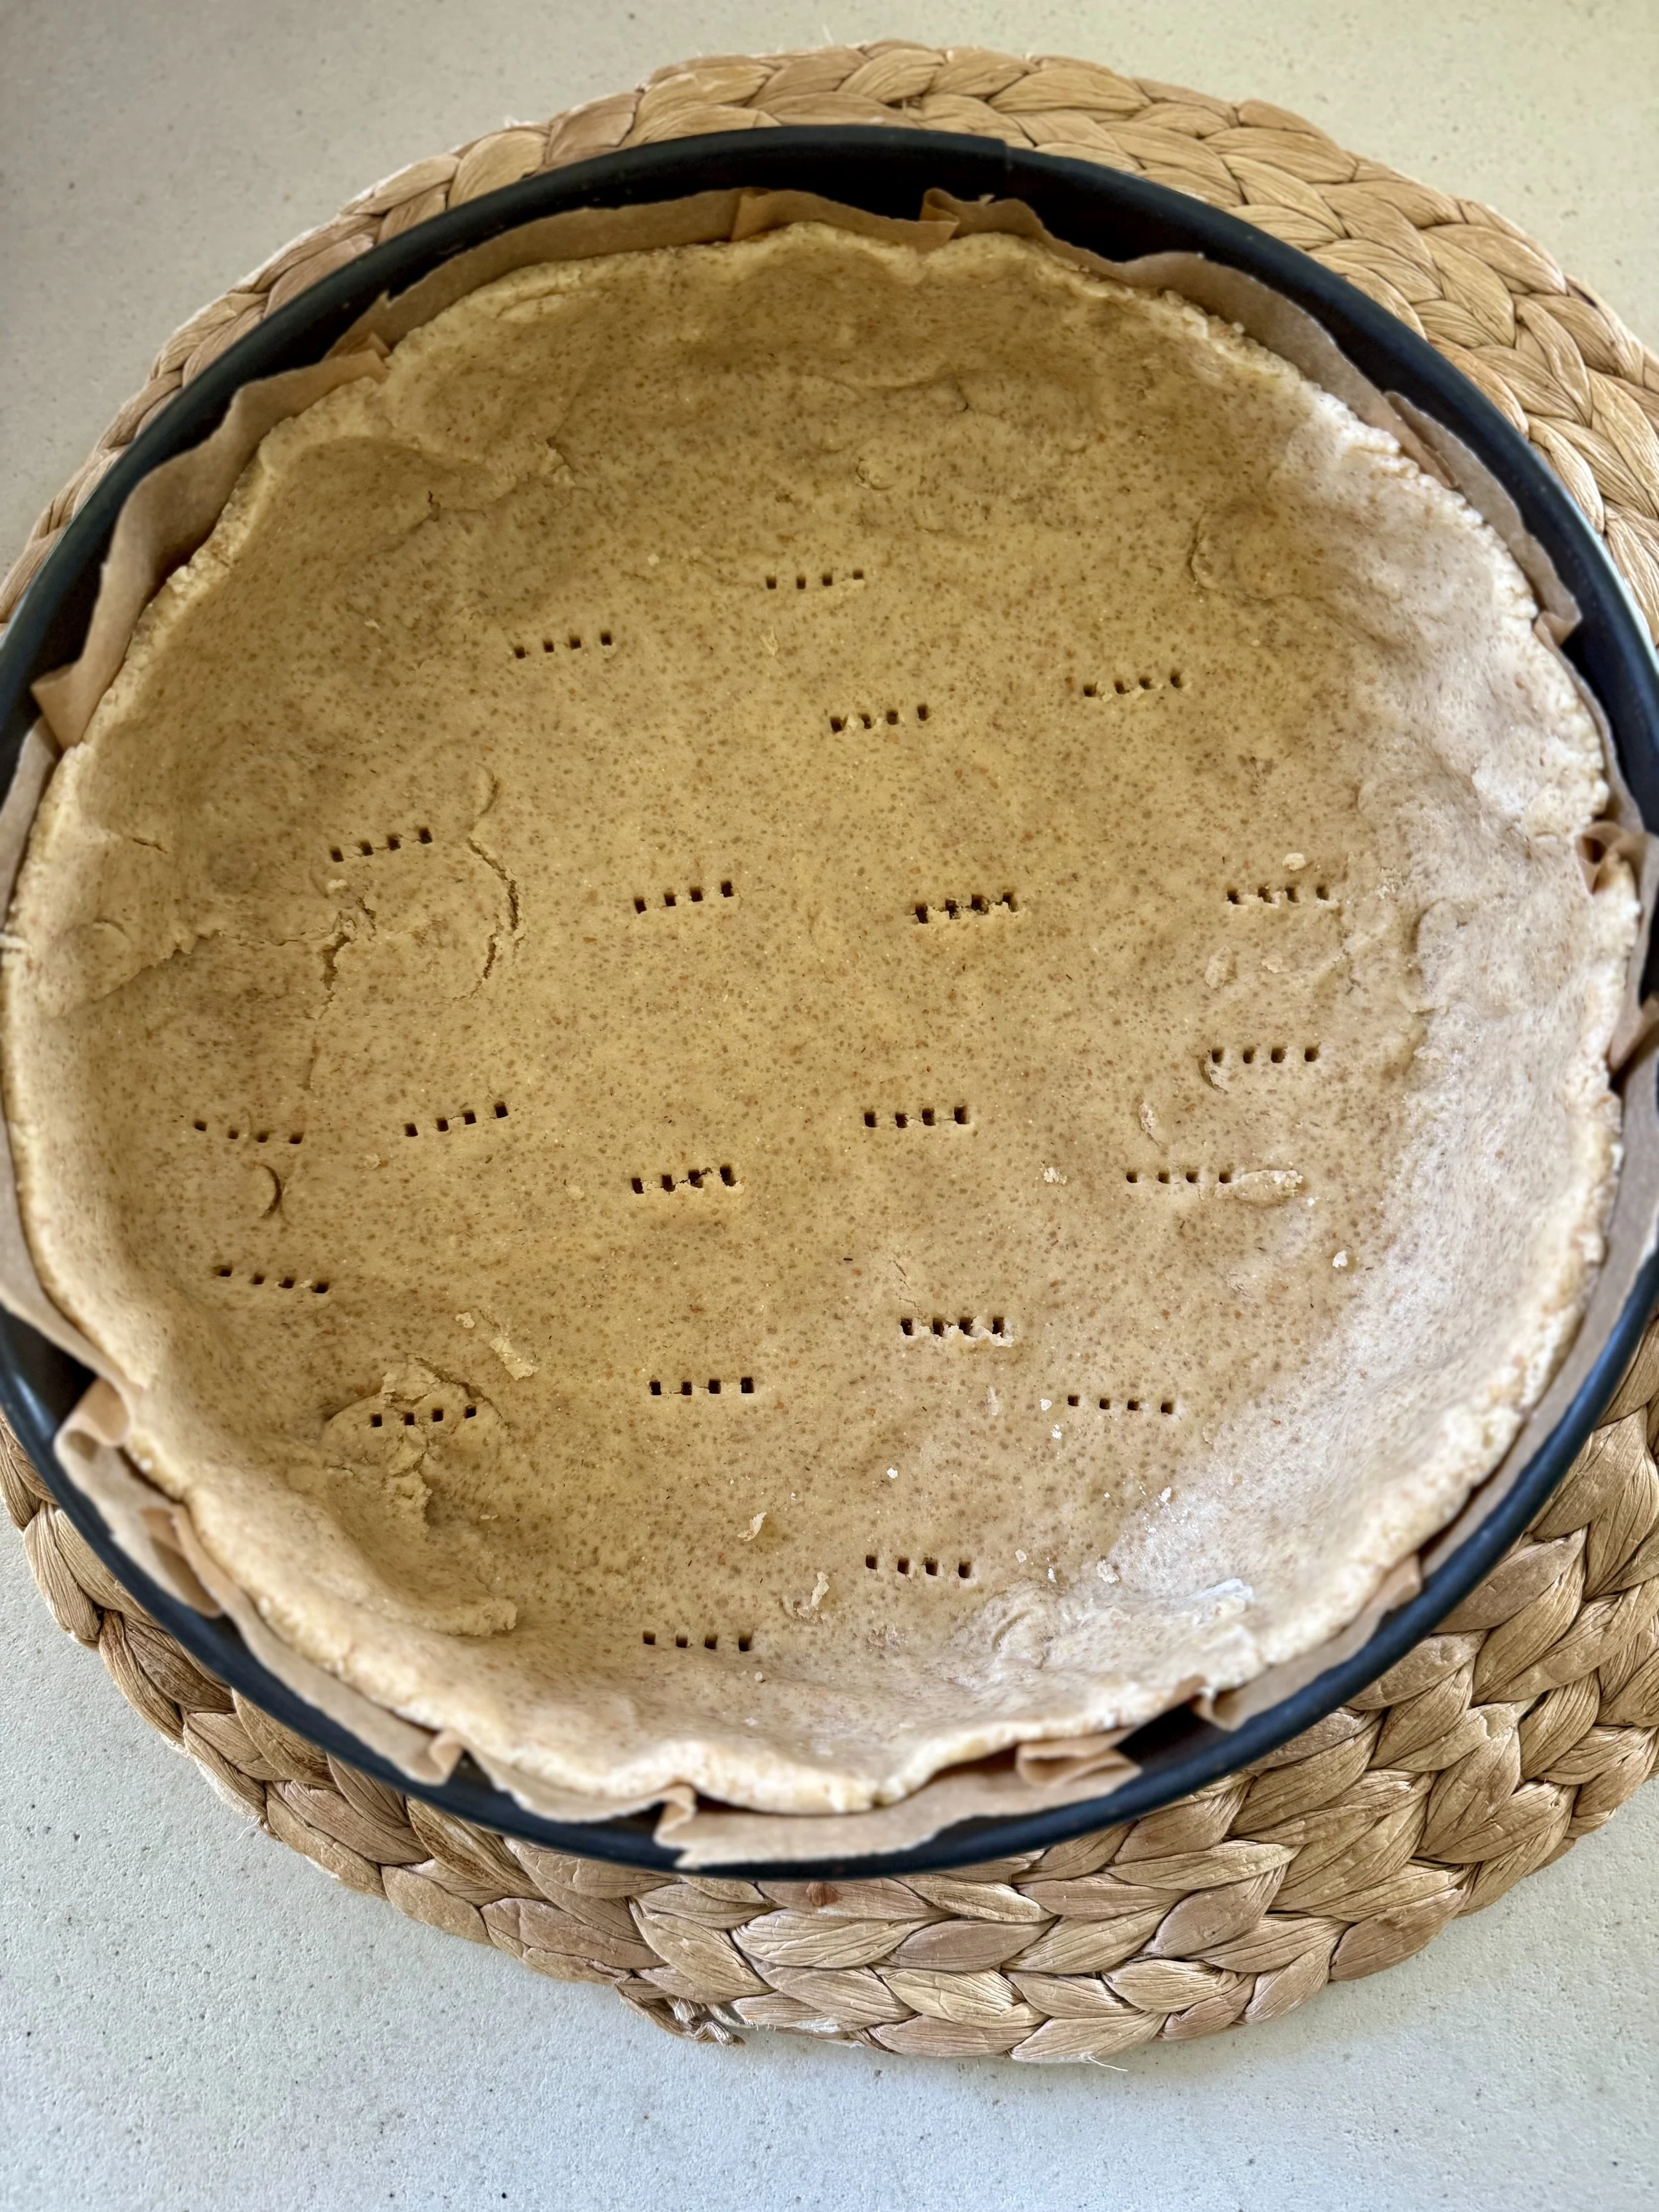
Sadur mīklu ar dakšiņu.
4. Ieliek mīklu ar visu veidni ledusskapī uz 30 minūtēm, arī drumstalas liek ledusskapī.
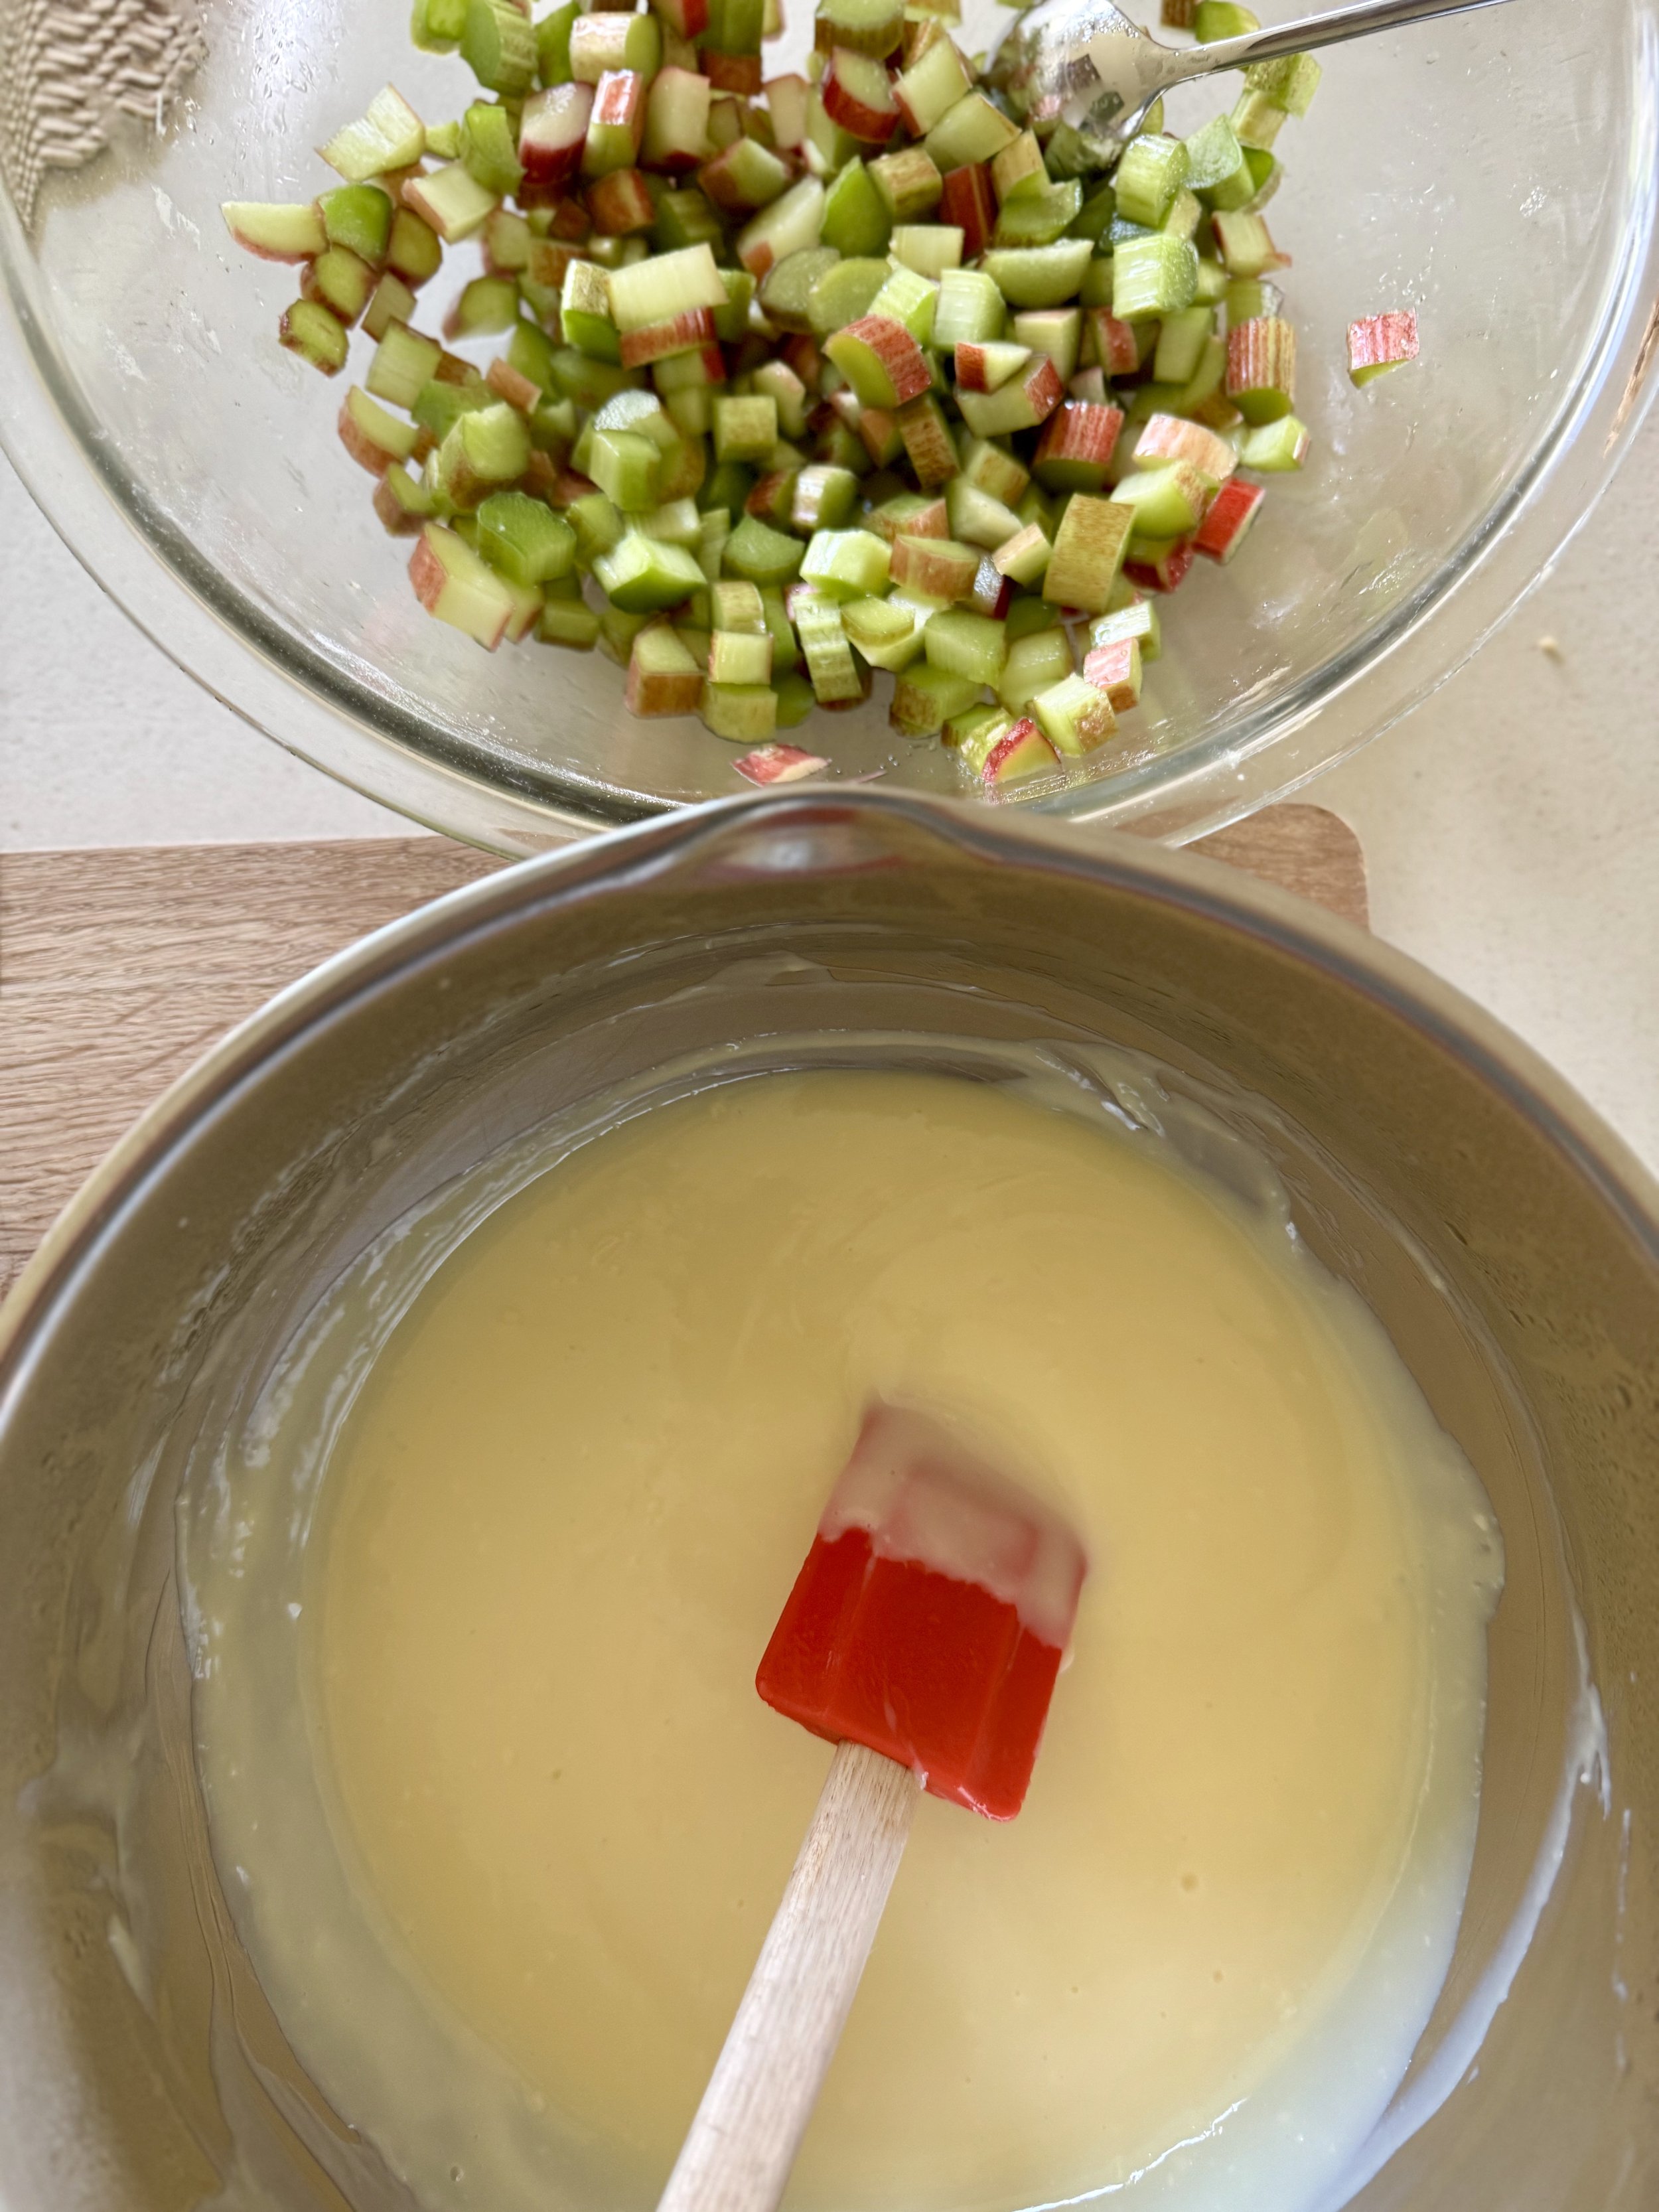
5. Nemizotus rabarberus sagriež vidējos gabaliņos (rabarberi nav jāmizo, miziņa lieliski izšķīst un vēl piešķir krāsu) un apber ar cukuru, noliek uz 30 minūtēm.
6. Sakarsē cepeškrāsni līdz 180 grādiem.
7.Gatavo pudiņu. Pudiņa maisījumam pievieno cukuru, vaniļu un samaisa, iemaisa 100 g piena.
Katliņā lej atlikušos 400 g piena un uzkarsē. Karstajā pienā iemaisa pudiņa maisījumu un uzvidējas liesmas maisot gaida, līdz tas sabiezē (visērtāk maisīt ar putojamo slotiņu), noliek malā.
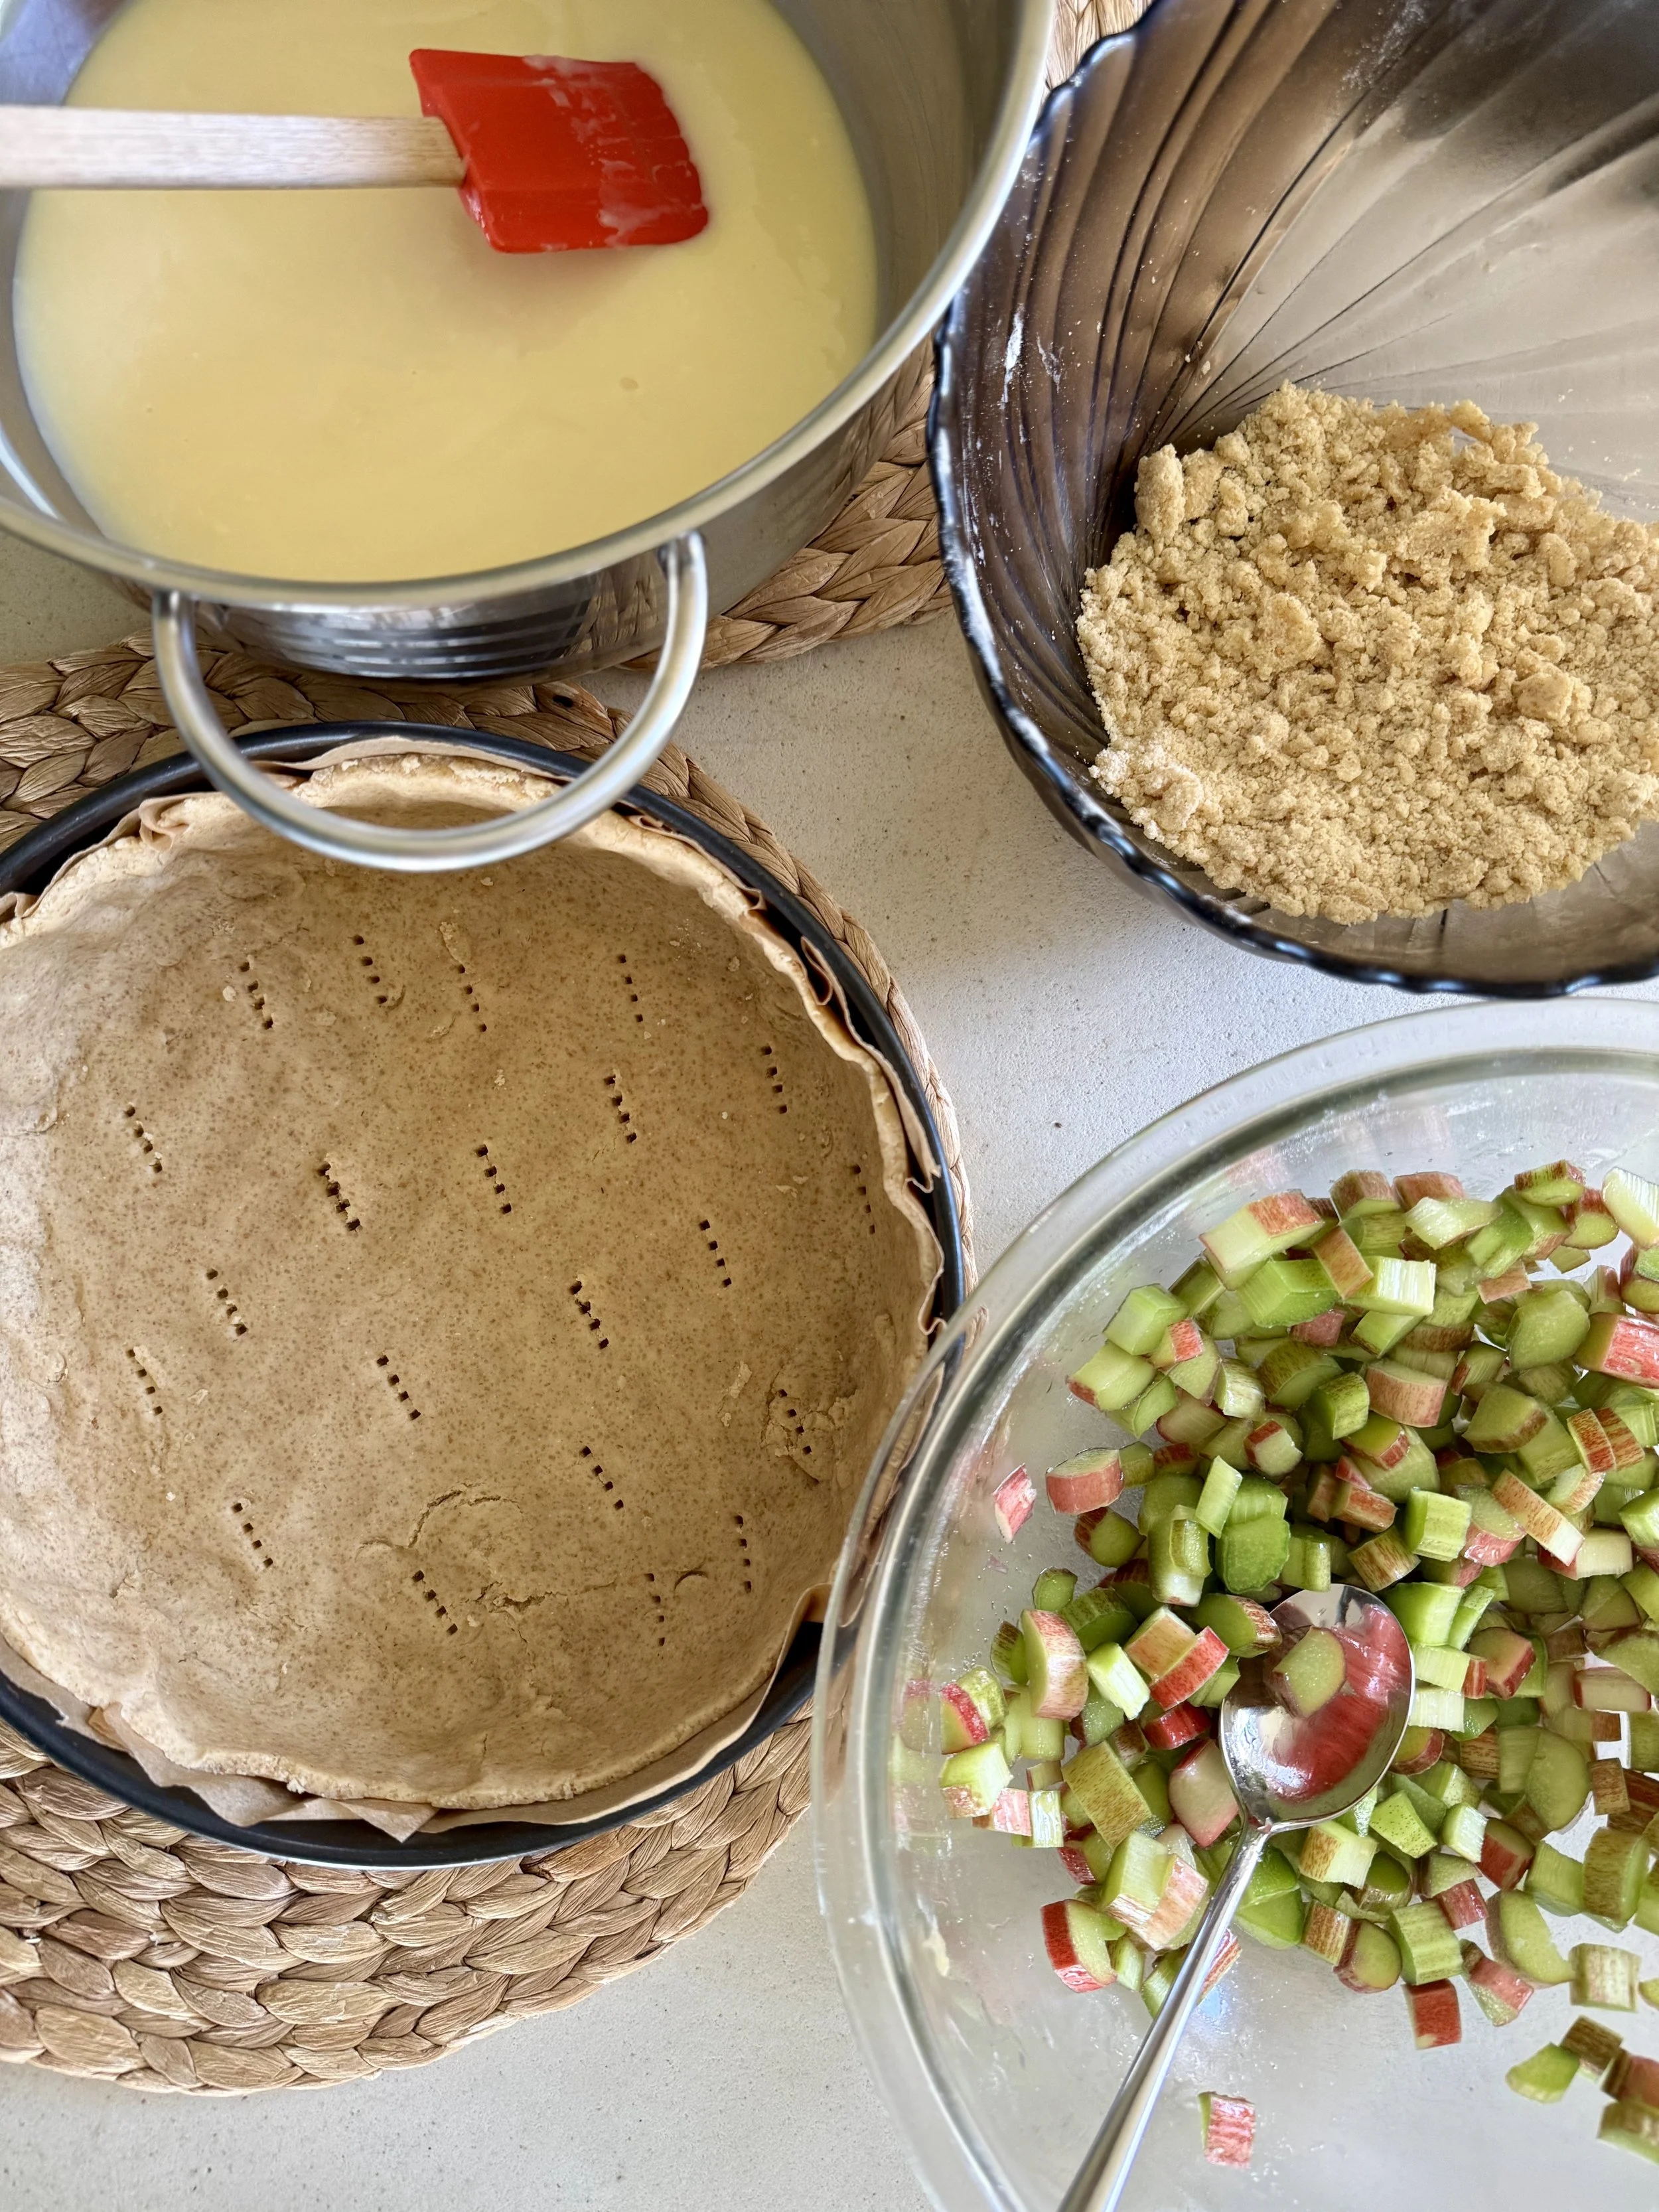
8.Izņem no ledusskapja mīklu un drumstalas. Virs mīklas lej karsto pudiņu un izlīdzina, pāri liek rabarberus (sula nolieta) un pārkaisa ar drumstalām. Var uzkaisīt pāri brūno cukuru.
9. Liek cepties sakarsētajā cepeškrāsnī uz zemākās iedaļas un cep aptuveni 50-55 minūtes.
10.Atdzesē, apber ar pūdercukuru un pasniedz.
Recepte: Ārija Avota
foto: Ārija Avota


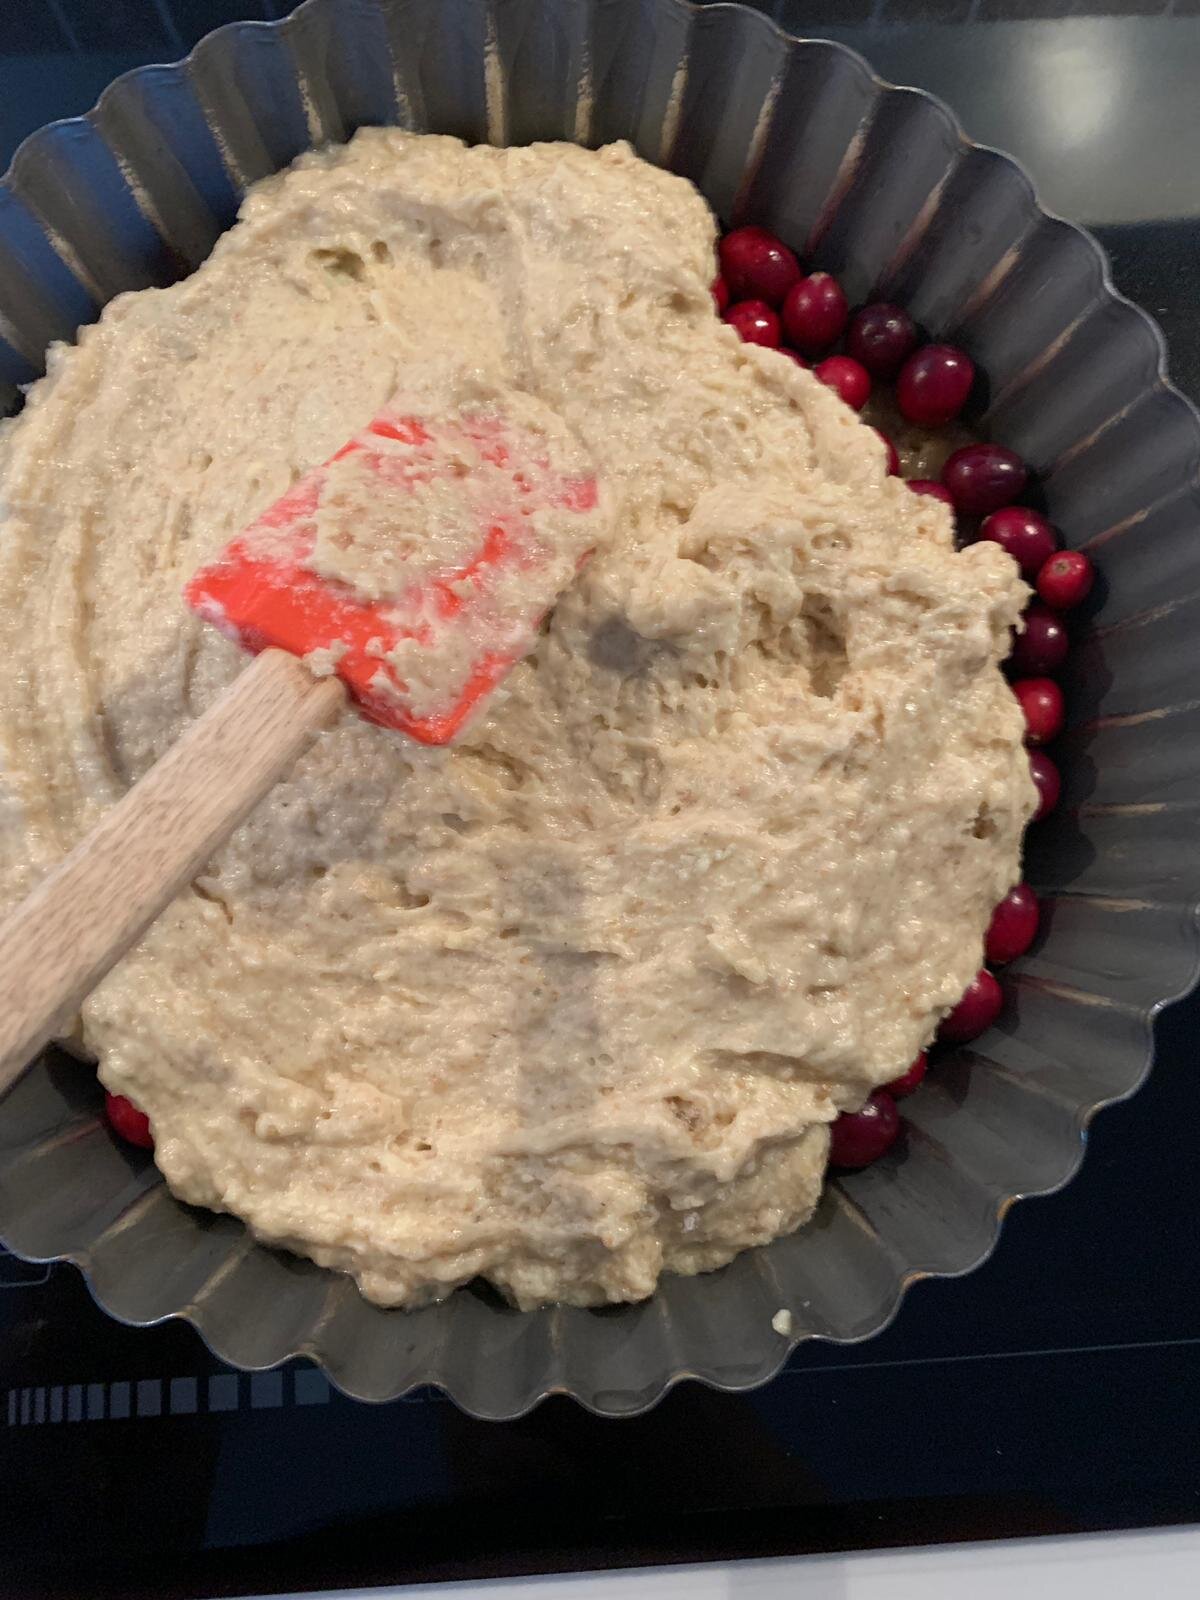
Cranberry upside down cake
This is a very perfect cake for the fall season- sweet and sour at the same time. It is very juicy and with the wholegrain flour and buttermilk added can be nice and filling.
For the base
70 g butter
120 g light brown sugar
200 g cranberries
For the batter
120 g butter, room temp
150 g sugar
2 eggs, room temp
150 ml buttermilk or kefir
1 tsp vanilla paste or vanilla sugar
200 g all purpose flour, 1/3 can be substituted with wholegrain
2 tsp baking powder
Pinch of salt
1. Preheat the oven to 180 degrees (celsius).
Make the base.
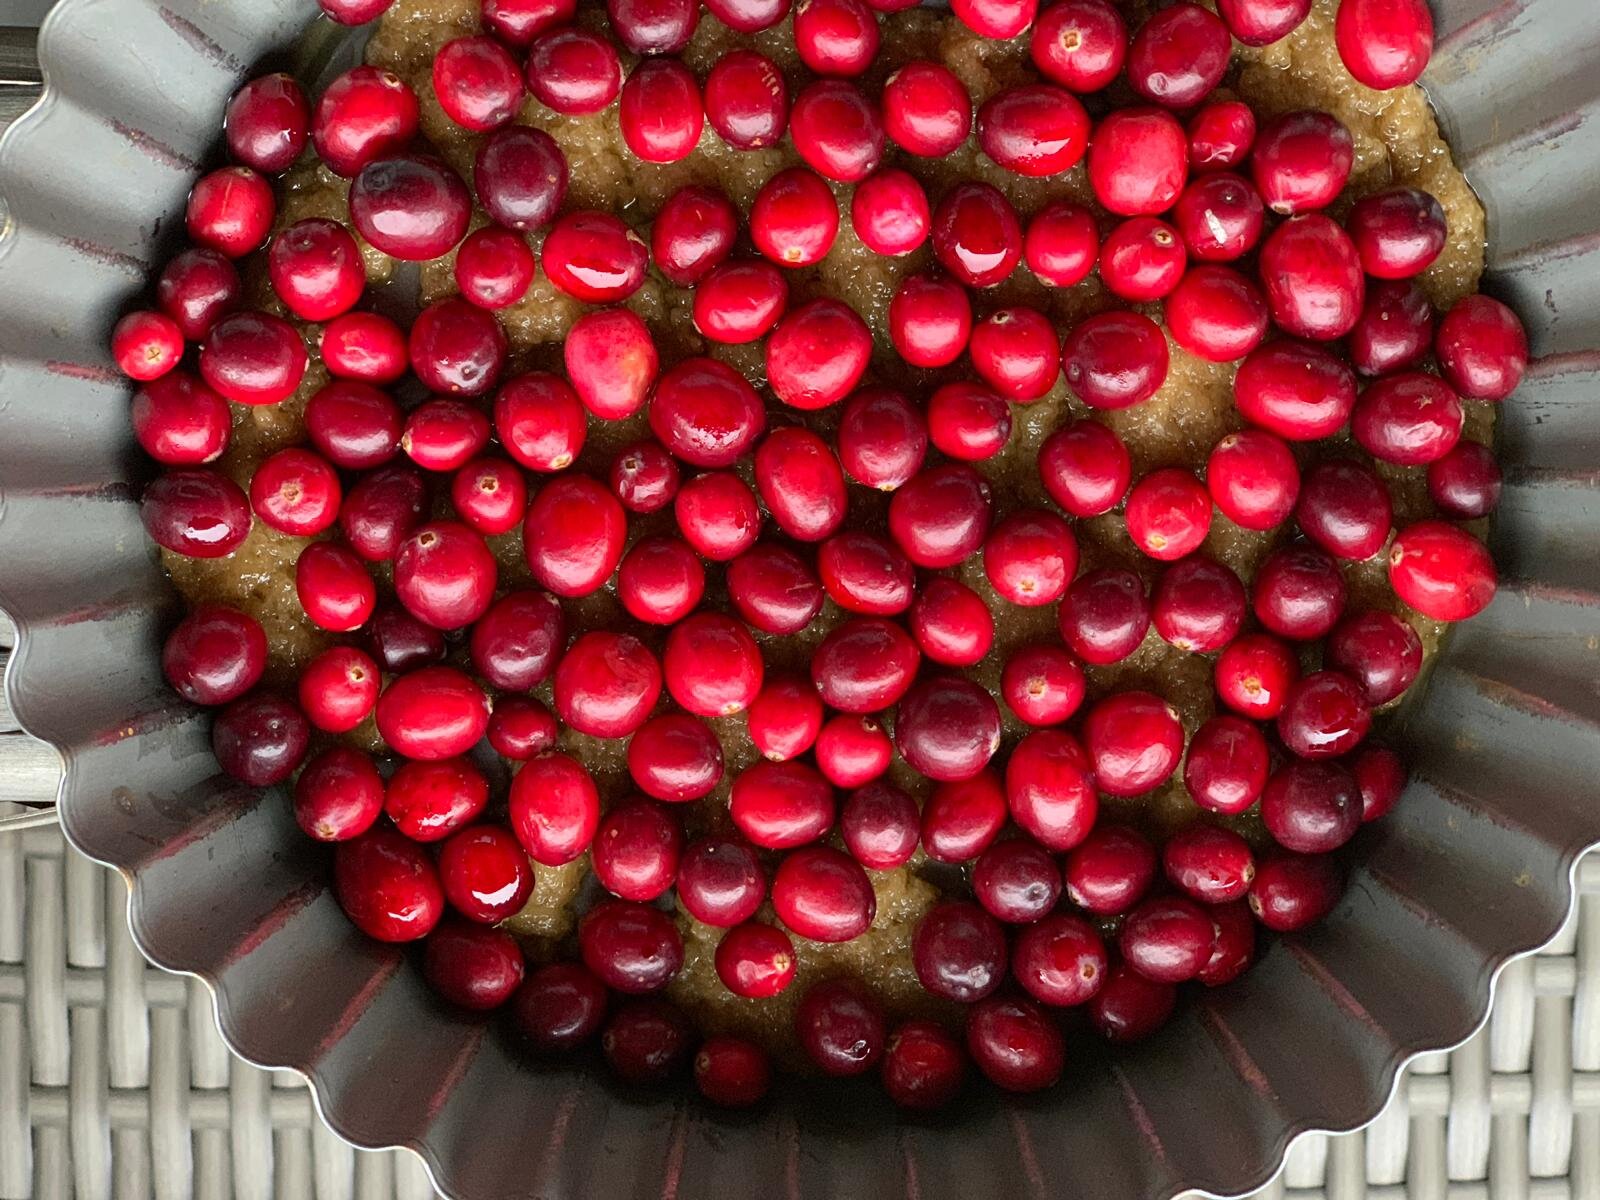
2. Melt the sugar and butter for the base in a small pot. When it has melted, stir and leave for a few minutes on the heat for the sugar to start to caramelize. Then pour in the bottom of ta greased cake pan (22-24 cm).
3. Sprinkle in the washed and dried off cranberries, press them down a little.
Make the batter.
4. In a medium bowl beat the eggs with half of the sugar until light and larger in volume. Mix in the vanilla.
5. In another bowl beat the soft butter with the rest of the sugar until fluffy.
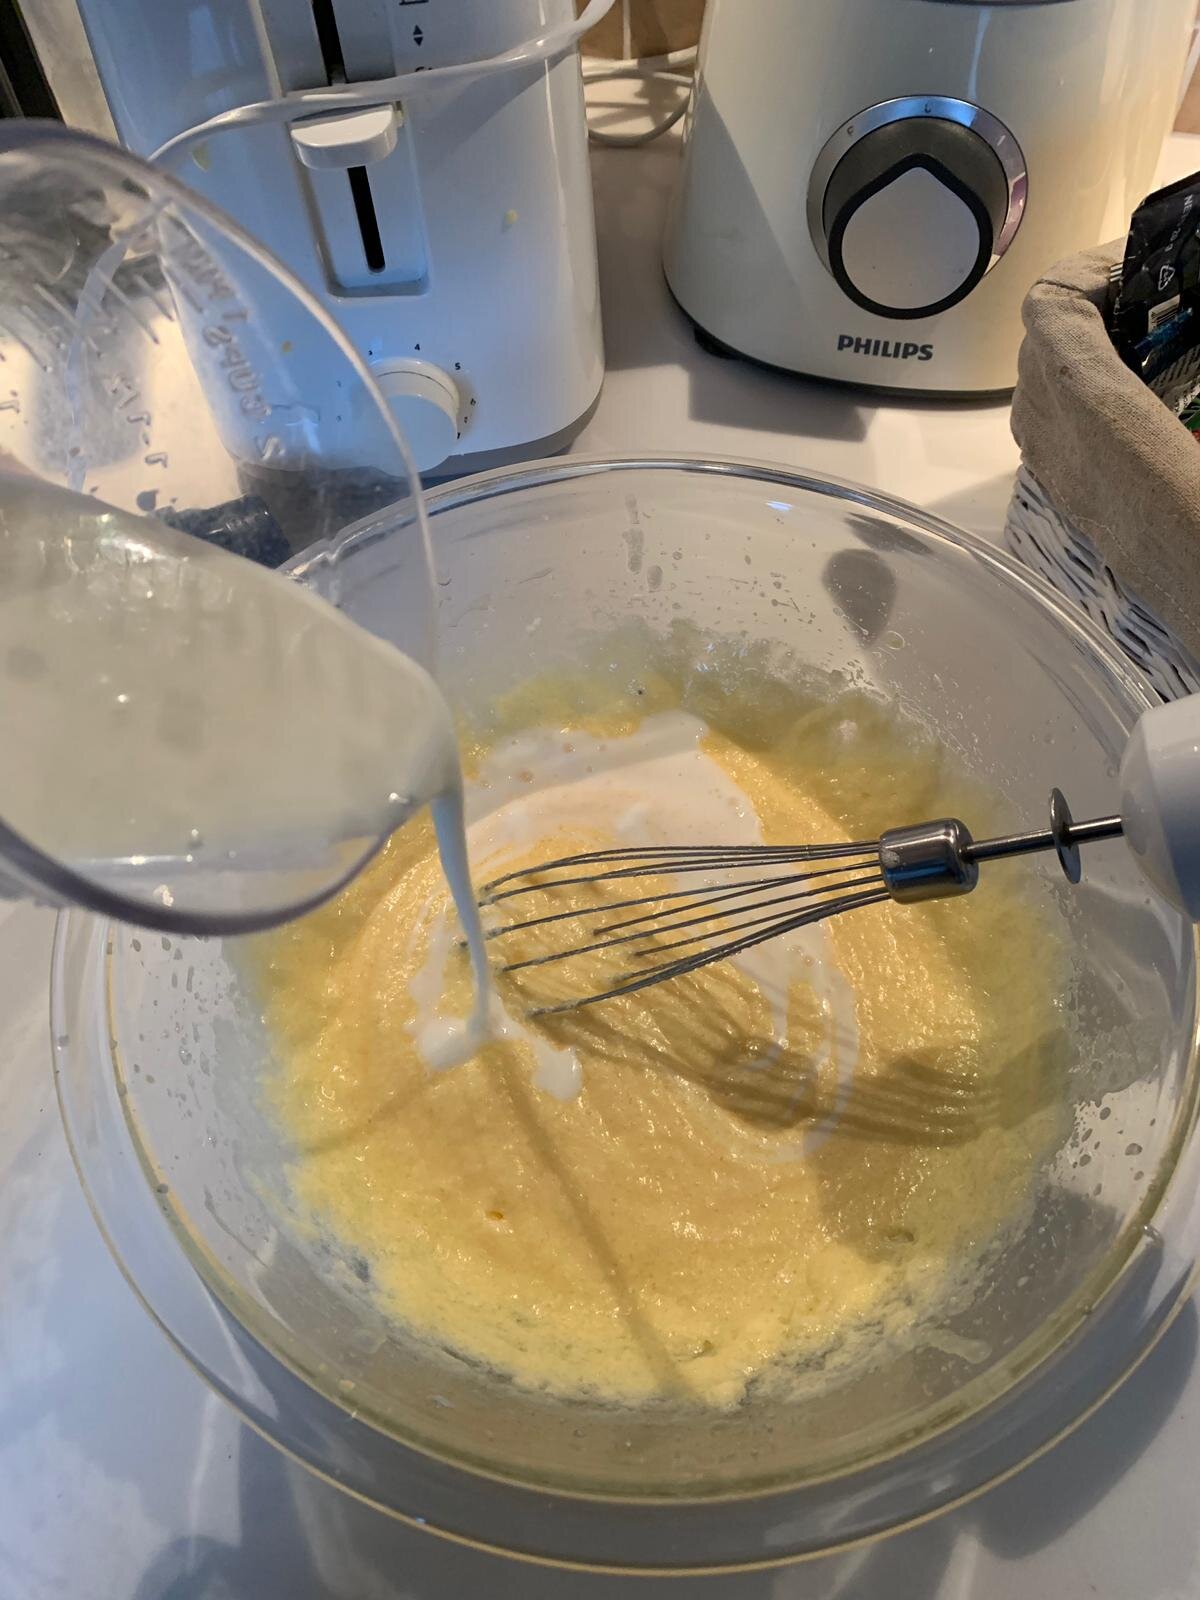
6. Add the egg mixture to the butter mixture gradually, beating with a mixer the whole time. Stir in the buttermilk.
7. Whisk together the flour, baking powder and salt in a small bowl.
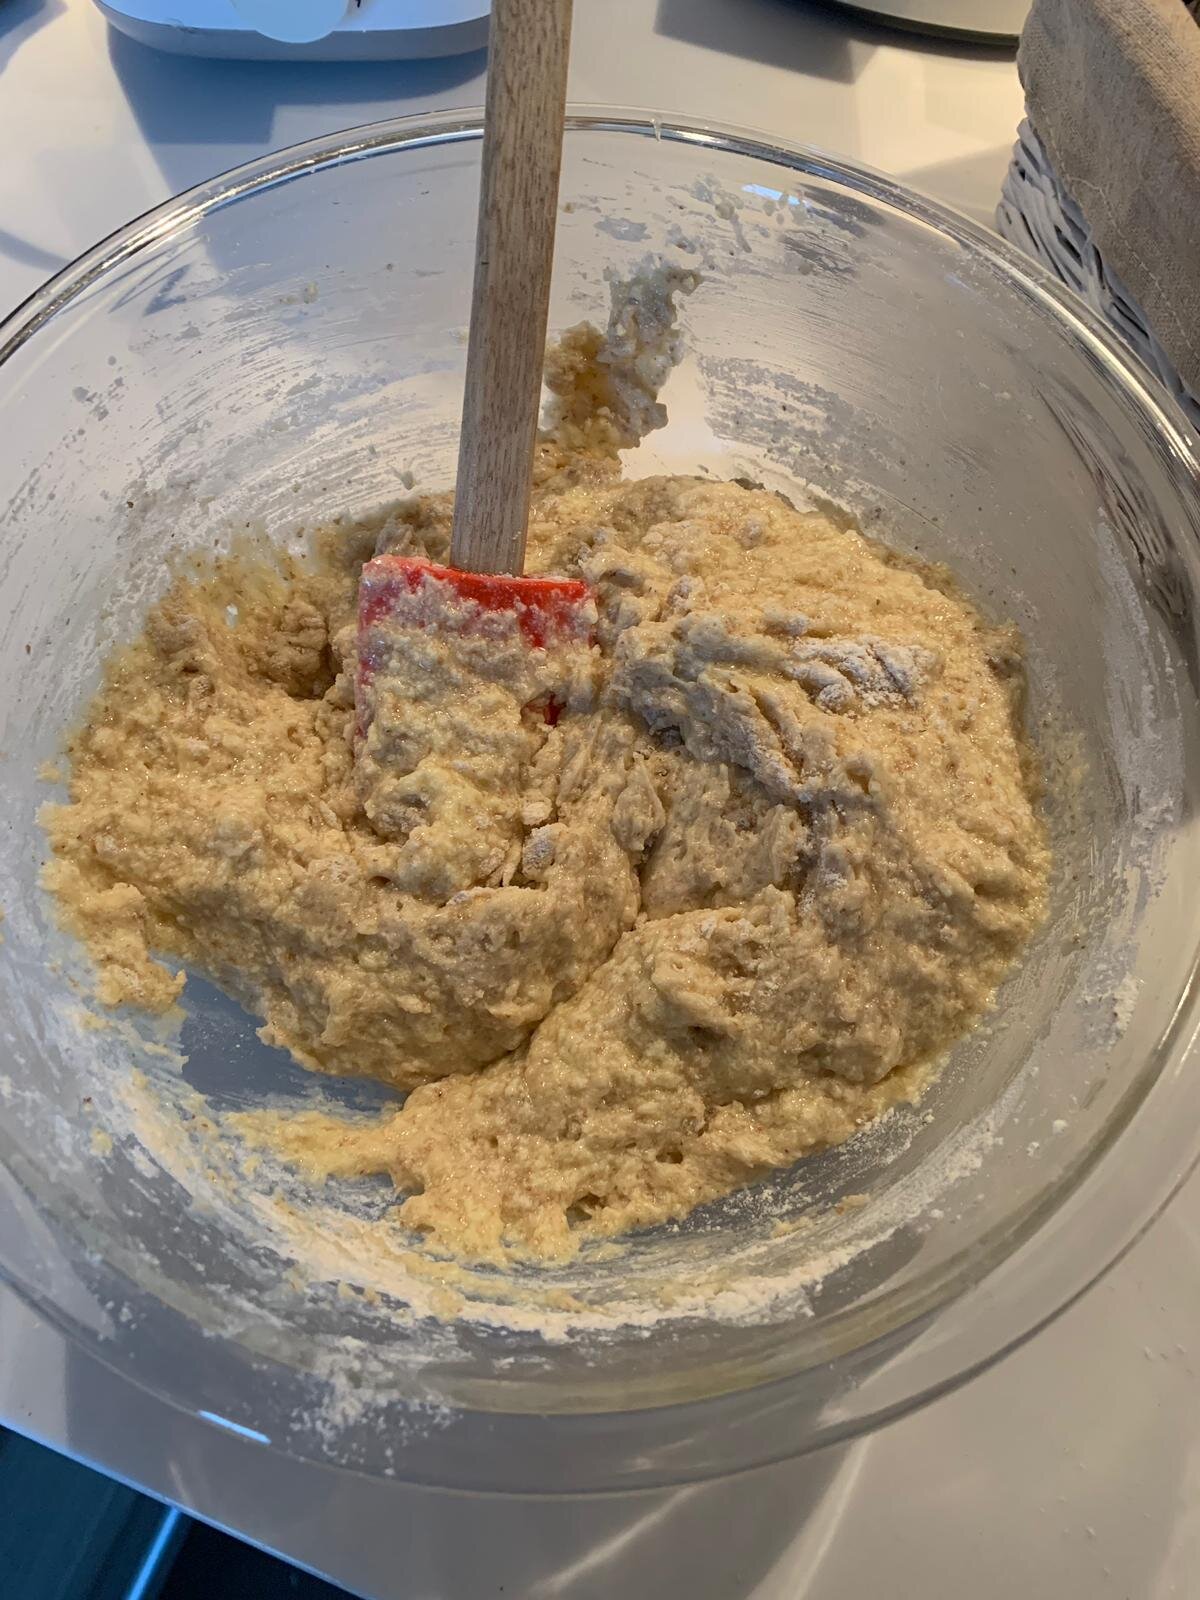
8. Stir in the dry ingredients to the wet ingredients and be careful not to overmix. The cake can turn out dense and not as fluffy.
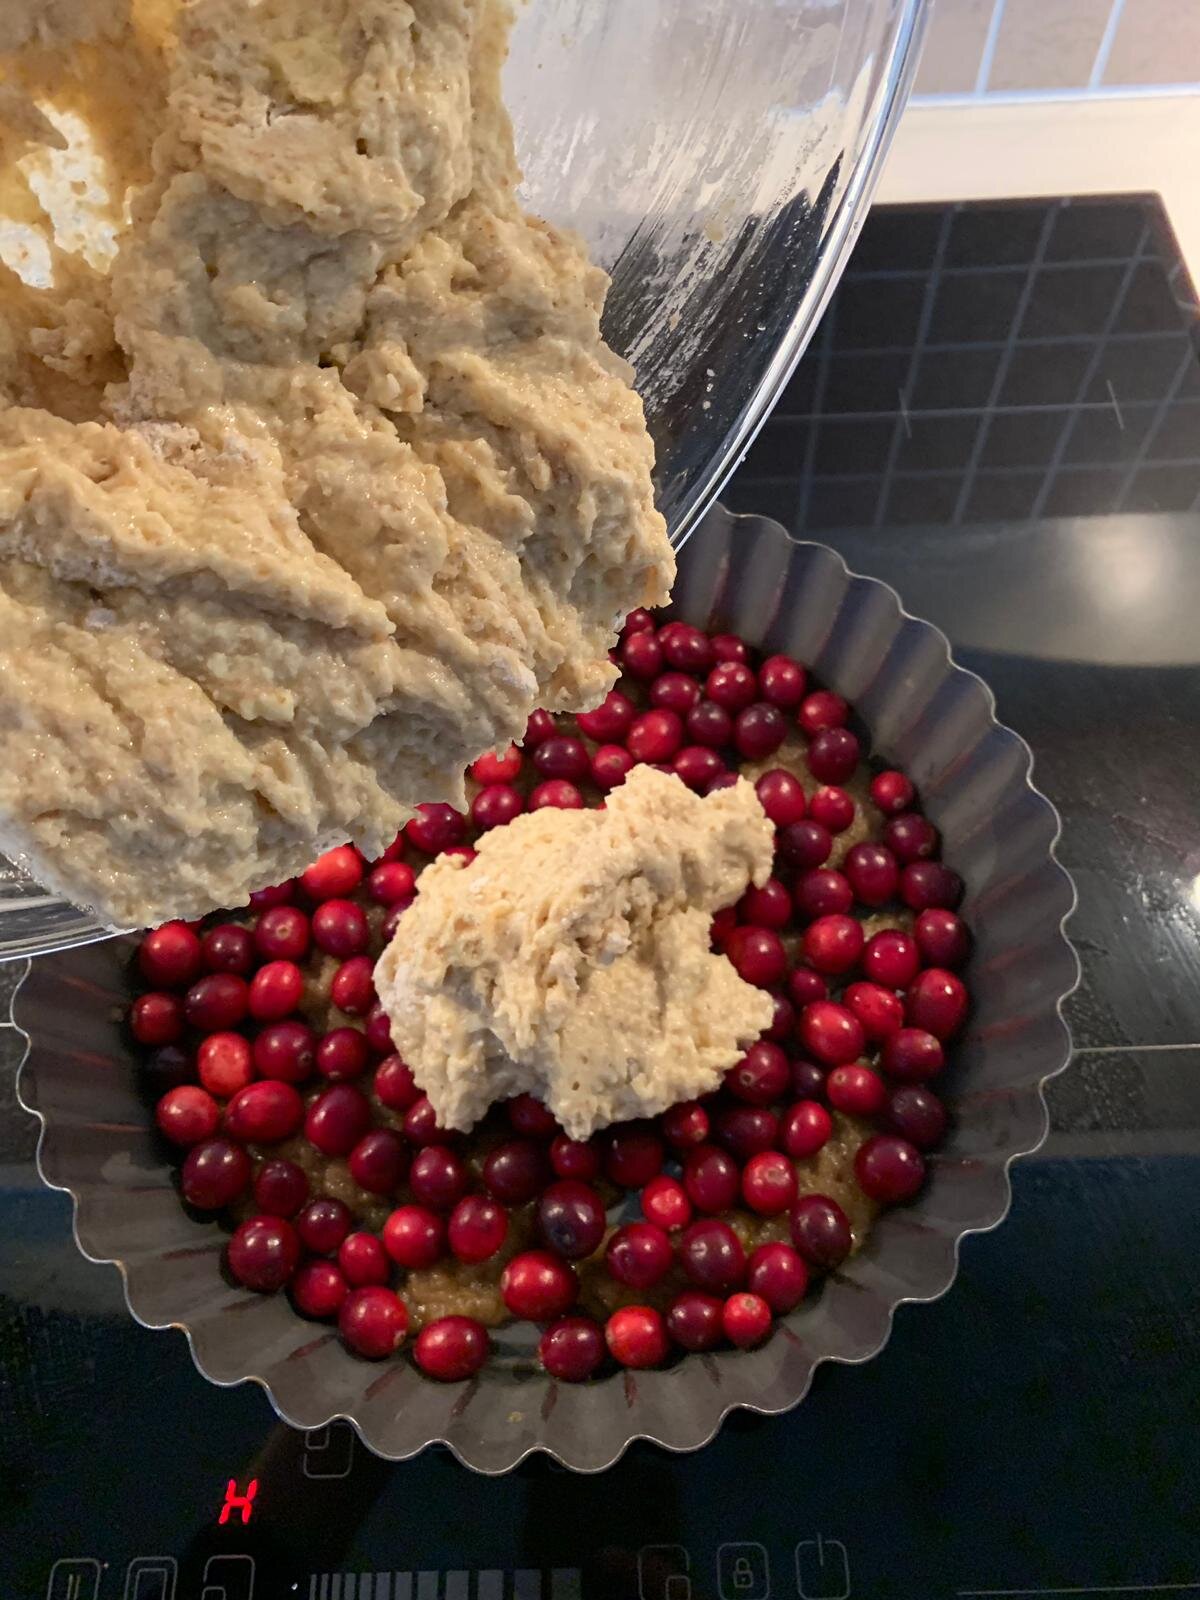
8. Pour the batter over the cranberries in the pan.
9. Bake in the oven for approximately 35 min, check the readiness with a toothpick.
10. Cool for 10-15 min and remove from pan. Best served warm.
Recipe: Ārija Avota
Photo: Ārija Avota
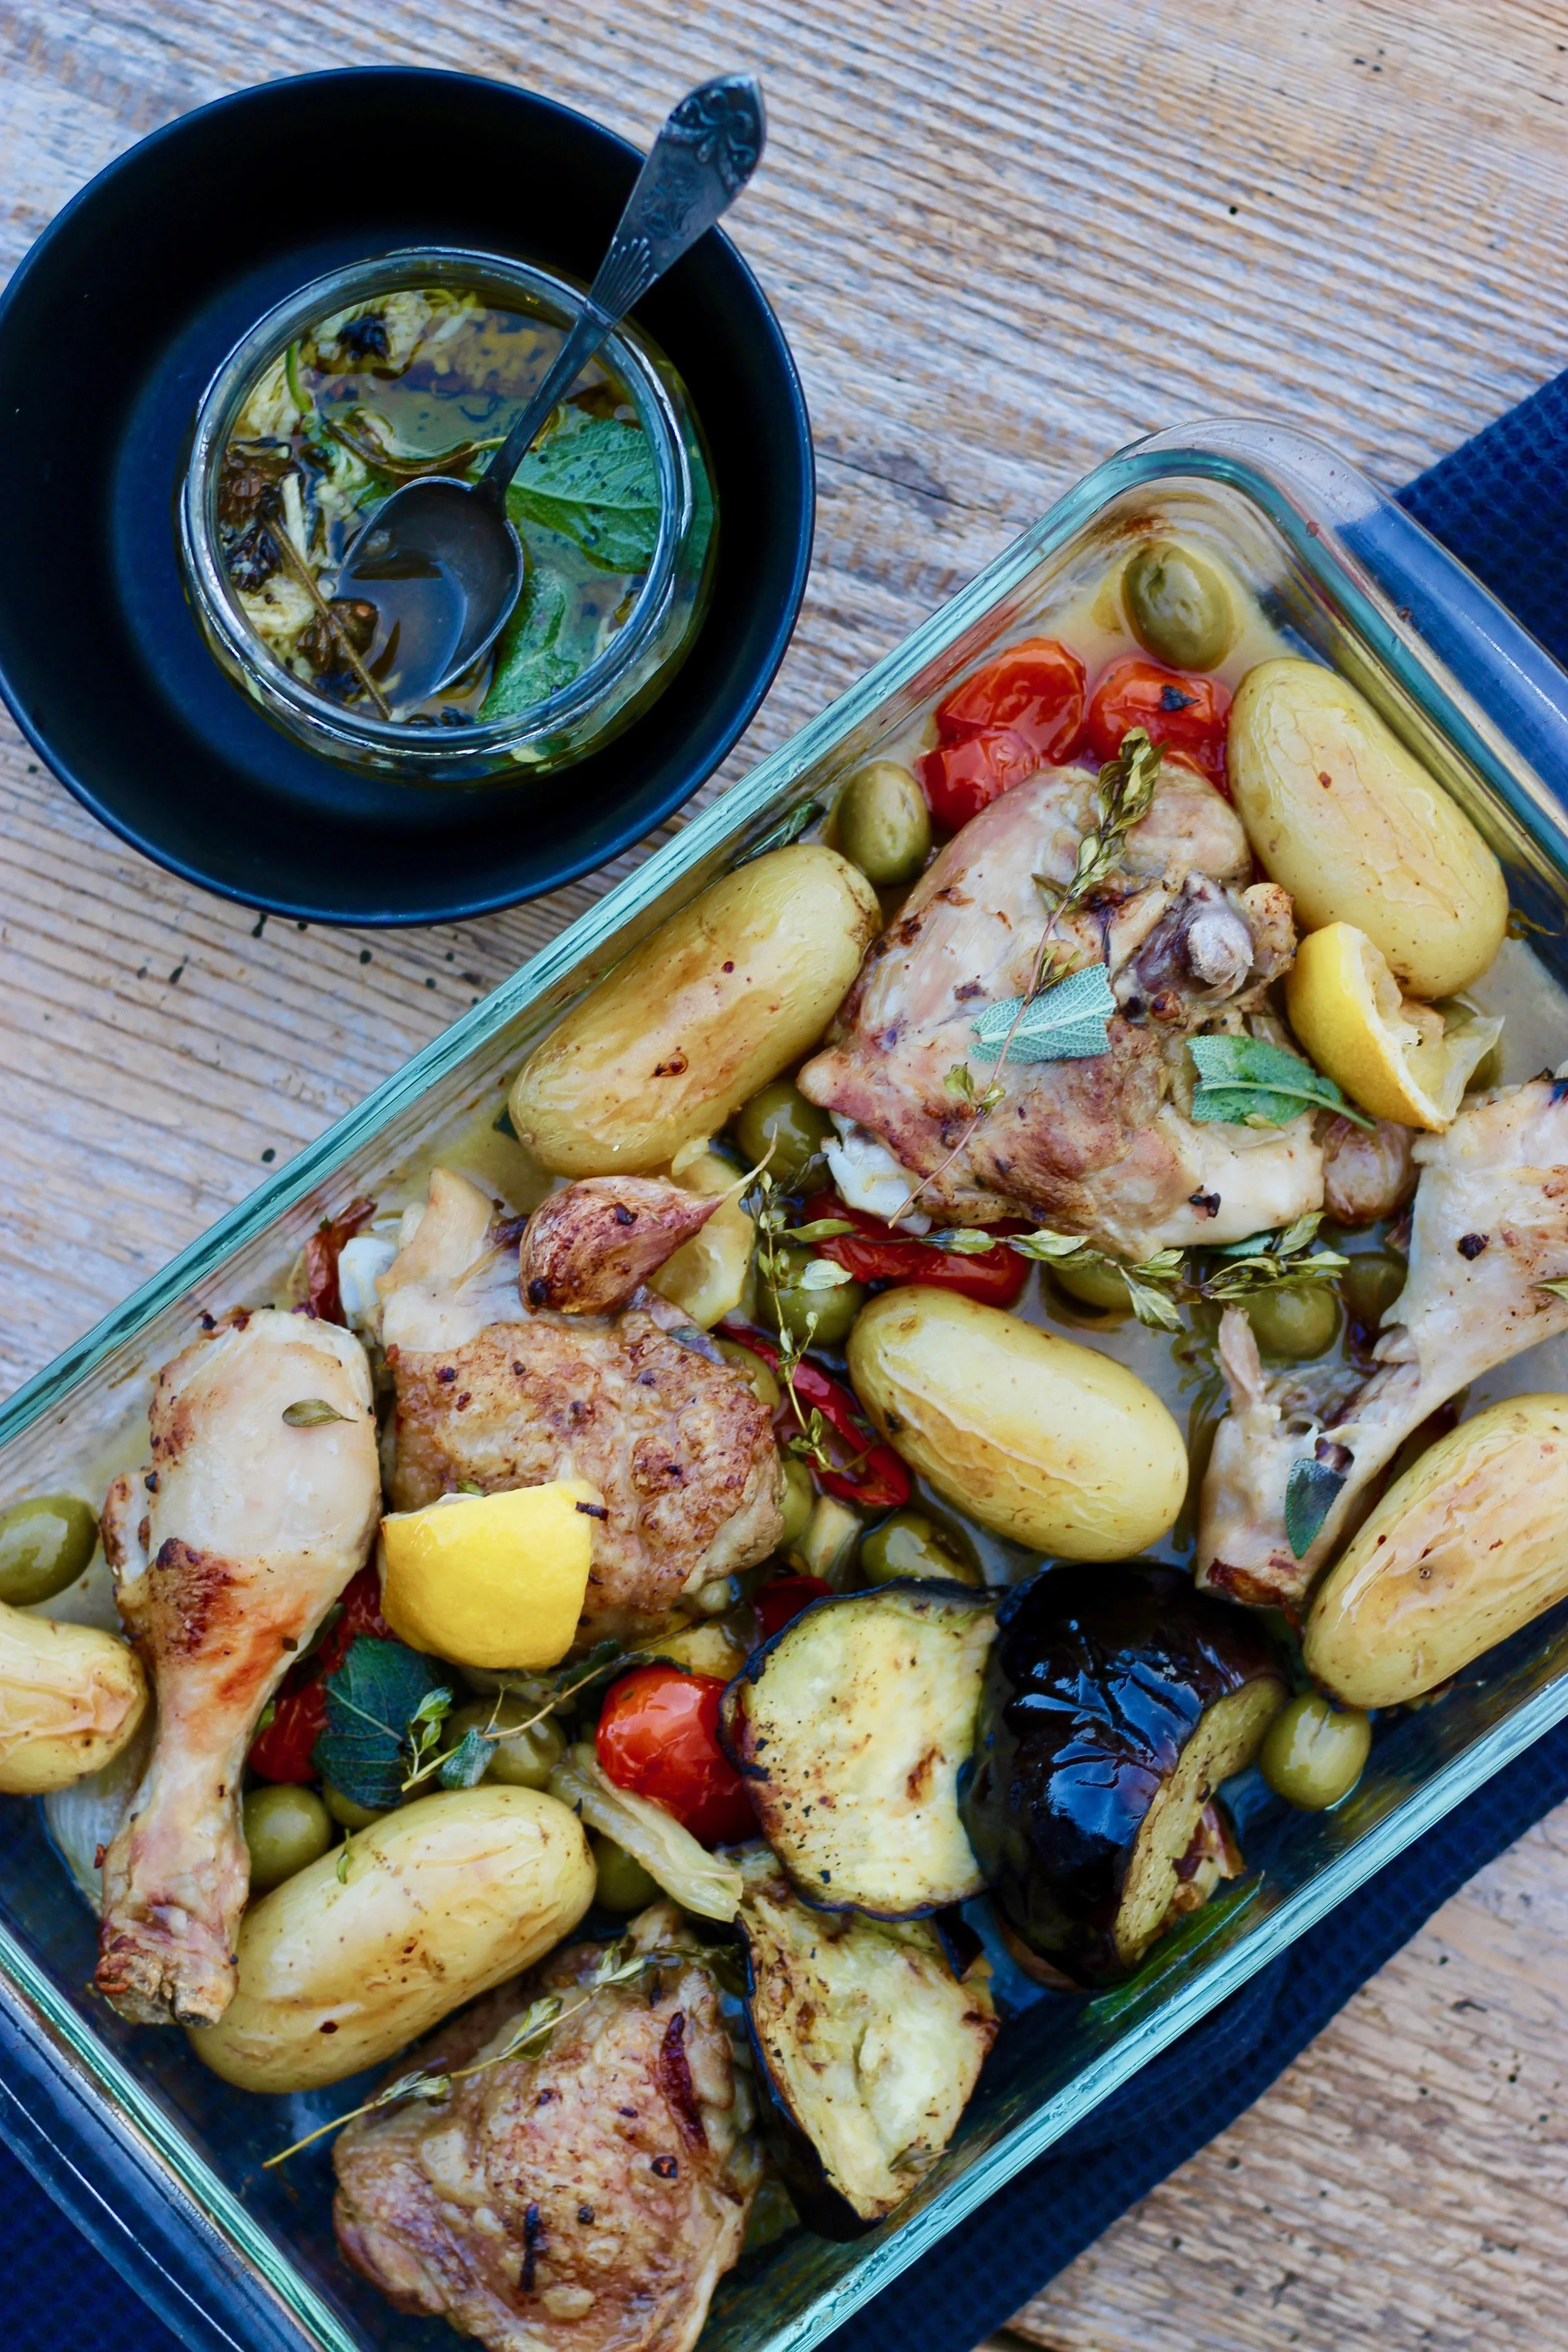
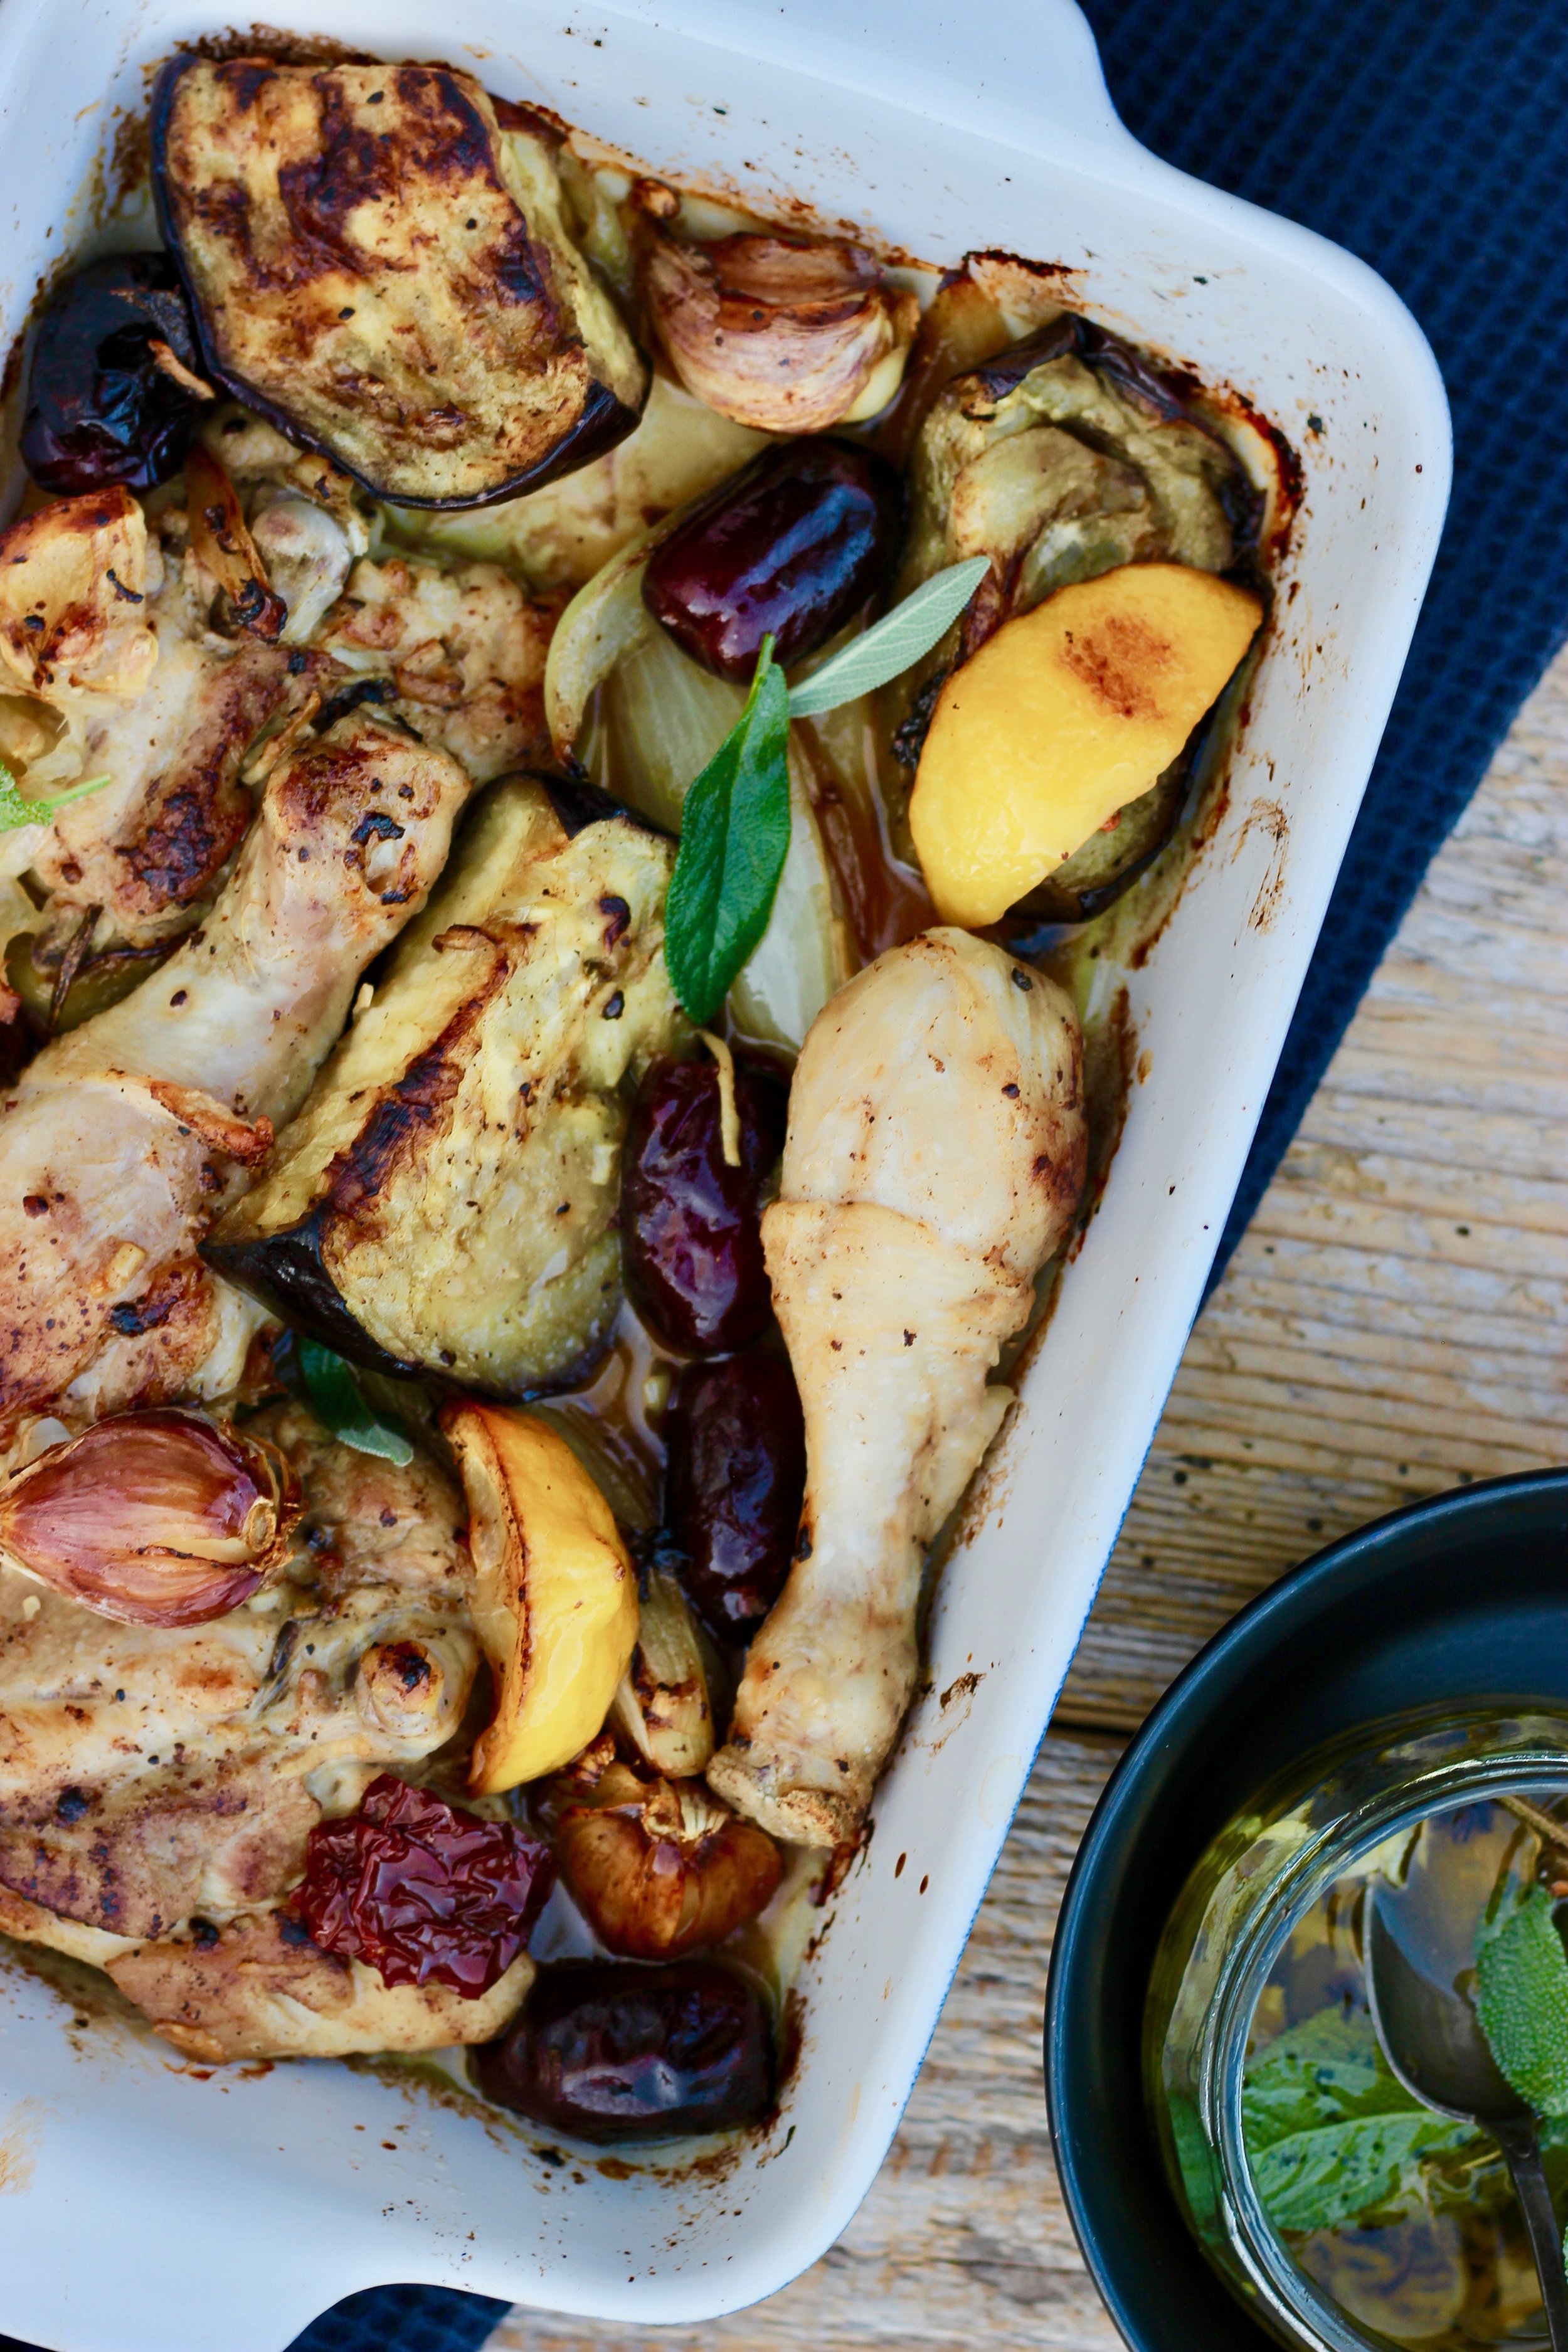
Oven baked chicken in herbs and veggies
This is again a very simple recipe, but creates the perfect explosion of flavors- the buttery onions, garlic and eggplant; the sourness of the lemon and tomatoes; the saltiness of olives and sweetness of dates and the aromas of all the herbs to bring it all together. The chicken and potatoes bring richness and nourishment.
Vegetarians can skip the chicken and add goats cheese and eggplant!
I could eat this dish every day because when you change the sides you add (look in the optional section) you get a completely different range of flavors. I have sometimes divided everything in two trays and varied what I add to the chicken- chili for spice lovers and eggplant with dates for a sweeter option.
This truly is the recipe where you use whatever you have t make a dish- it creates a surprise every time. I hope the surprise is a good one though :)
6 pieces of chicken, drumsticks or thighs
6 small new potatoes
2 handfuls of green olives with the pits
Handful of cherry tomatoes
8 garlic cloves
2 small onions
½ lemon
Herbs like thyme, parsley or sage
Salt and pepper
Olive oil
Optional: chili, dates, carrots, eggplant, capers, sun dried tomatoes, pumpkin, etc.
If you decide to use the eggplant- it must be cut in large pieces, salted and left for 20-30 min, then rinse and pat dry. Cook in olive oil on the pan along with the chicken.
1. Wash and pat the chicken dry, put salt and pepper on, rub it in.
2. Wash all the veggies and maybe cut the potatoes if necessary, cut the onion in 4 segments. Squeeze out the seeds of the cherry tomatoes in a bowl. Cut the half lemon in 4 segments.
3. In a large pan with a removable handle (if you don’t have one, just transfer everything after cooking to a deep oven dish) cook the chicken in olive oil until nice and golden on both sides.
4. When the chicken is almost done, add pressed garlic cloves, the onion and lemon to the pan. At the very end add the olives, herbs and cherry tomatoes. Just cook a little longer and stir together.
5. Heat the oven to 200 degrees (celsius).
6. Add the potatoes to the pan or if the pan isn’t suitable for the oven- transfer everything to a deep oven dish. Transfer everything to a larger dish also when you just have more of everything and it is a larger portion.
7. Place in the oven and cook until chicken and potatoes are ready.
Recipe: Ārija Avota
Photo: Oto Avots
,

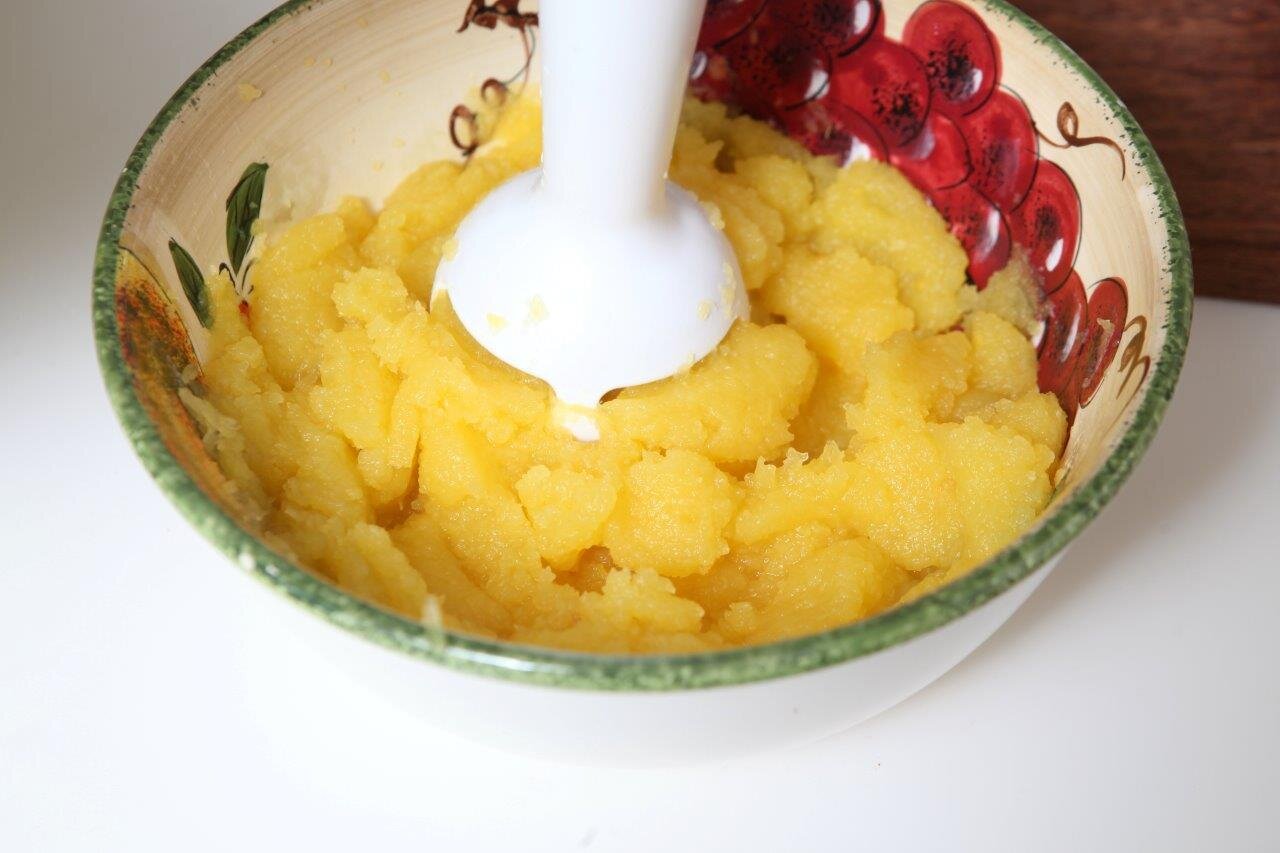
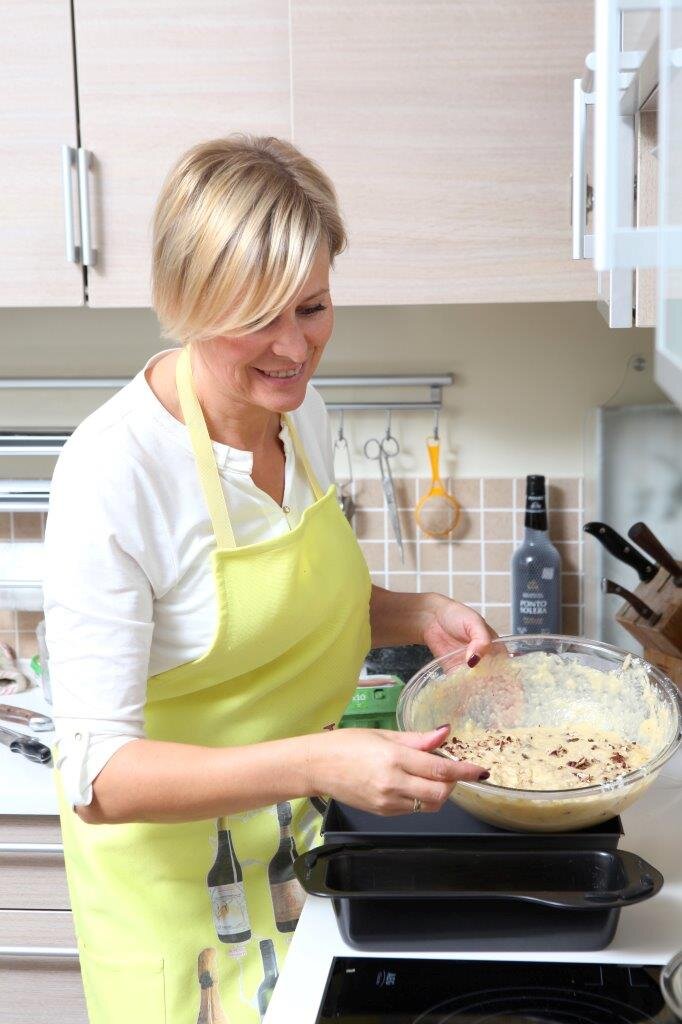
Pumpkin bread with cream cheese
450 g pumpkin puree
450 g all purpose flour
400 g sugar
4 eggs
225 g butter, melted
120 ml water
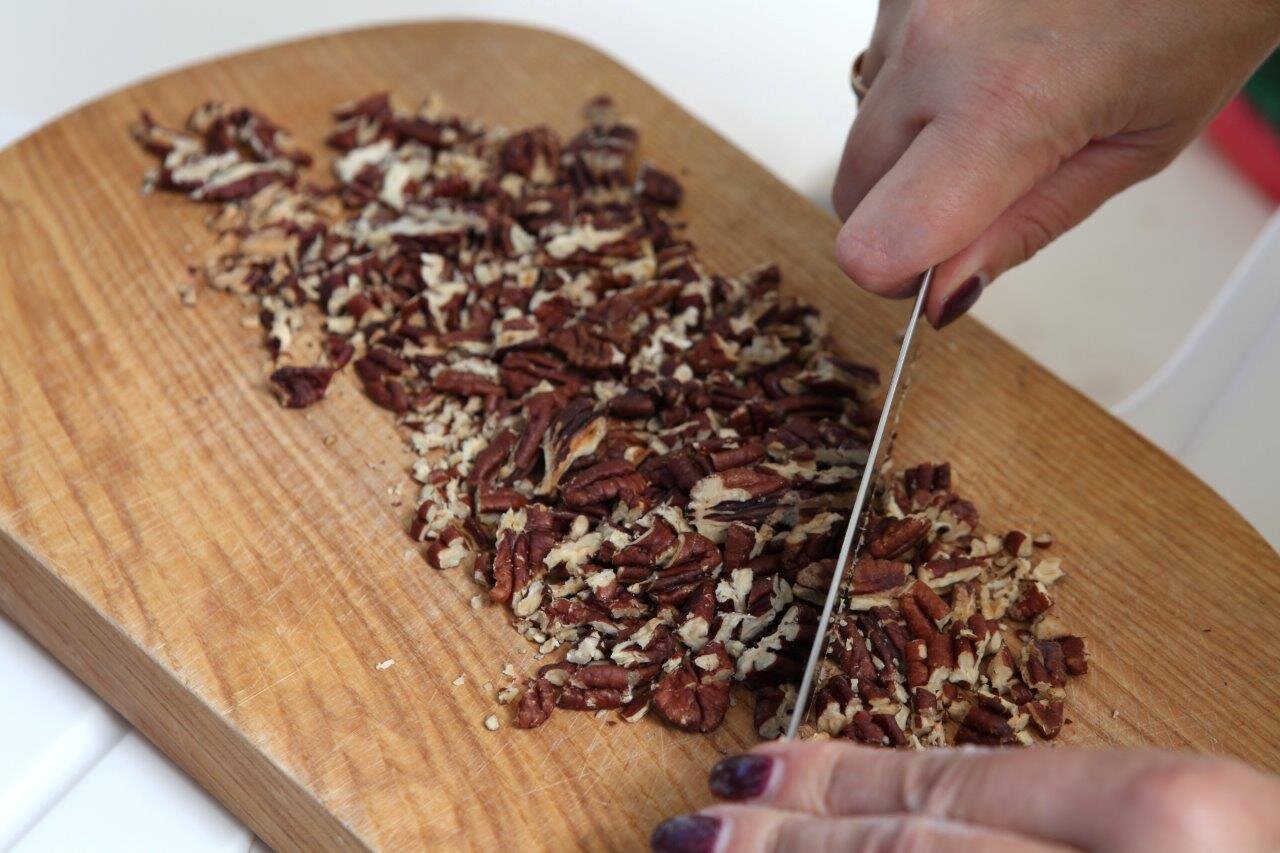
100 g walnuts or pecans
1 tsp baking powder
1 tsp baking soda
1 ½ tsp cinnamon
¼ tsp nutmeg
2 tsp vanilla paste or vanilla sugar
¾ tsp salt
For the filling
225 g cream cheese, room temp
100 g sugar
2 eggs
1 ½ tbsp all purpose flour
2 tbsp butter for the pan
1. Butter two bread pans (approx 28x10x6 cm), preheat oven to 180 degrees (celsius).
2. Place pumpkin slices in the oven to bake for about 45-60 min, depending on the size of the slices. When the pumpkin is soft (test by cutting it with a knife) remove from oven, let it cool and use a spoon to scrape off the flesh from the skin. Then blend in a puree consistency.
3. Place the nuts on a baking sheet and bake in the oven until fragrant, about 8-10 minutes. Let cool and chop up roughly.
Make the filling
4. Use a mixer or whisk to beat the cream cheese until soft and then add the sugar. When creamy, beat in the eggs one by one. Stir in the flour, set aside.


Make the batter
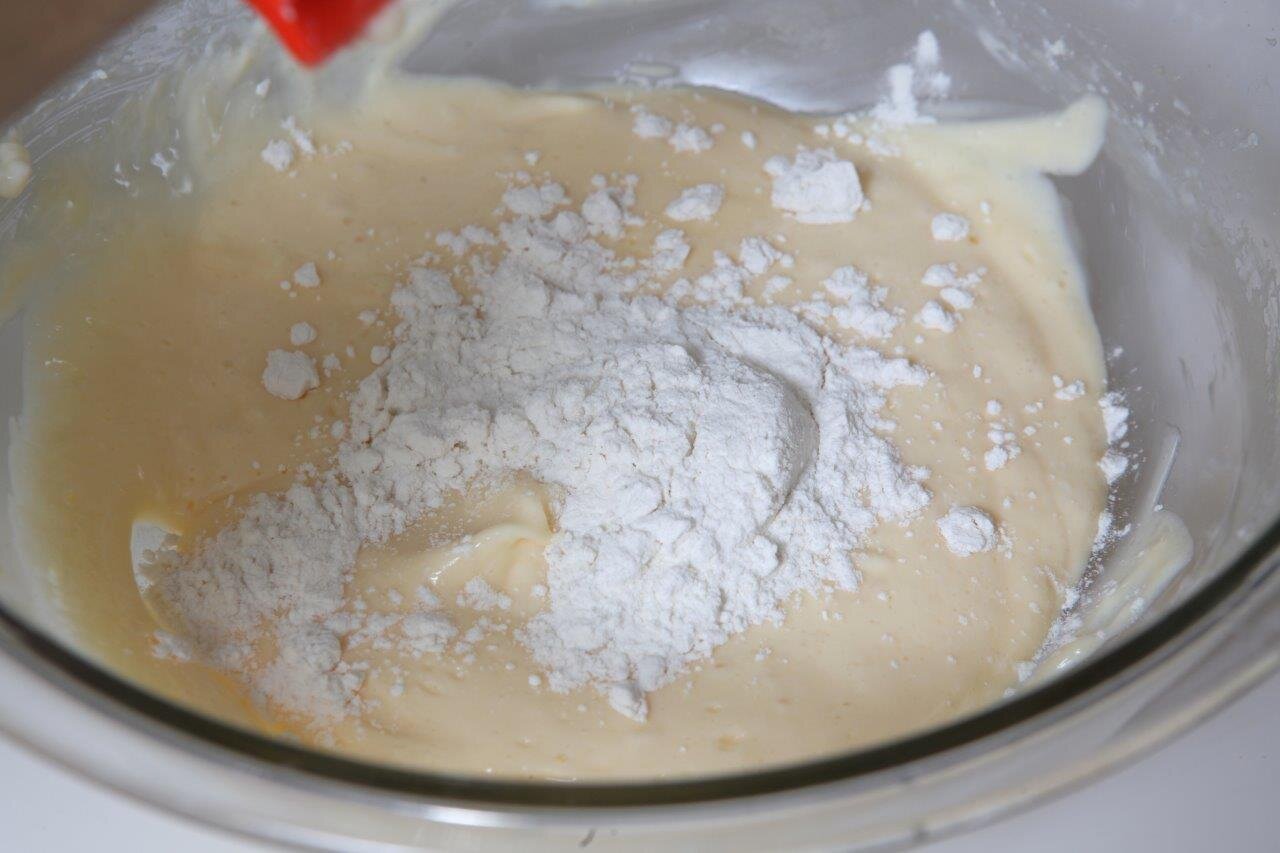
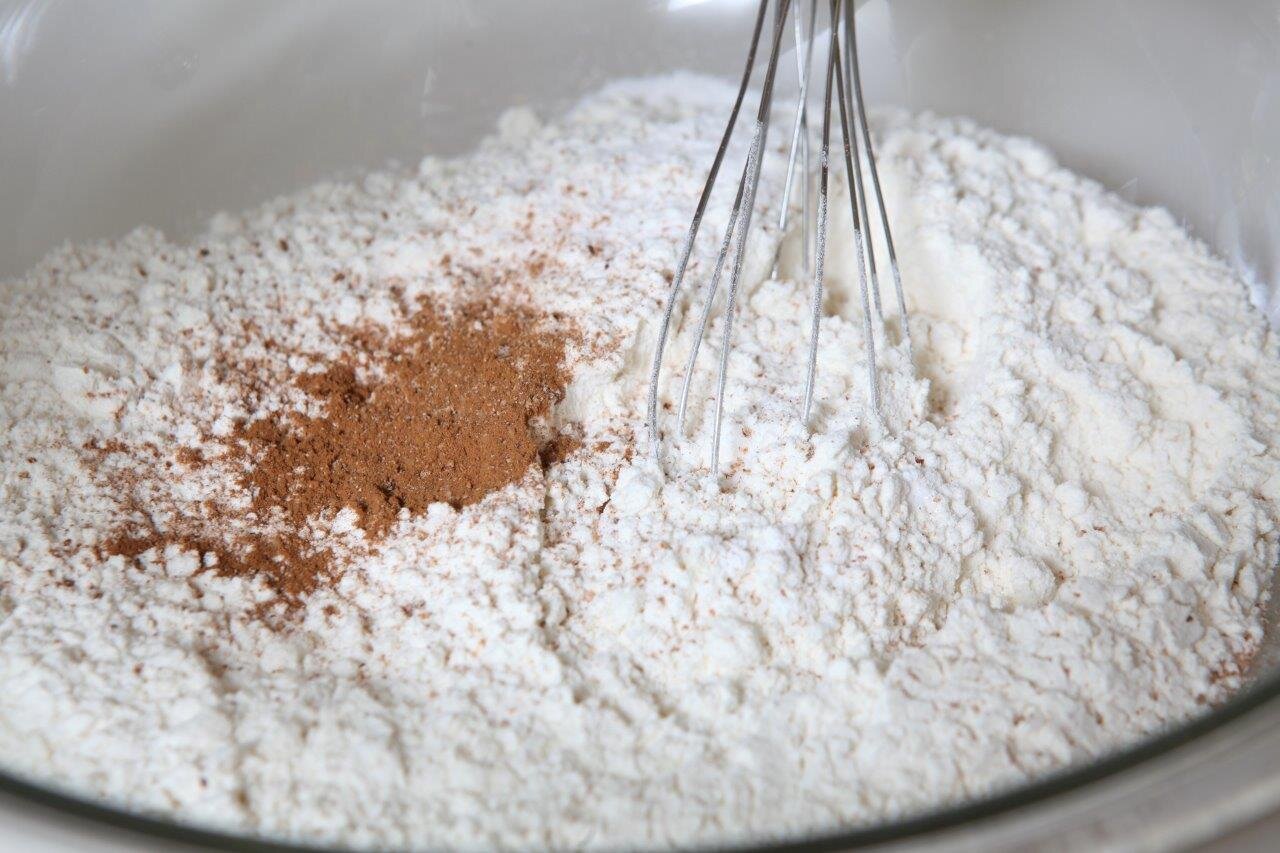
5. In a medium bowl, whisk together the sifted flour, baking powder, baking soda, salt, cinnamon, nutmeg. Set aside.
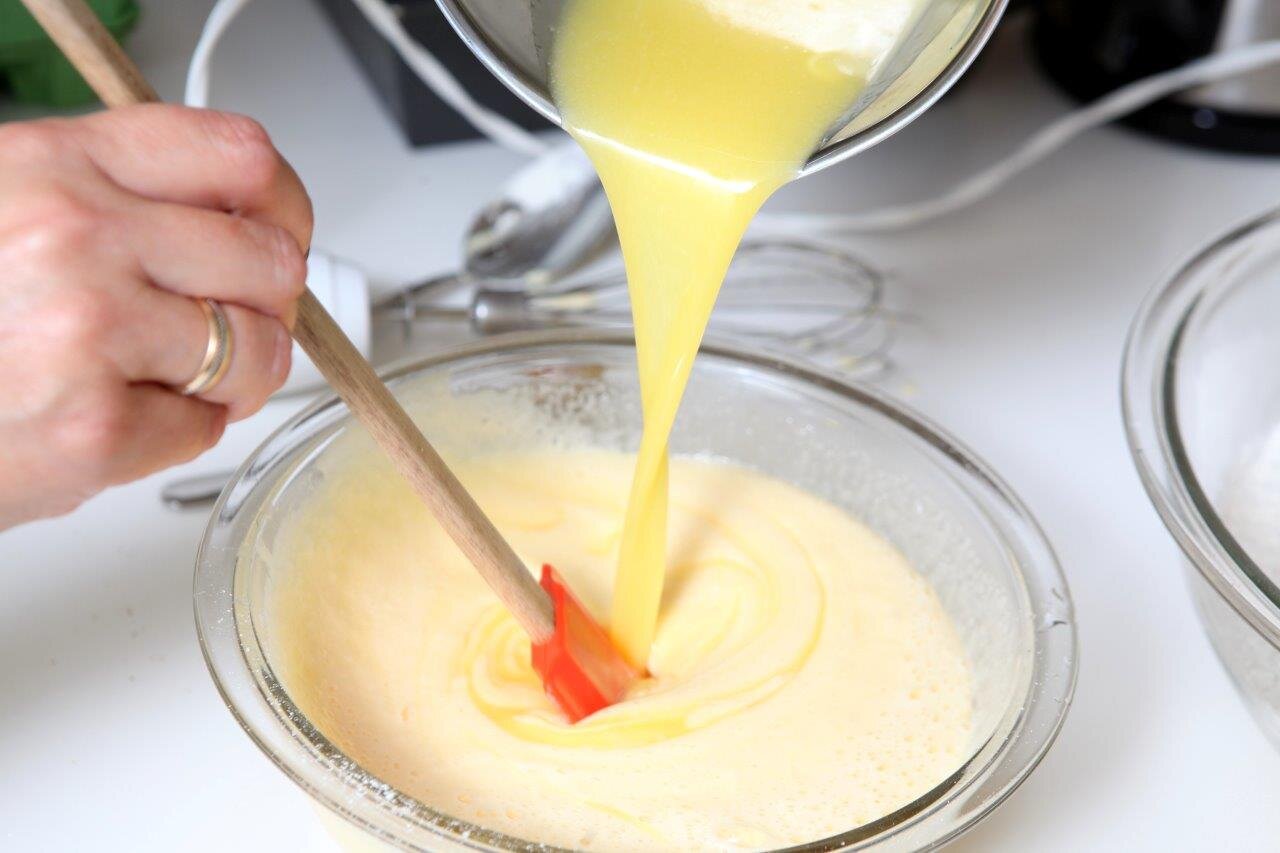
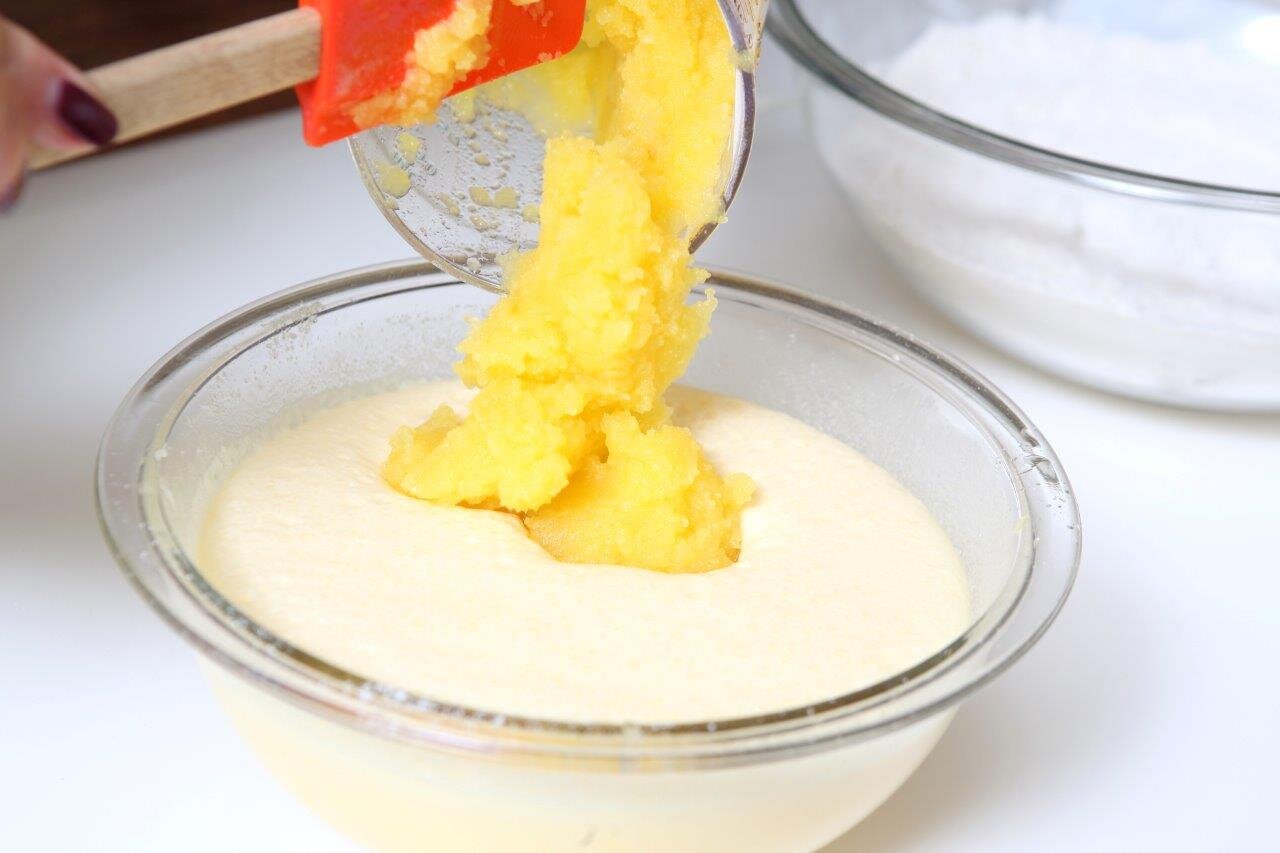
6. In a large bowl beat the eggs lightly, then add sugar and cooled melted butter. Stir in the pumpkin puree, water, vanilla and chopped nuts.
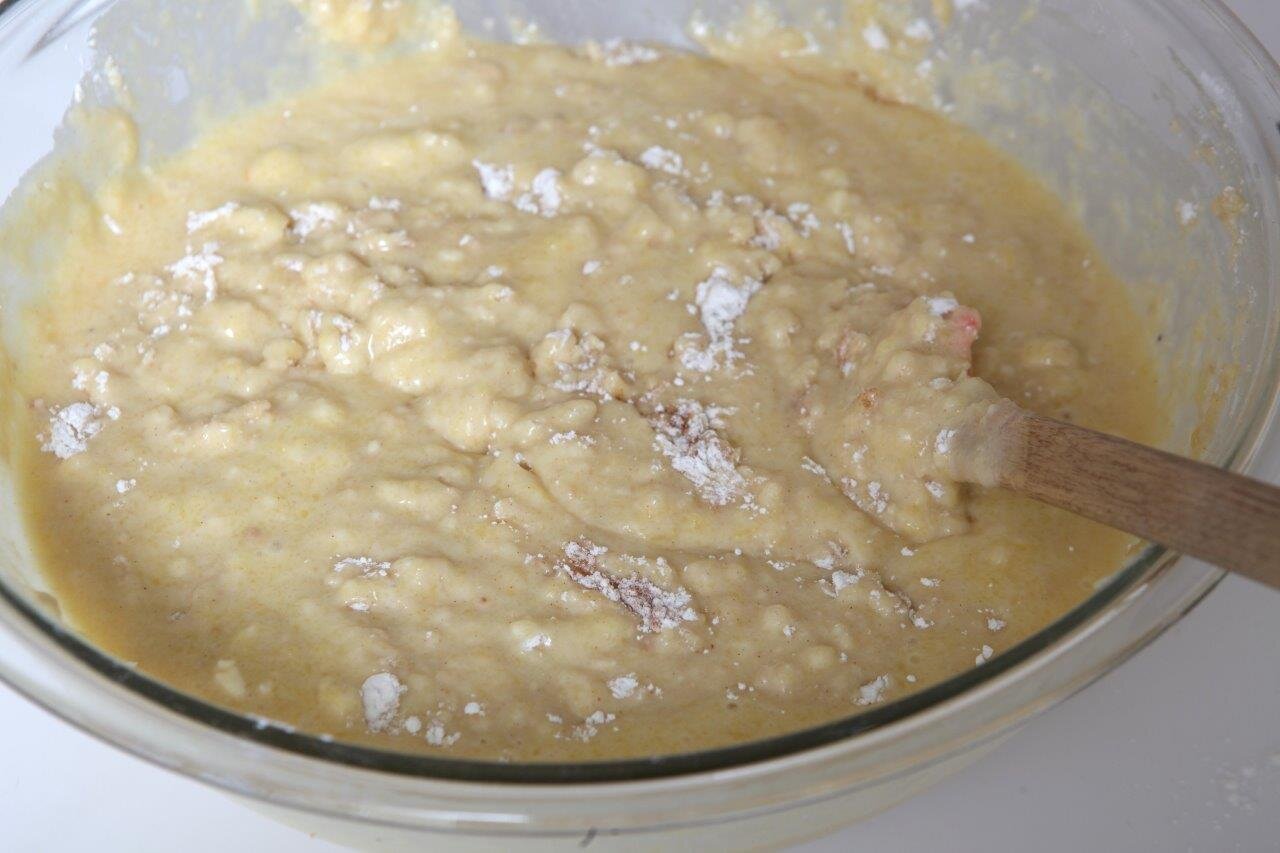
7. Lightly stir the flour mixture in the pumpkin mixture, be careful not to overmix, that will make the bread tough and not as light. It’s ok if the batter has a few chunks of flour in it.
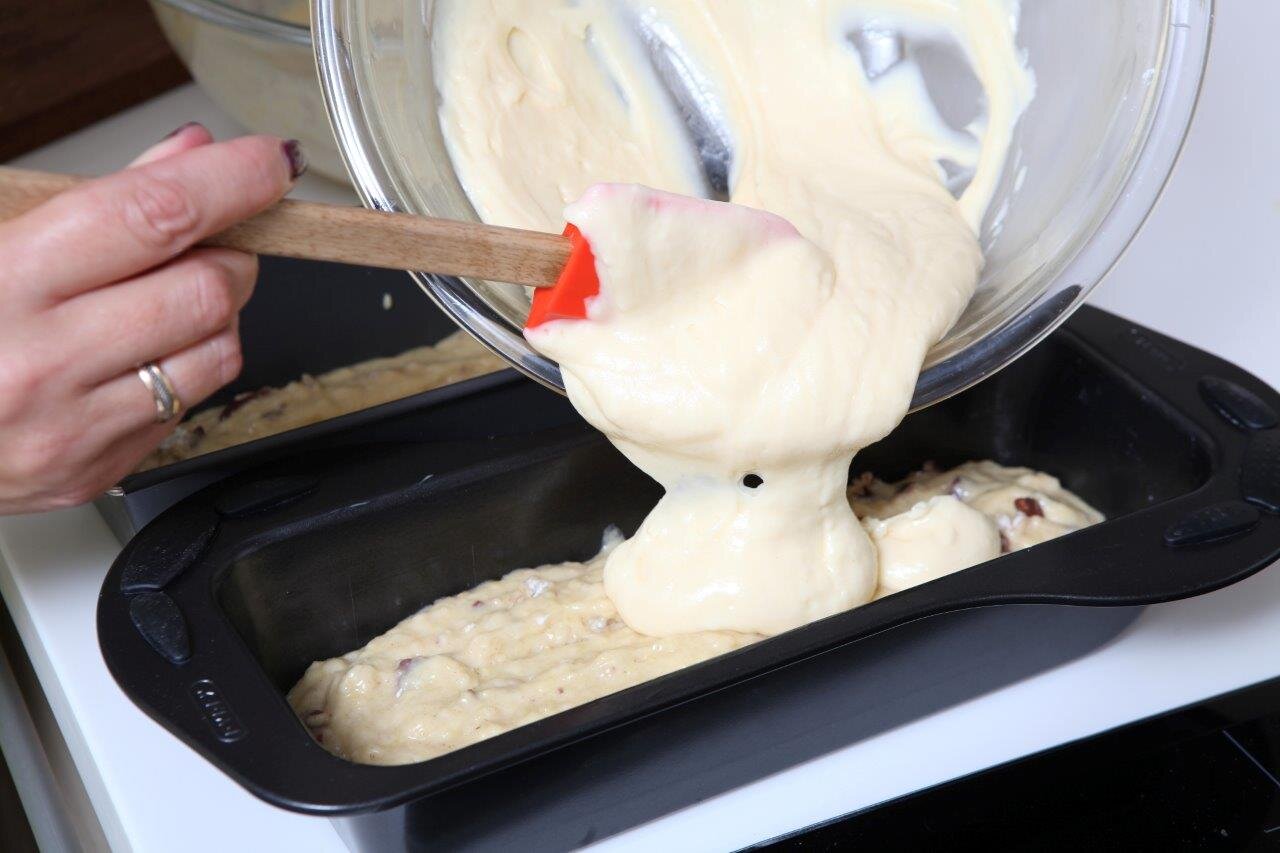
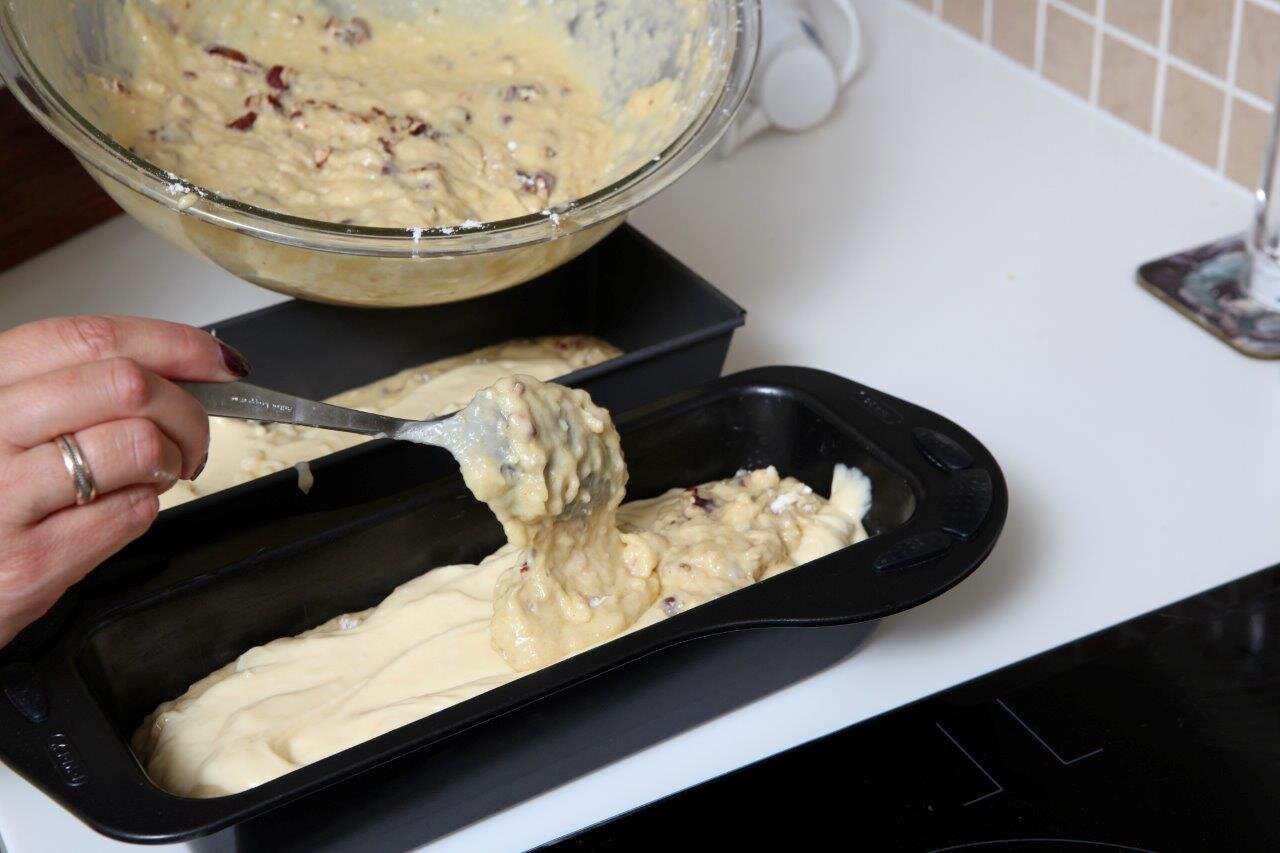
8. Pour a quarter of the batter at the bottom of both pans. Now pour half of the filling in each pan in the middle. Top it off with the rest of the batter and even it out with a spatula.
9. Place both pans in the center of the oven and bake for 55-65 min until a toothpick inserted comes out clean.
10. Remove from the oven and place on a wire rack to let cool for at least 10 min. Then you can turn over the pans to remove the breads and slice them to serve. Can be served both hot and cold either with some butter or Nutella.
Recipe: Ārija Avota
Photo: Ieva Andersone (IG: @photoievaandersone)


Carrot cupcakes
Carrot cake has a very nice and interesting taste that really complements fall- the play of the used spices creates an amazing smell that fills your home and always has everyone asking: what are you making?!
If you have never tried carrot cake, I highly recommend to try it and no be afraid of the fact there is a vegetable in cake :) And also do not be discouraged of the long list of ingredients because everything can easily be made in two bowls and doesn’t take long.
This is actually a very versatile recipe because you can use the same batter for cupcakes or cake (pour it in a 20 cm pan and bake for 30 min checking the readiness with a toothpick).
For the cupcakes
300 g carrots, peeled and grated
2 eggs, room temp
100 g sugar, can use brown sugar too
160 ml (160 g) rapeseed oil (or any other oil without a distinct smell- sunflower, vegetable, etc.)
160 ml (120 g) unsweetened applesauce
1 tsp vanilla sugar or vanilla paste
100 g walnuts or pecans, chopped
175 g all purpose flour, 1/3 can be replaced with whole grain
1 tsp baking soda
1 tsp cinamon
Pinch of salt
For the icing
100 g cream cheese
30 g heavy cream
50 g powdered sugar
Makes 12 cupcakes
Make the cupcakes
1. Chop the walnuts or pecans. Wash, peel and finely grate the carrots in a large bowl (can use a food processor if you have one)
2. In that large bowl with the carrots add eggs, sugar, oil, applesauce and vanilla and beat together using a wire whisk. Mix until sugar is dissolved.
3. Heat the oven to 180 degrees (celsius) and line a muffin tin with paper liners.
4. In a small bowl whisk together the dry ingredients- flour, baking soda, cinnamon, salt and chopped walnuts. Then stir in with the wet ingredients but just until incorporated, do not overmix. It’s ok if there are some lumps left as they will continue to mix when putting batter in the muffin tin.
5. Fill the muffin tin evenly with the batter- do not be afraid to fill the tin to the top, because this batter doesn’t raise too much over the top.
6. Place the tin in the middle of the oven and bake for 17-22 min. I suggest checking the readiness with a toothpick after 17 min and bake some more only if necessary. Since ovens differ greatly, it could be you need to bake a little longer, but not longer than 25 min since you don’t want to overbake and have dry cupcakes. Remove from oven and let cool for at least 20 min.
Make the icing
7. While the cupcakes are cooling you can make the icing. Use a deep, narrow container or bowl and soften the cream cheese with a spatula.
8. Cream cheeses sometimes differ in consistency- some are thicker and others are more liquid, so look at that to determine how much to soften the cream cheese before using a mixer to beat it. Start beating it until fluffy and then add the powdered sugar and beat until nice and smooth.
9. Slowly and gradually add the cold heavy cream while beating constantly. This is also where you check the consistency because a thicker cream cheese may need more heavy cream and vice versa. In the end the icing should be a nice stiff but creamy consistency.
10. Place the icing in the fridge to cool a bit more while still waiting for the cupcakes to cool too (you can’t put icing on a warm cake).
11. Take a piping bag and place the decorating tip you want on the end of it (for the cupcakes in the photo I used the standard “star”) and fill the bag with the icing. Decorate each cupcake with a swirl, starting from the outer edge to center and up. The icing doesn’t have to be perfect, the flavor combo is delicious either way! So even if you do not have the tools necessary for decorating- you can use a spatula to spread the icing on more freely.
12. Serve immediately or save for the next day in the fridge.
Recipe: Anna Inne-Smilga
Photo: Oto Avots

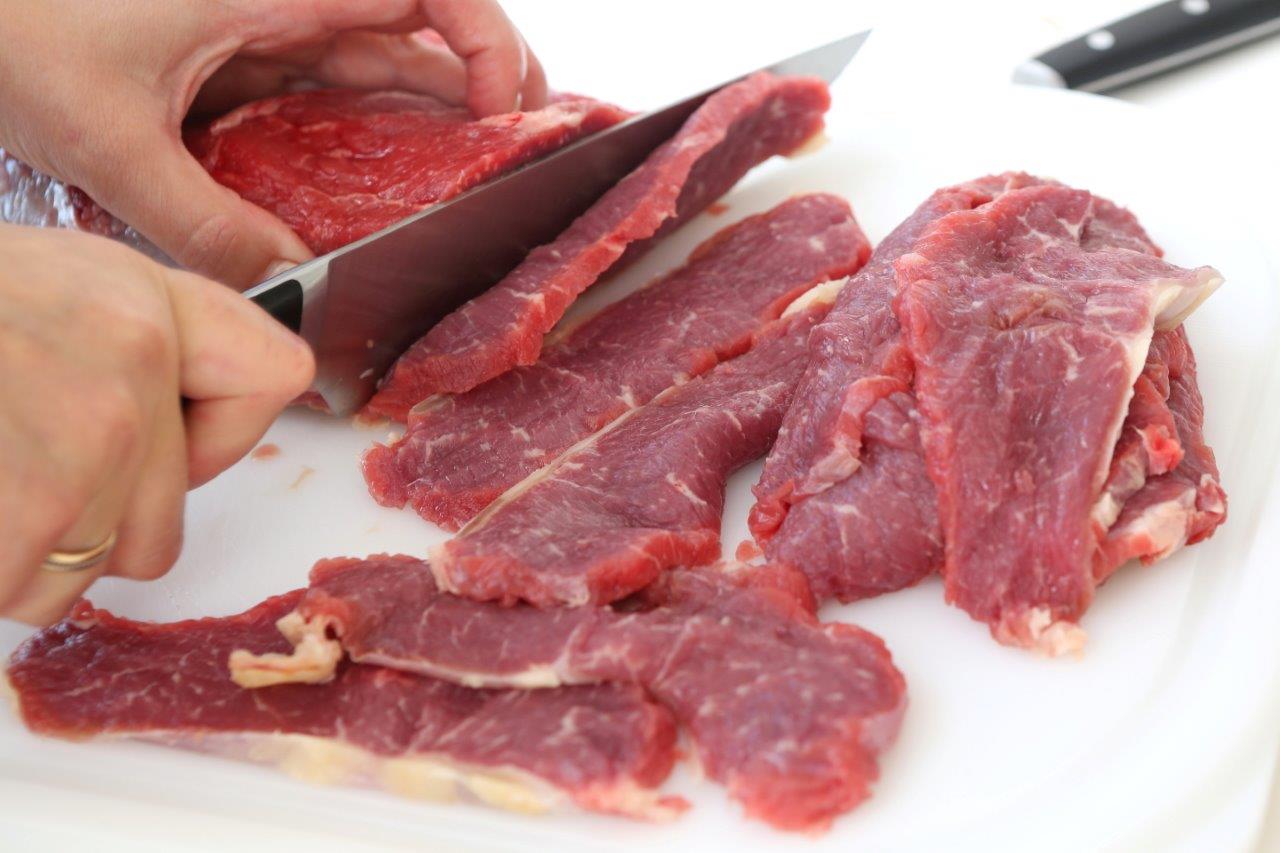
Beef slices in tomatoes
When it’s tomato season you want to use them in as many ways possible and here is another option- this time with juicy beef. As usual, the quality of the meat is of high importance. I usually go get it in specialized stores or markets and ask for beef or veal chops. That part of the animal isn’t as expensive and with this recipe is still very juicy and soft. It pairs very nicely with pasta or good bread (to soak up all the juices).
8 beef or veal chops, slices without the bone, cut very thinly
2 eggs, lightly beaten
1 cup breadcrumbs
Olive oil for cooking
Salt and pepper
600 g tomatoes, blanched and diced, or use canned
Large handful of parsley, chopped
2 garlic cloves, pushed through garlic press
Salt and pepper
Sugar to taste
Olive oil for cooking
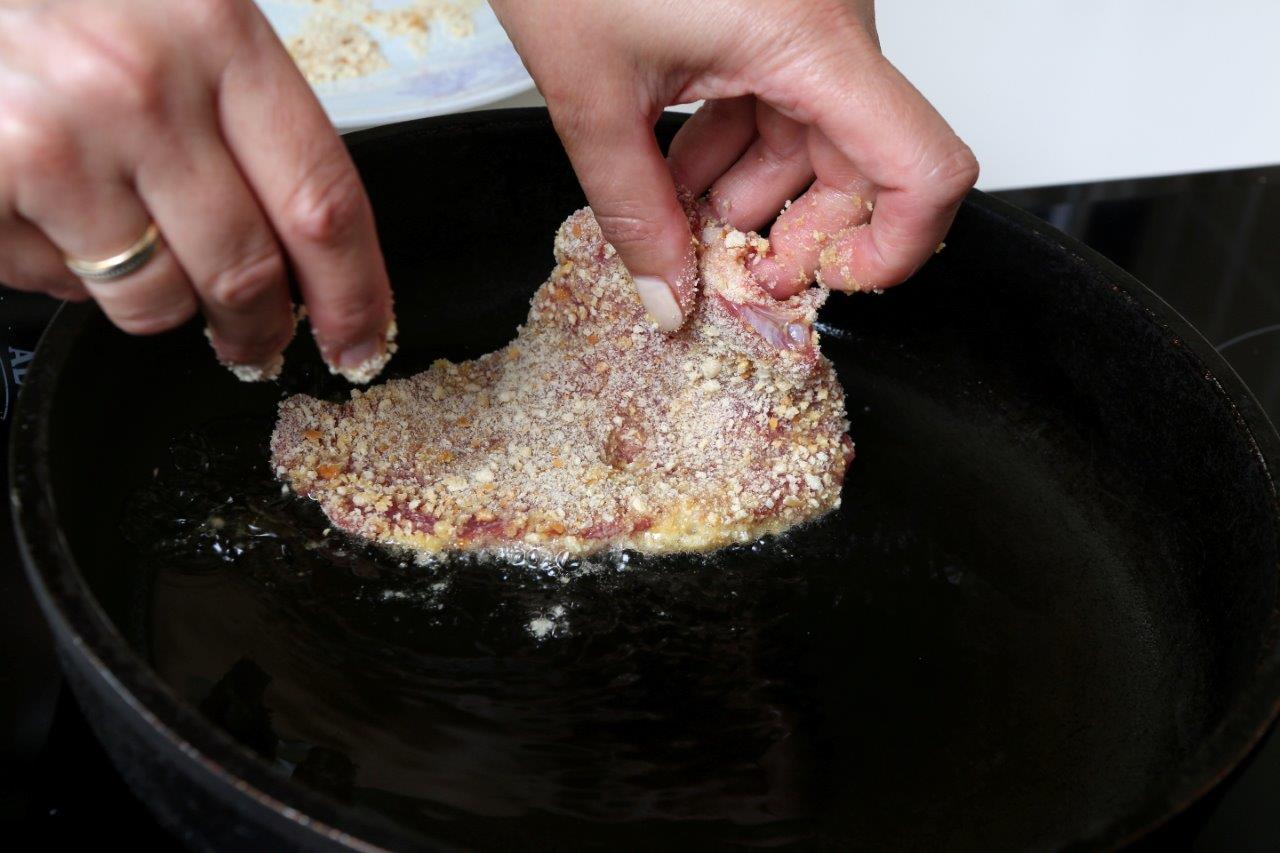
1. Slice the beef chop in very thin slices using a large sharp knife and tenderize both sides of each slice. If it is difficult to cut the chop, place it in the freezer for a while and then slice it. In a medium bowl lightly beat the eggs and put the breadcrumbs on a baking sheet.
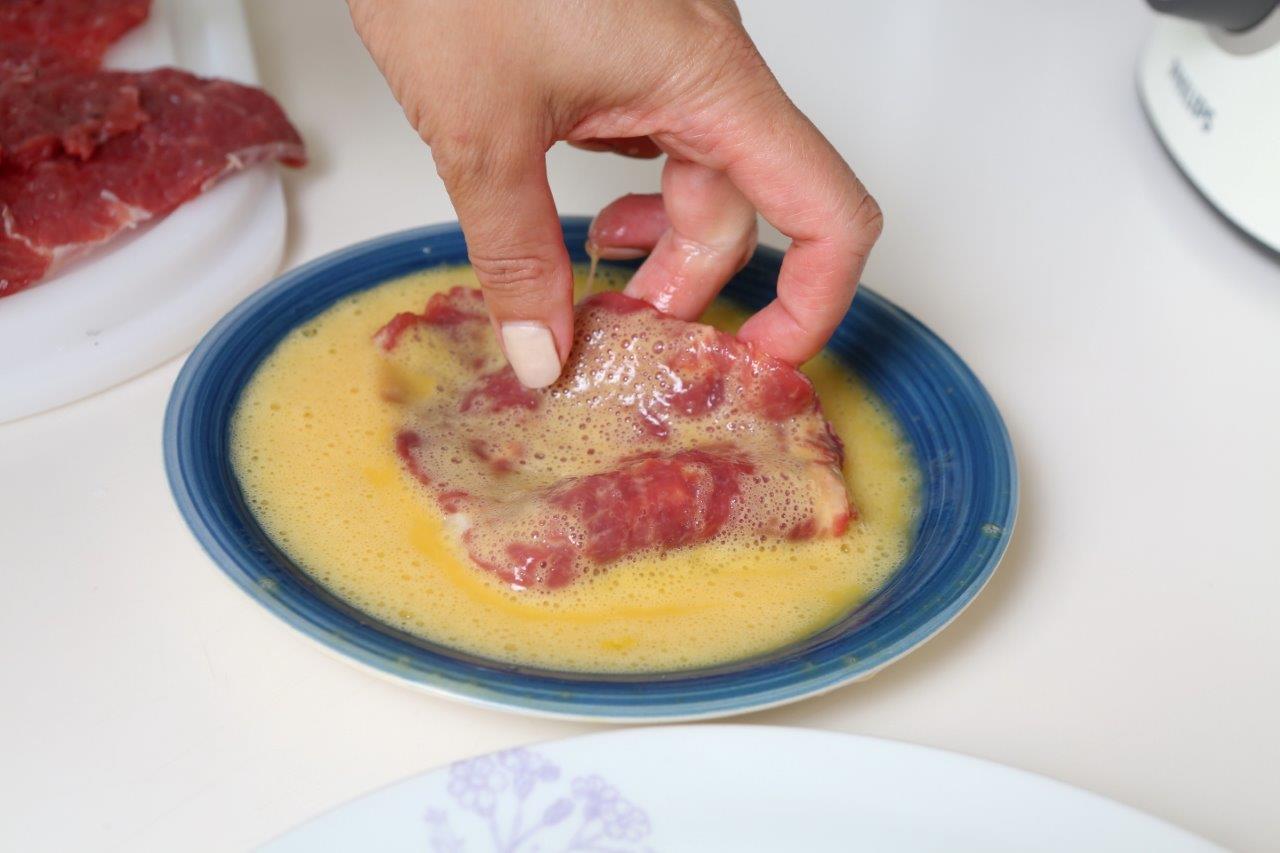
2. In a large thick bottom frying pan heat up 6-8 tbsp of olive oil. Soak the meat in the egg first and then cover in breadcrumbs before placing on the pan. While it is cooking, sprinkle with salt and pepper from both sides. Do not overcrowd the pan- cook the meat in portions so it doesn’t start to sautee, but does fry. The meat should be cooked for approximately a minute on each side until golden. Before cooking the next portion, wipe the pan clean with a paper towel and heat fresh oil each time.
3. Place the cooked meat slices on a paper towel to remove excess oil.
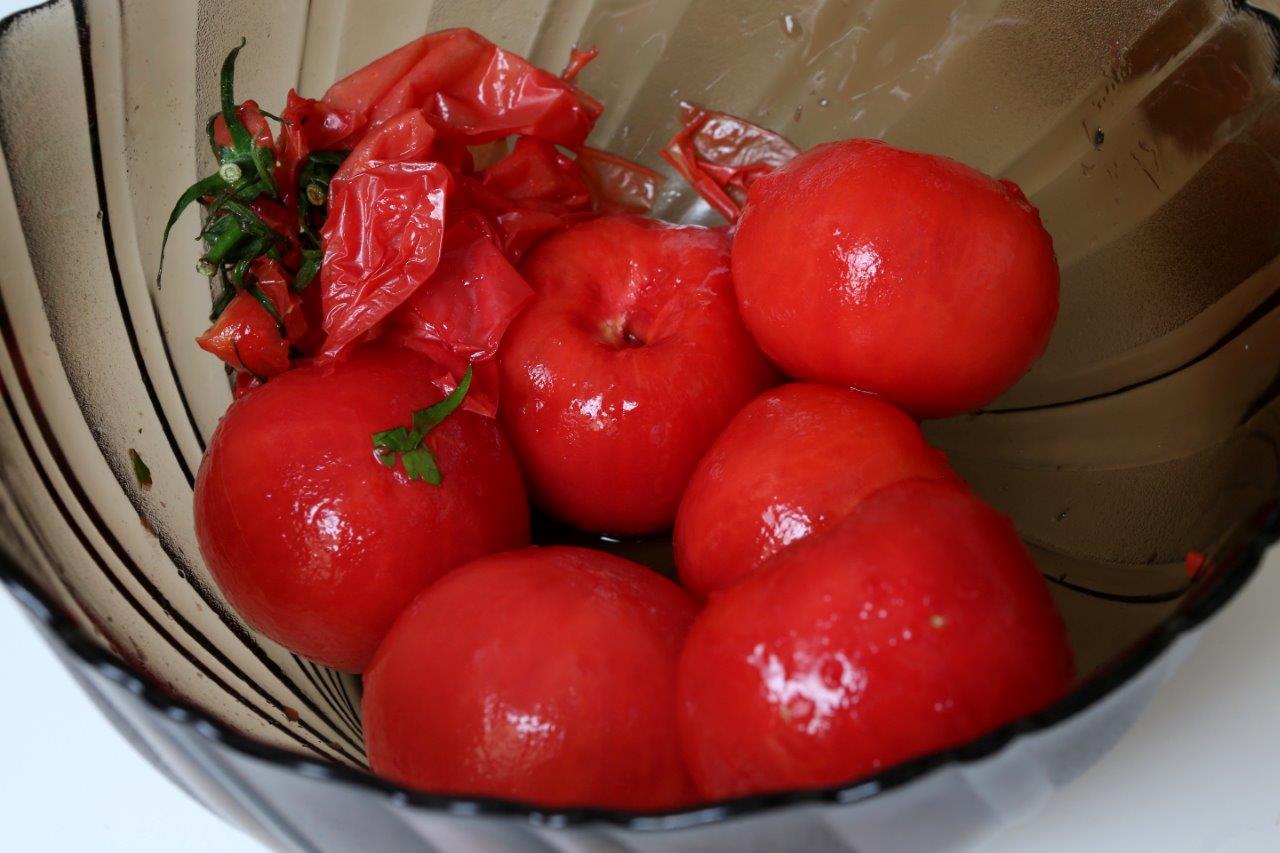
4. Place the tomatoes in a bowl and blanche them with boiling water, peel the skins off and dice in large chunks.
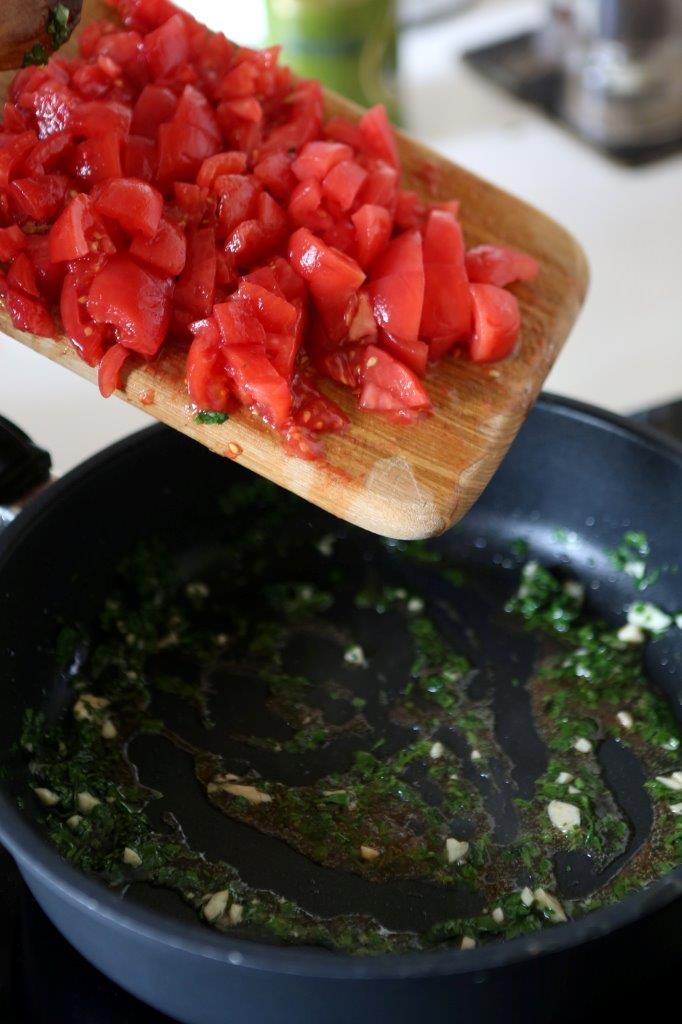
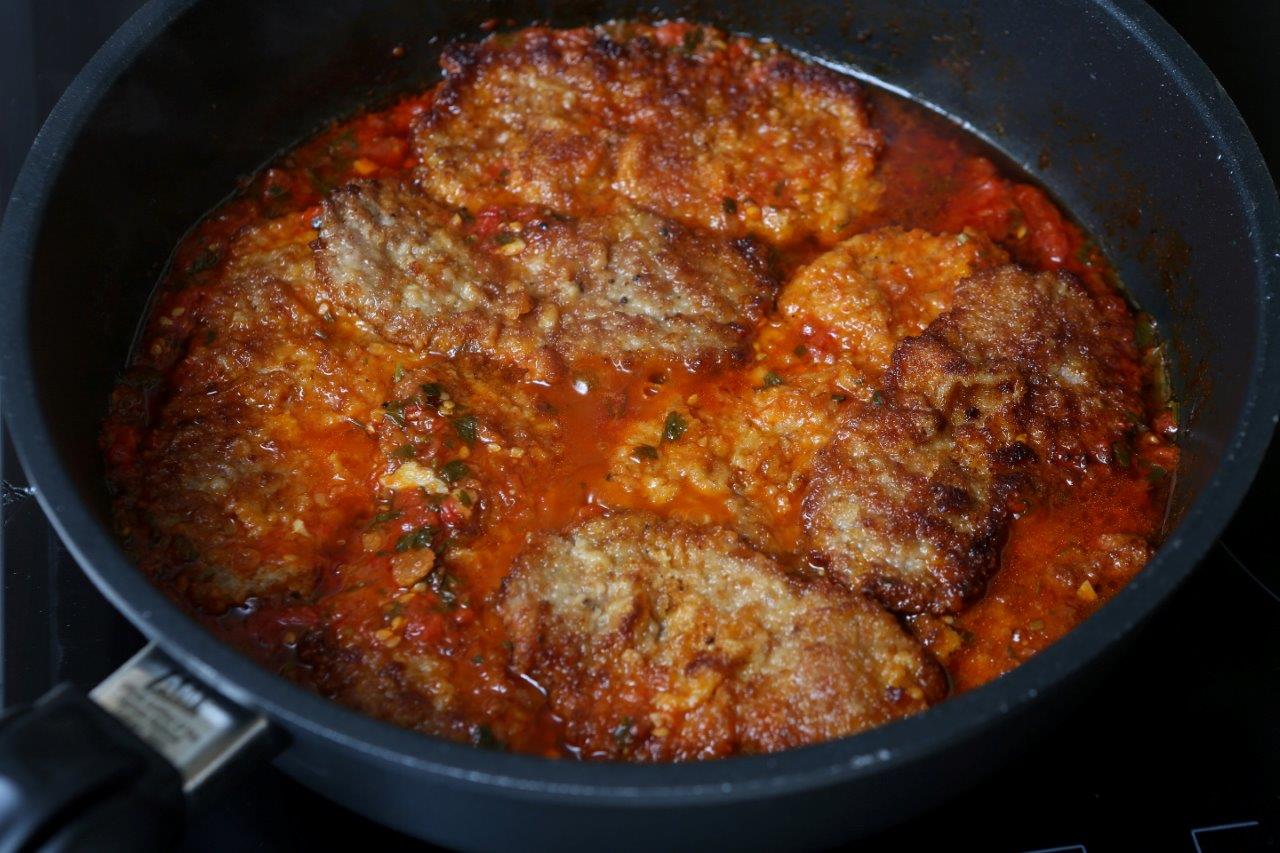
5. On a pan with a lid, heat 4-6 tbsp olive oil and cook the pressed garlic and chopped parsley on medium heat until fragrant. Add the tomatoes, salt and pepper, a bit of sugar and sautée on low heat for about 10 minutes. Taste and add more salt if necessary.
6. Place the meat slices on top of the tomatoes, put the lid on the pan and sautée on very low heat for about 20-30 minutes, stirring occasionally so the tomatoes don’t burn. Veal needs less time- about 20 min.
7. If for some reason (heat too high or tomatoes not juicy enough) there is too little liquid in the pan, you can add clean water during the cooking process.
8. Serve with ciabatta bread and sautéed veggies or if you want it to be more filling- with pasta. Pair with a nice glass of red wine.
Recipe: Ārija Avota
Photo: Ieva Andrsone (IG: @photoievaandersone)

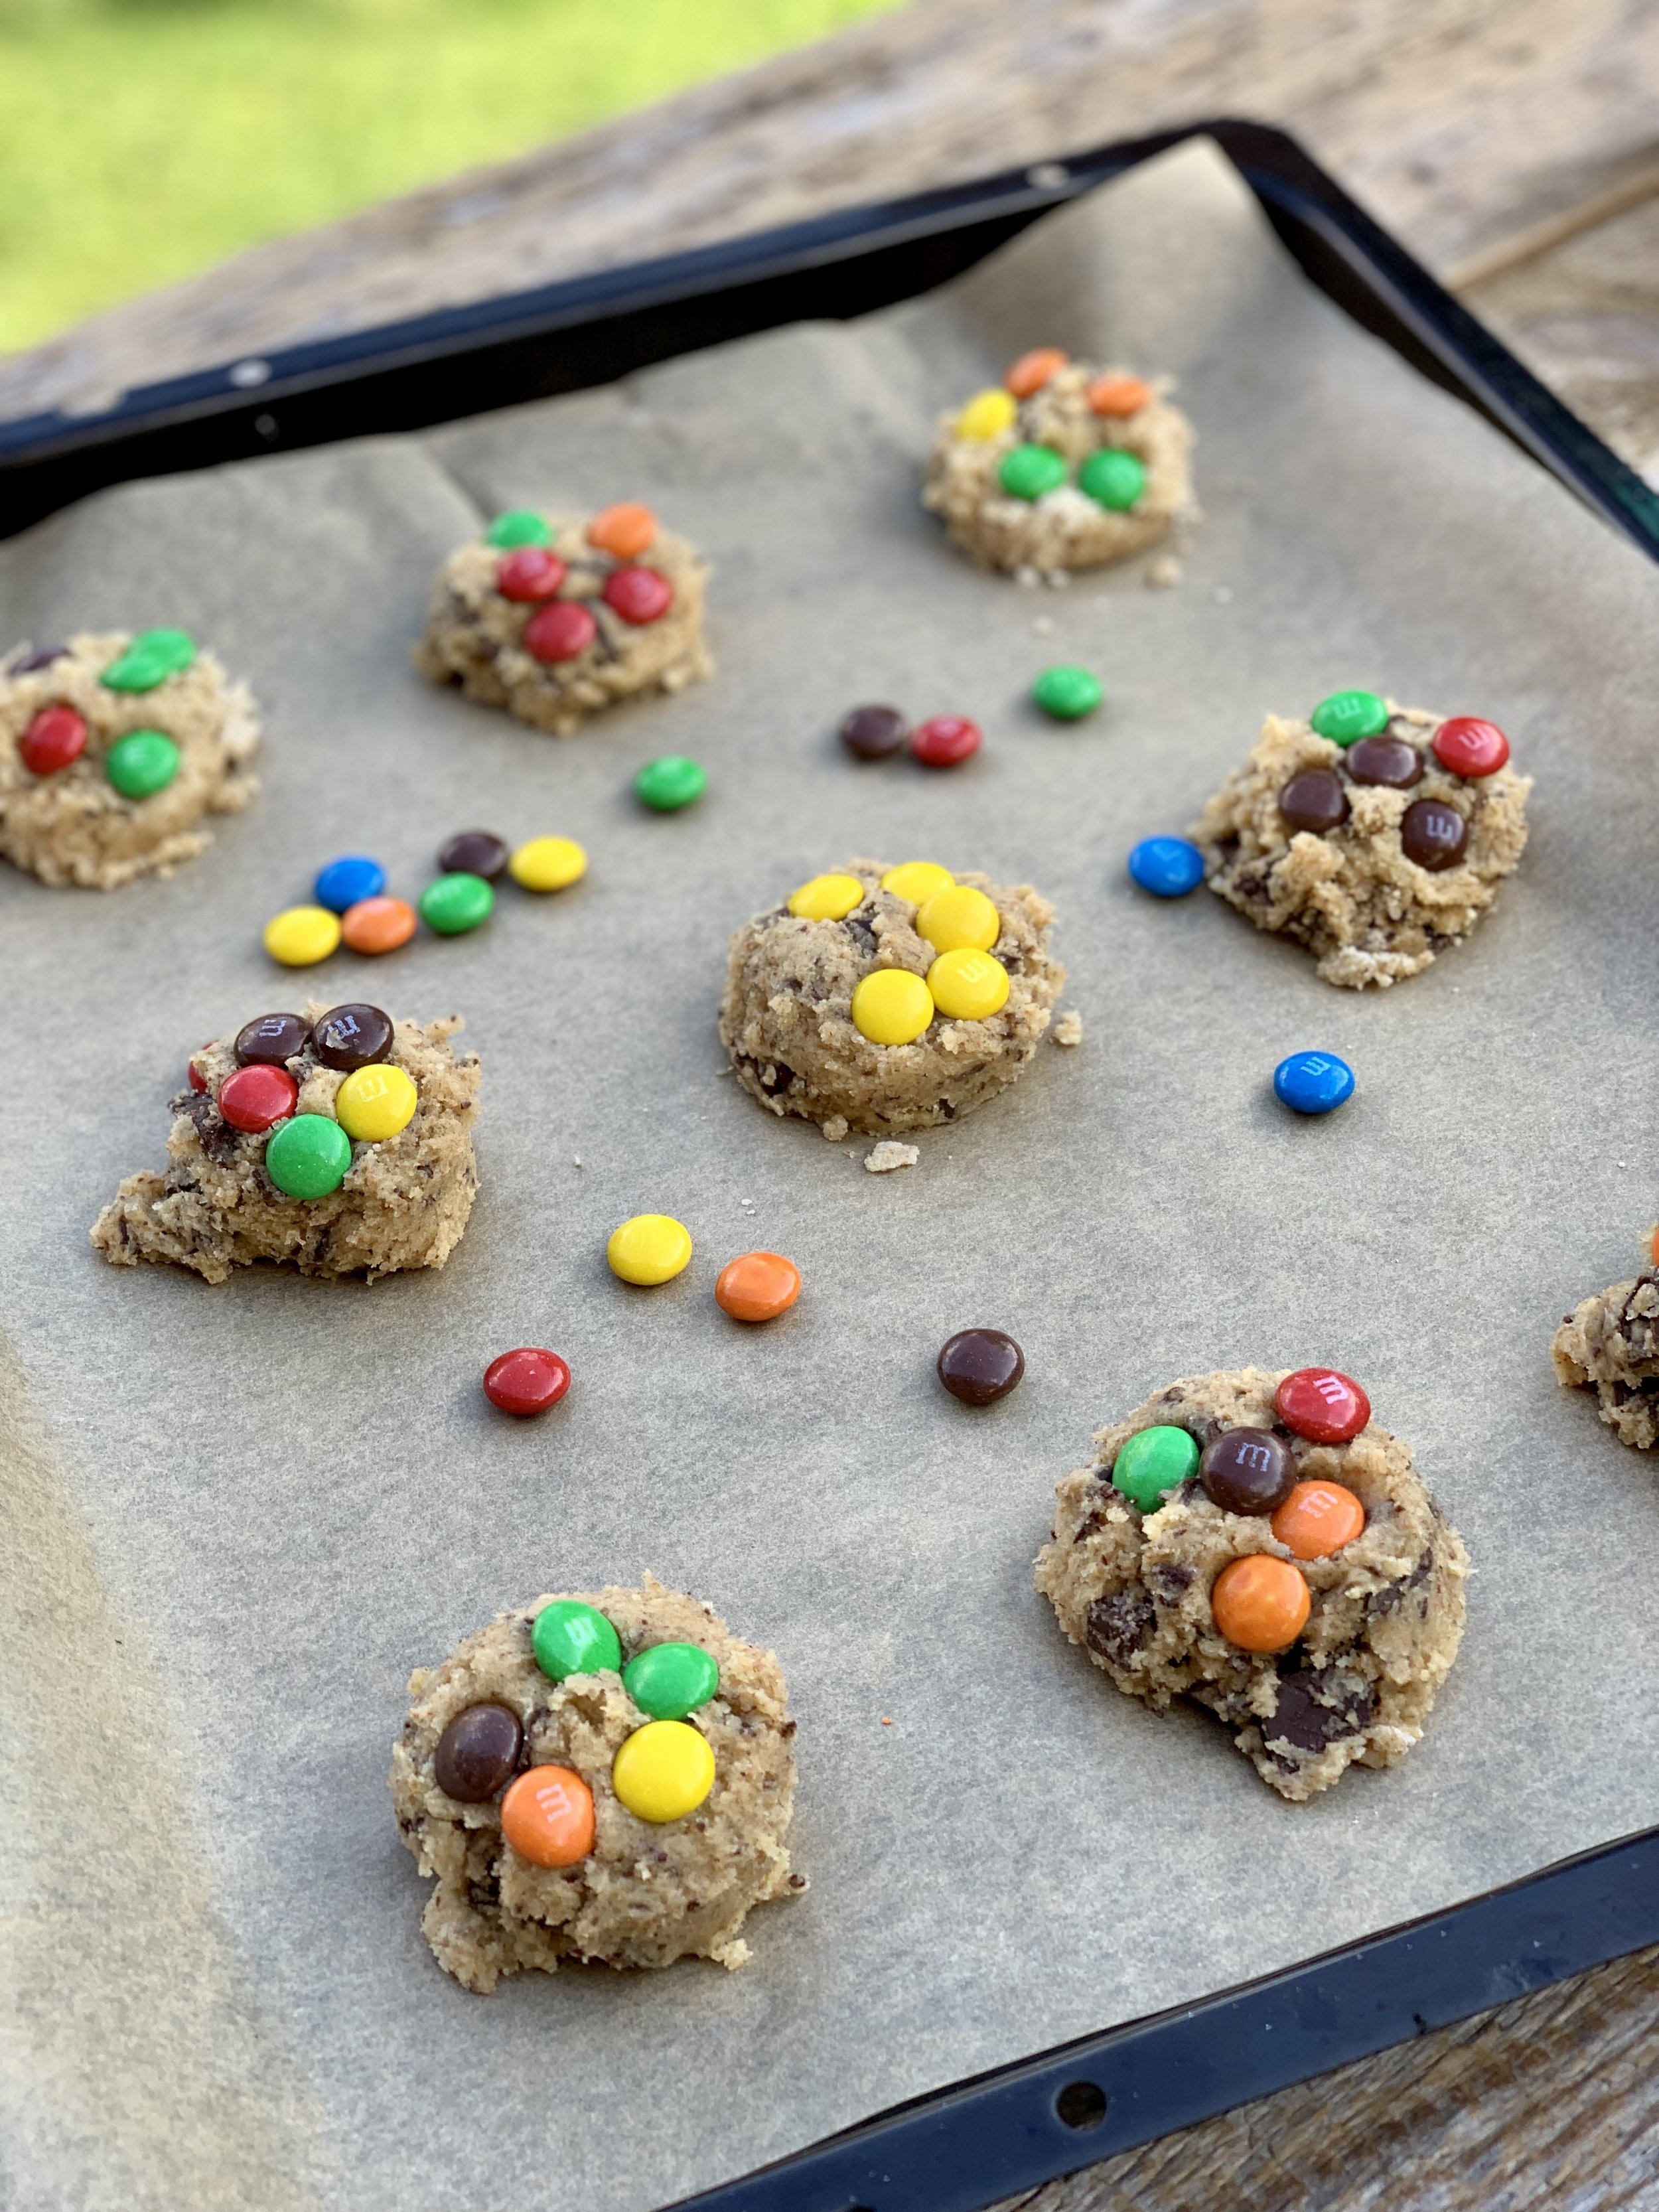
Chocolate chip cookies with M&M's
This is a spin on the classic chocolate chip cookie- the M&M’s actually make them even more appealing (if that is even possible). This recipe is simple and makes the perfect chewy cookie- just be sure to find the right timing for your oven, because if you bake for a minute too long the cookies will turn out crunchy (not a bad thing either way).
260 g all purpose flour, 1/3 can be replaced with whole grain
1 tsp baking soda
¼ tsp salt
170 g unsalted butter, room temp
120 g sugar
120 g ligth brown sugar
1 large egg
1 large egg yolk
1 tsp vanilla paste or vanilla sugar
200 g chocolate chips (can chop a chocolate bar into chunks)
2 handfuls of M&M’s
Makes 18 large cookies
1. Preheat the oven to 180 degrees (celsius). Line two baking trays with parchment paper.
2. In a medium bowl, whisk together the flour, baking soda, salt and set aside.
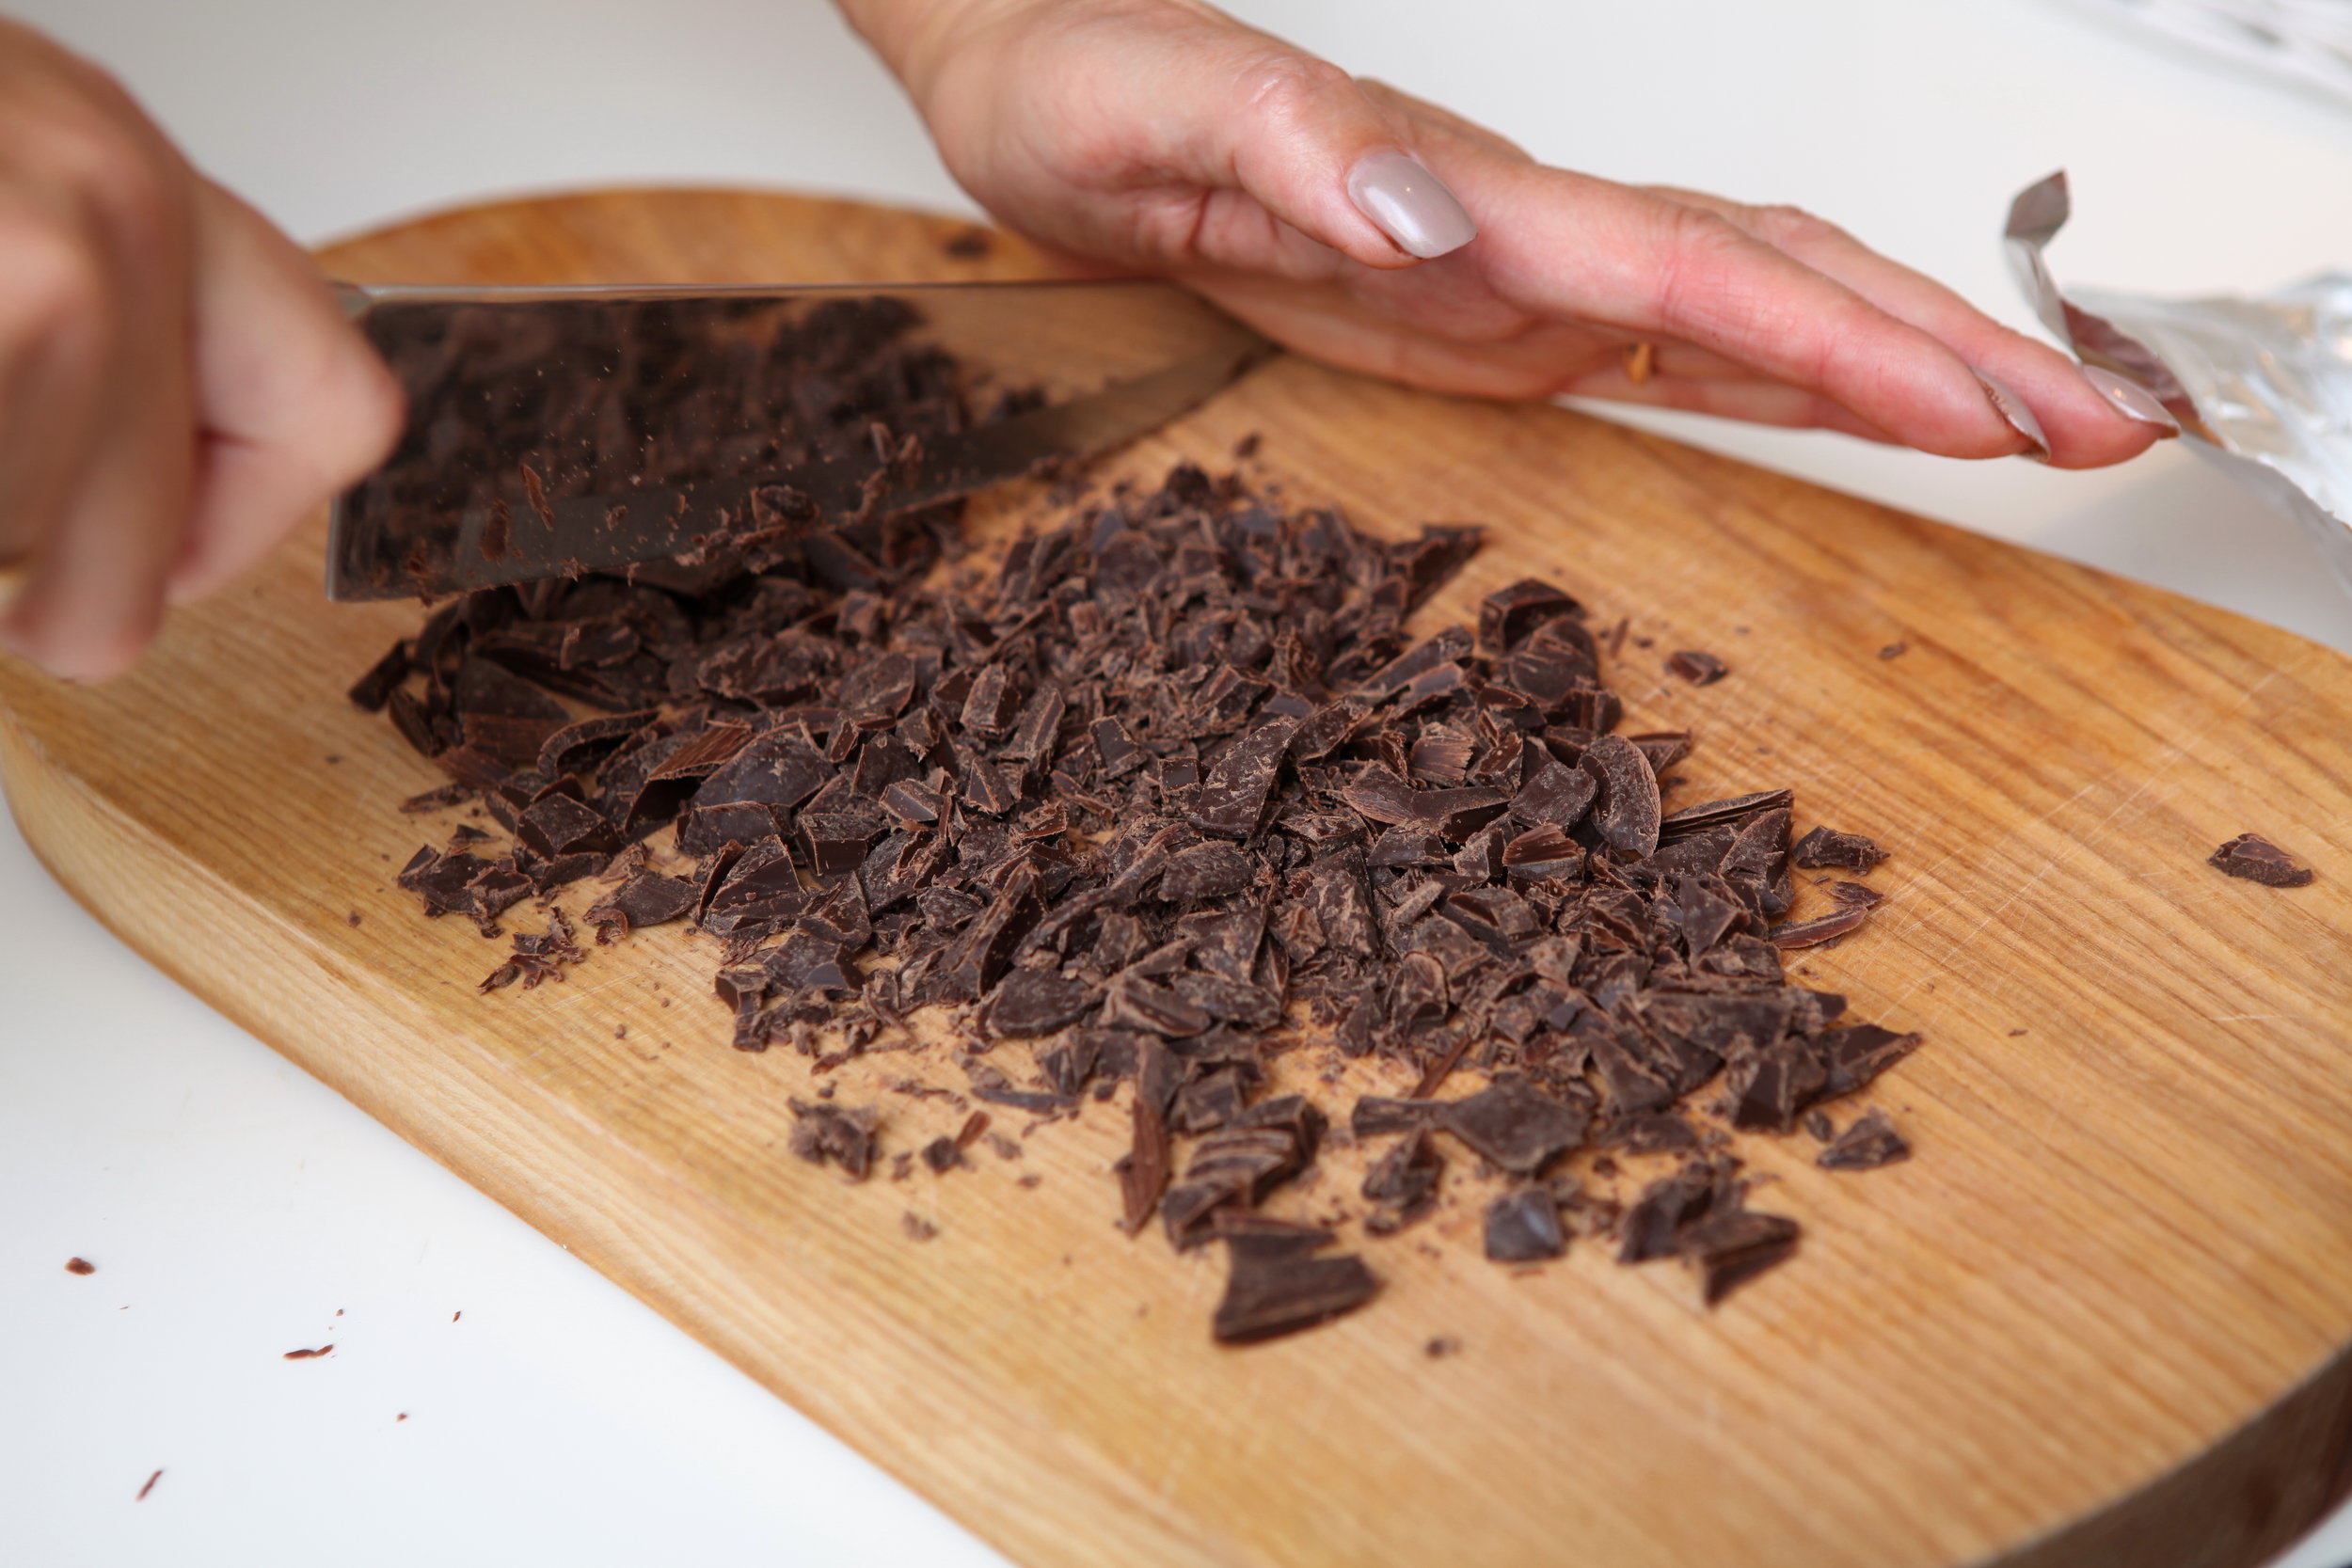
3. Chop the chocolate into chunks and set aside too.
4. In a large bowl beat the soft butter and both sugars using a mixer until light and fluffy (2-3 min). Add the egg and egg yolk along with the vanilla and beat until incorporated and smooth.
5. Use a spatula to gently stir in the dry ingredients to the butter mixture. Then stir in the chocolate chips or chunks. Do not overmix and do not use a mixer!
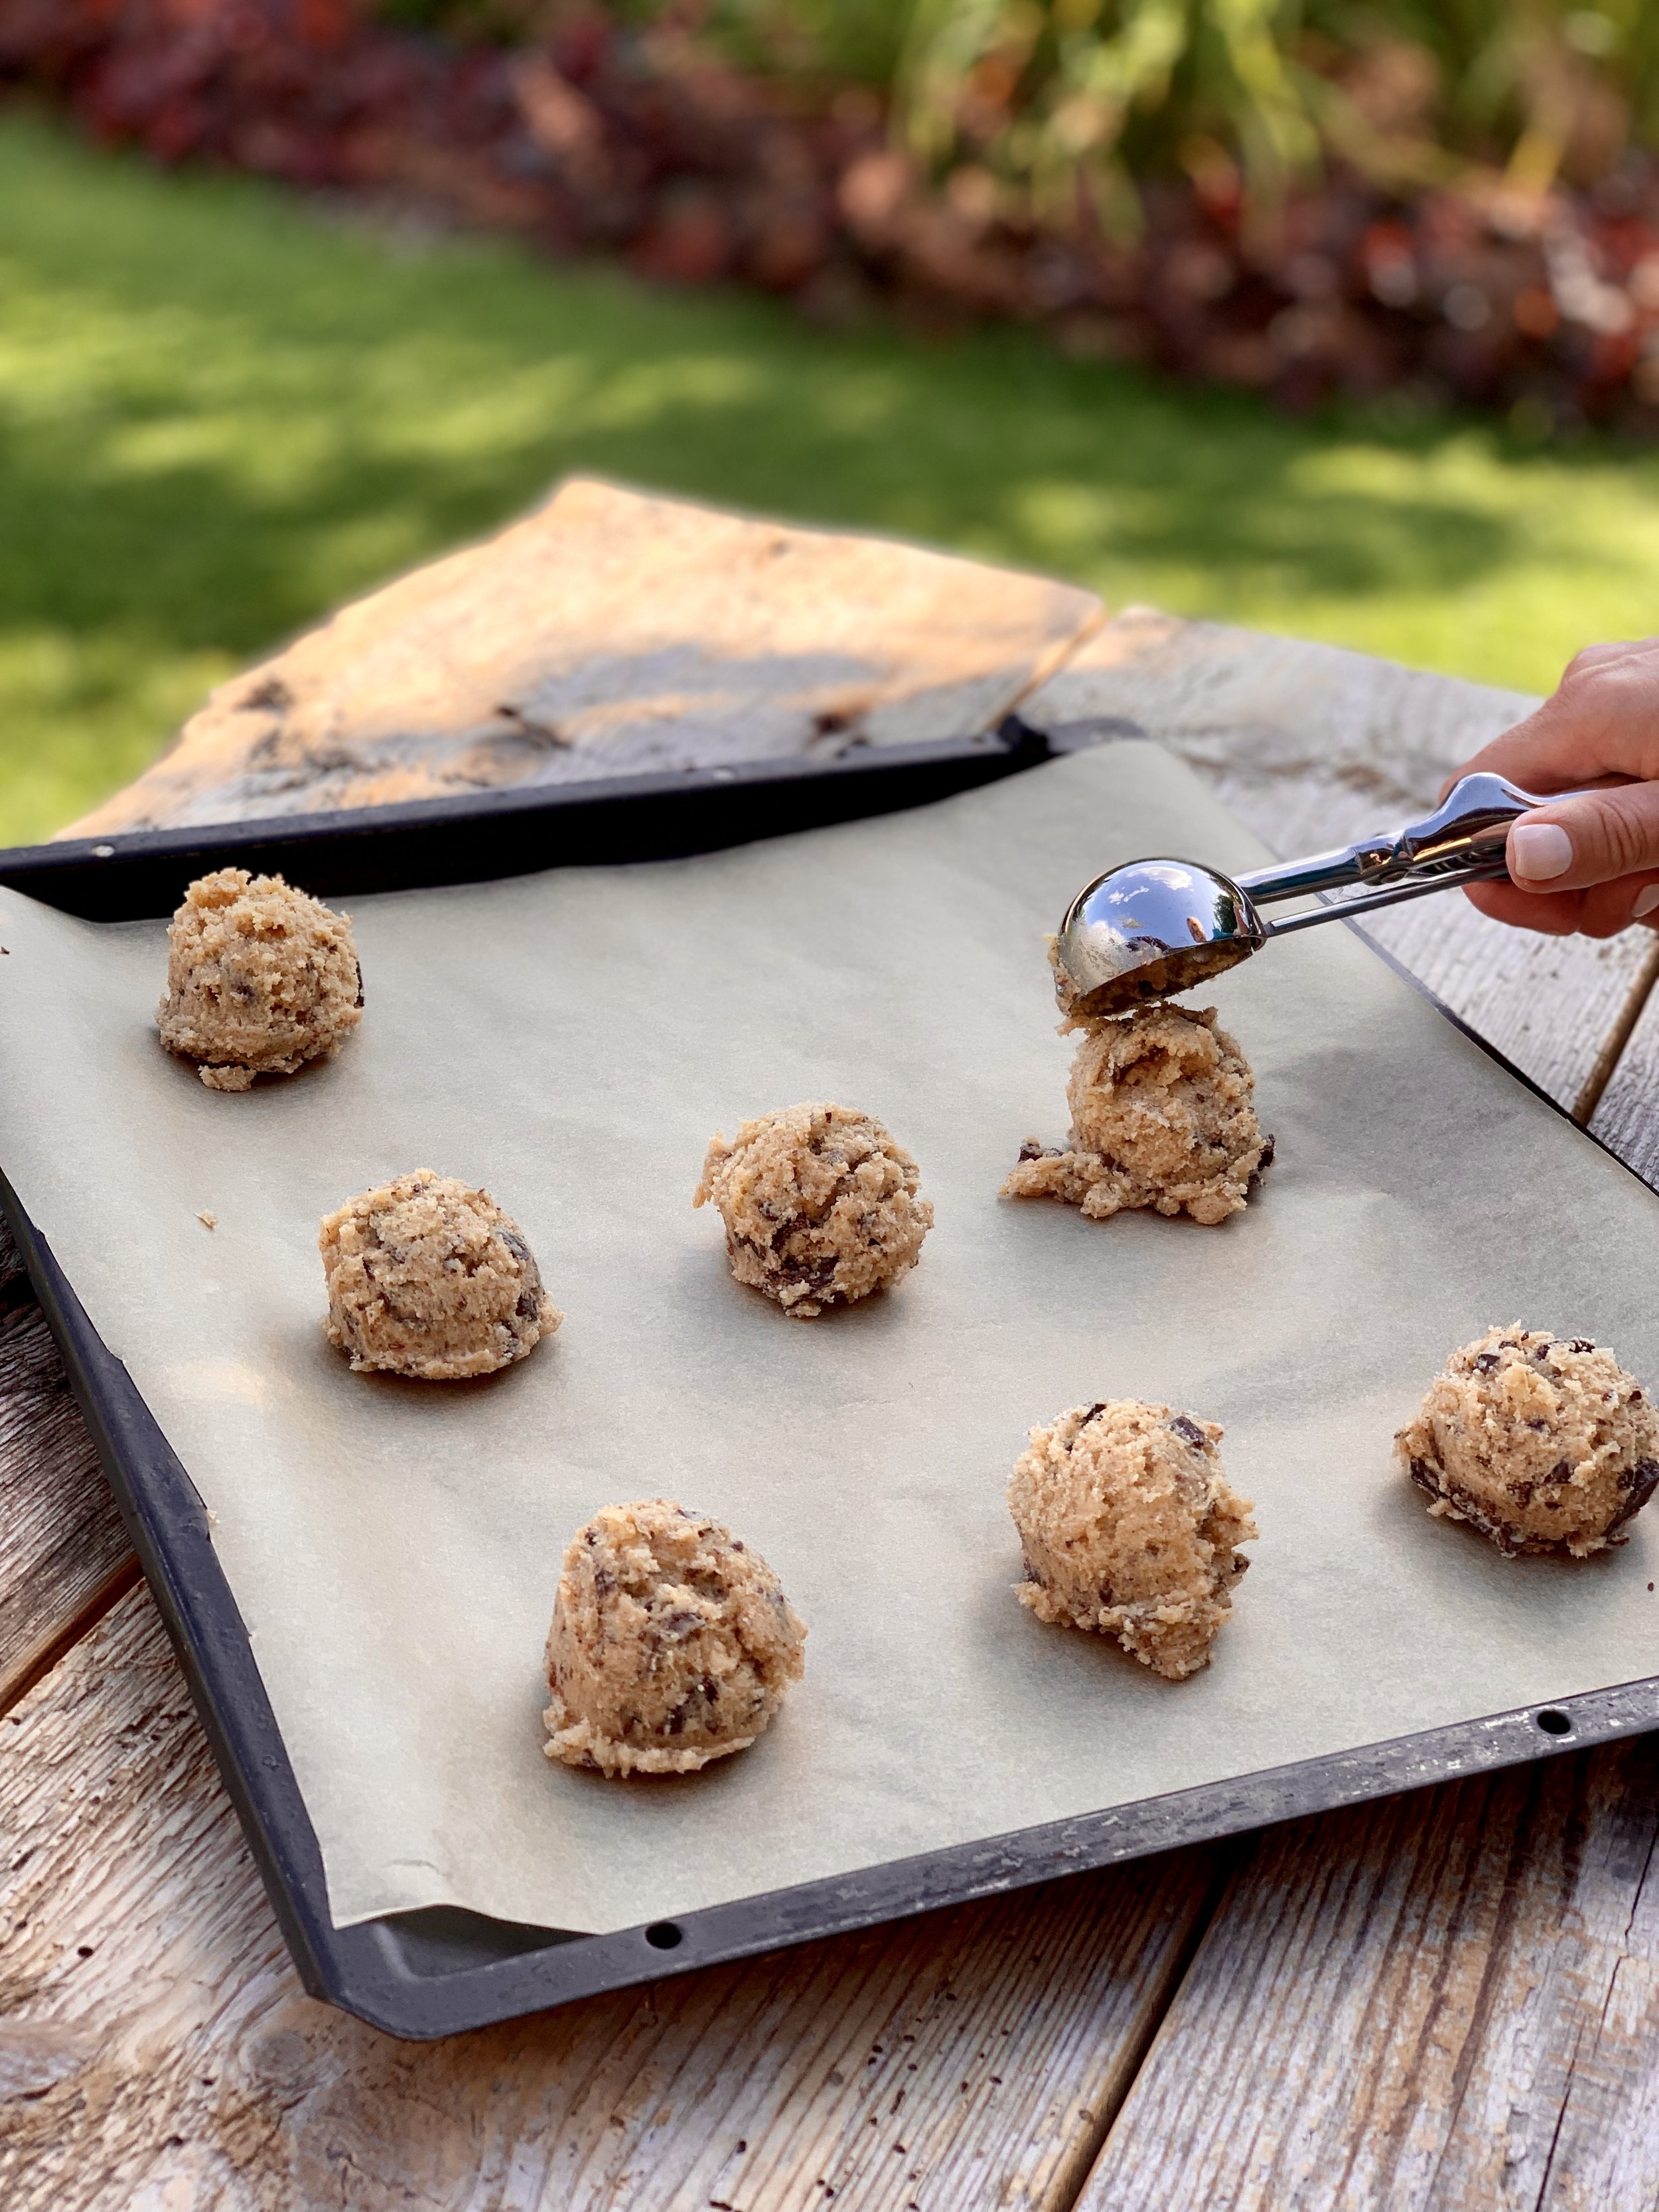
6. Use an ice cream scoop or a regular spoon to create balls of dough and place 9 on each baking tray. Flatten the balls a little bit.
7. Place the M&M’s on top of each cookie and press it in the dough (3-4 candies for each cookie).
8. Bake the cookies one tray at a time for approximately 12 min. When they are done the edges will be golden, but the center still soft. They will set as they cool and still be chewy. Leave them to cool before removing from the tray.
9. If you prefer crunchier cookies- bake for a minute or two longer.
Recipe: Ārija Avota
Photo: Oto Avots

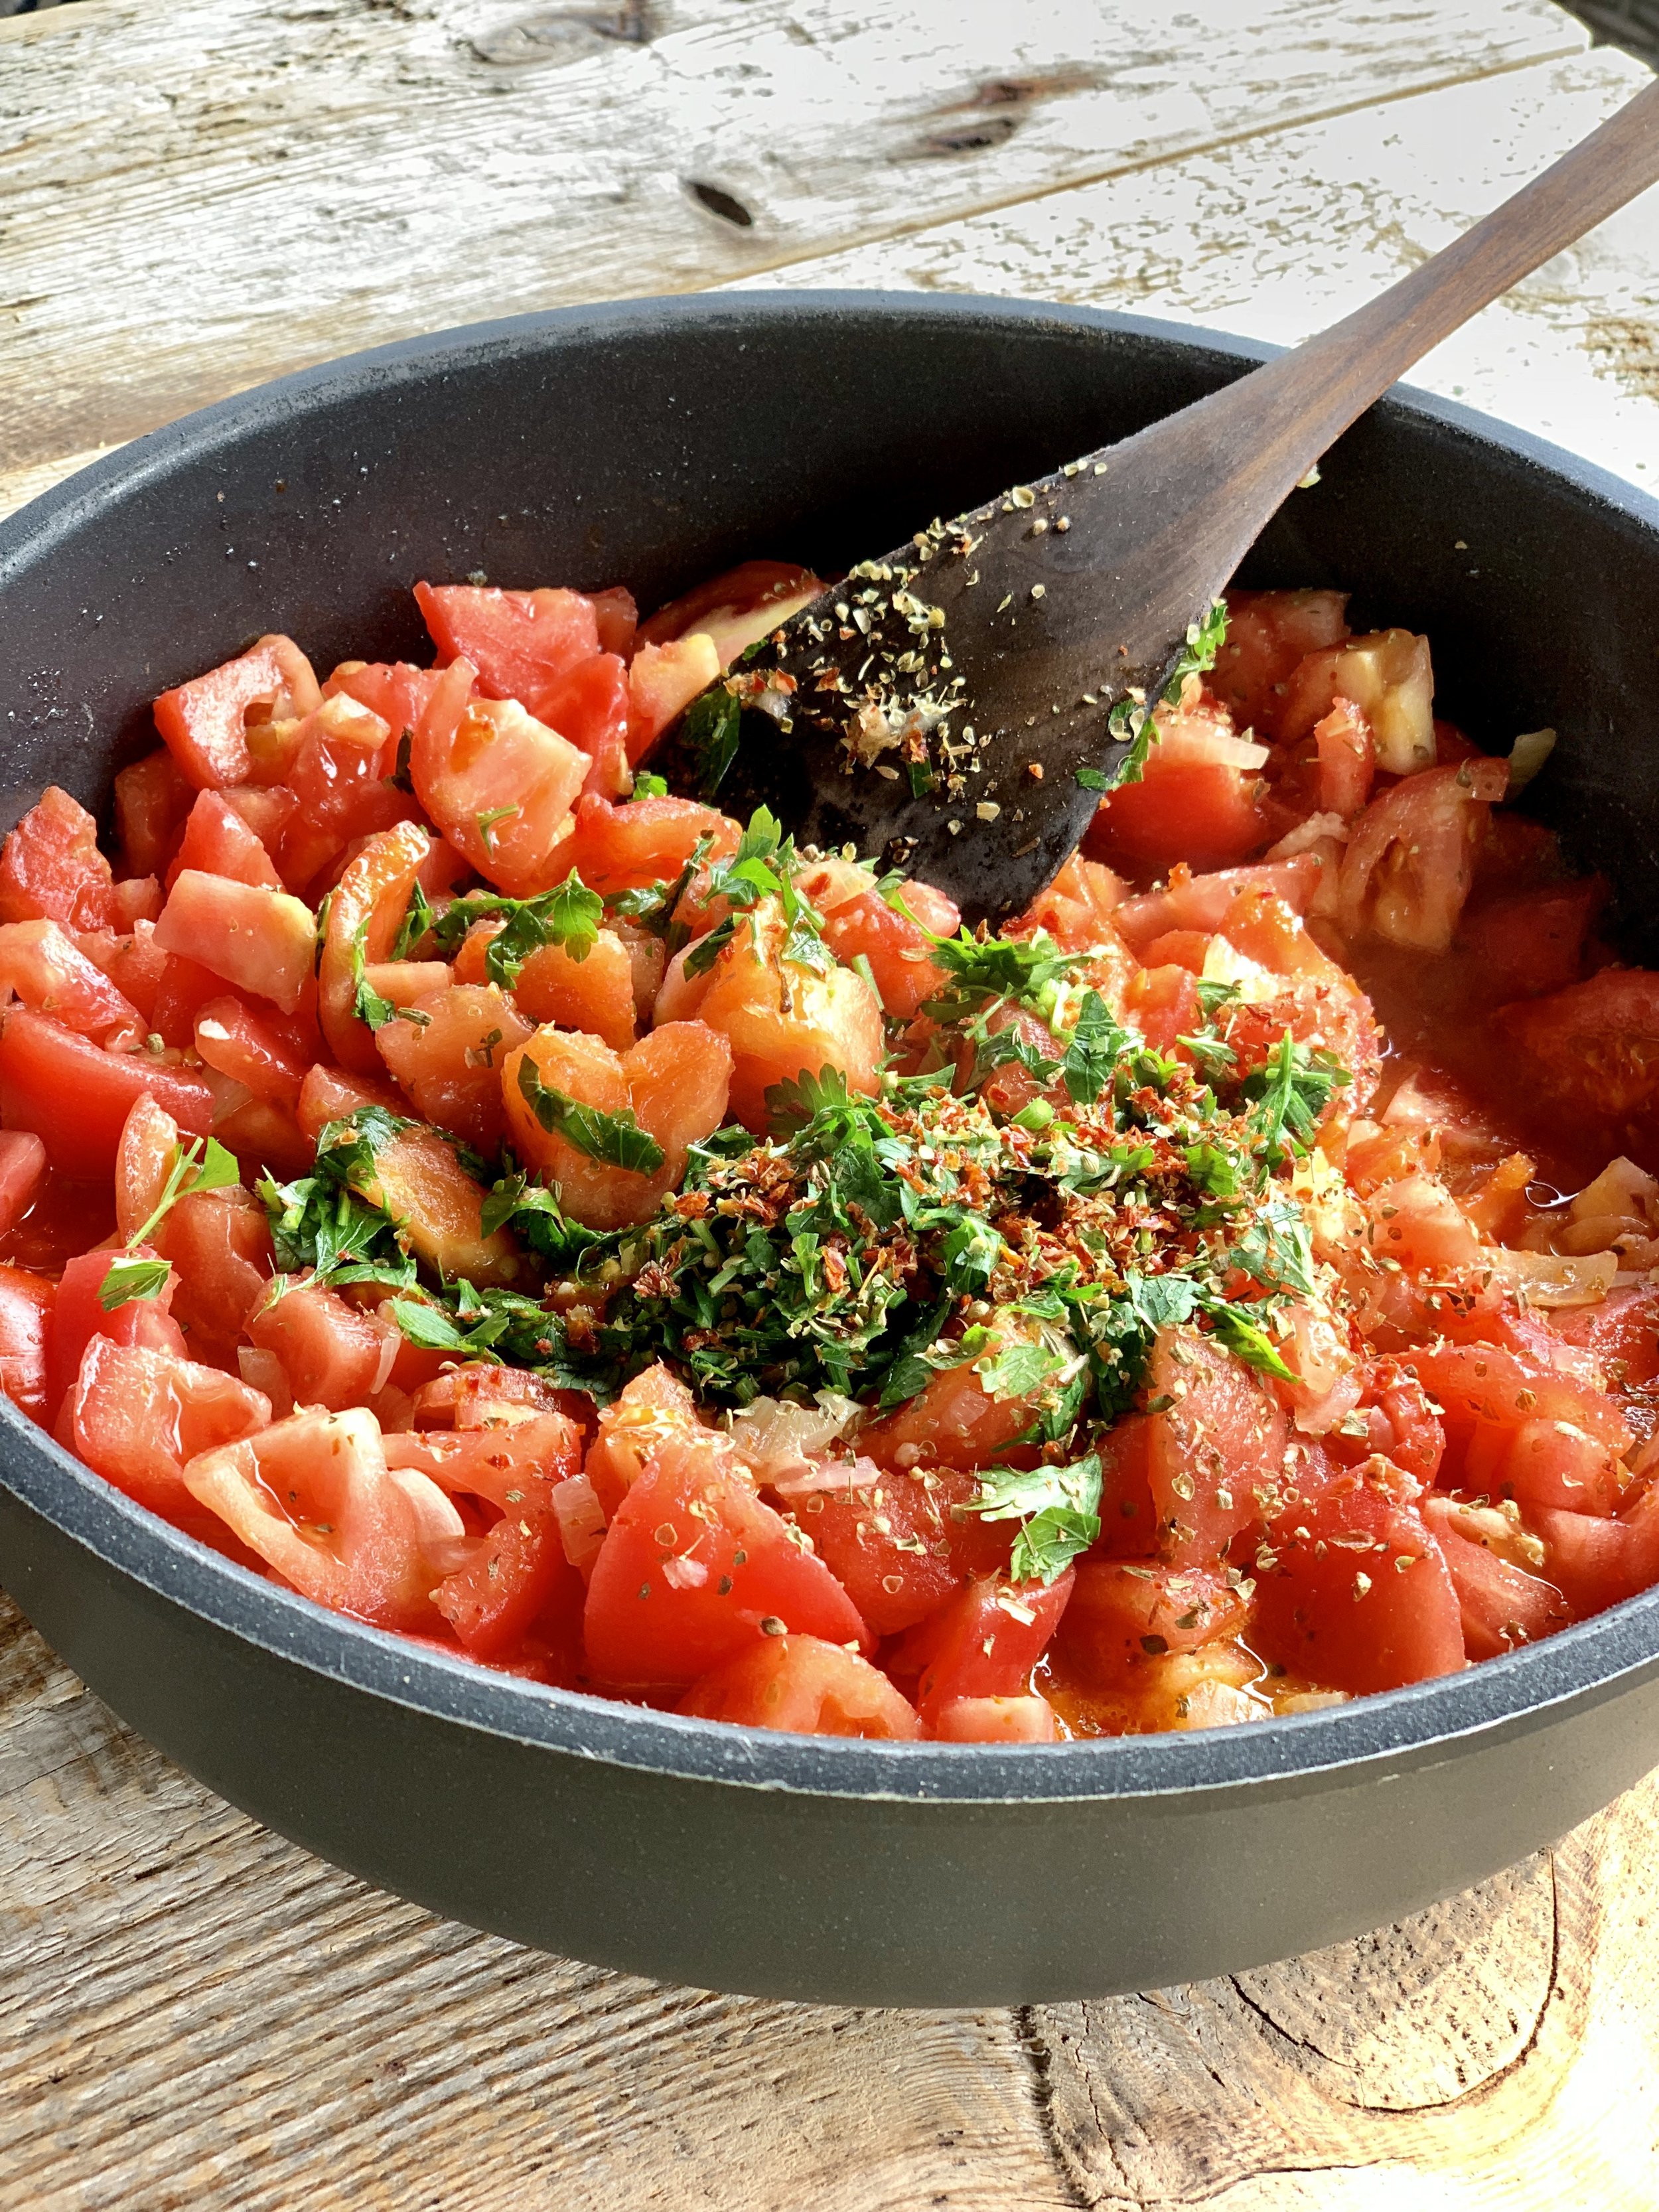
Marinara sauce
The marvelously versatile Marinara sauce!
You can use it in a large portion of my recipes- the lasagna, chili, different pastas, lentil and tomato soup, curry etc.
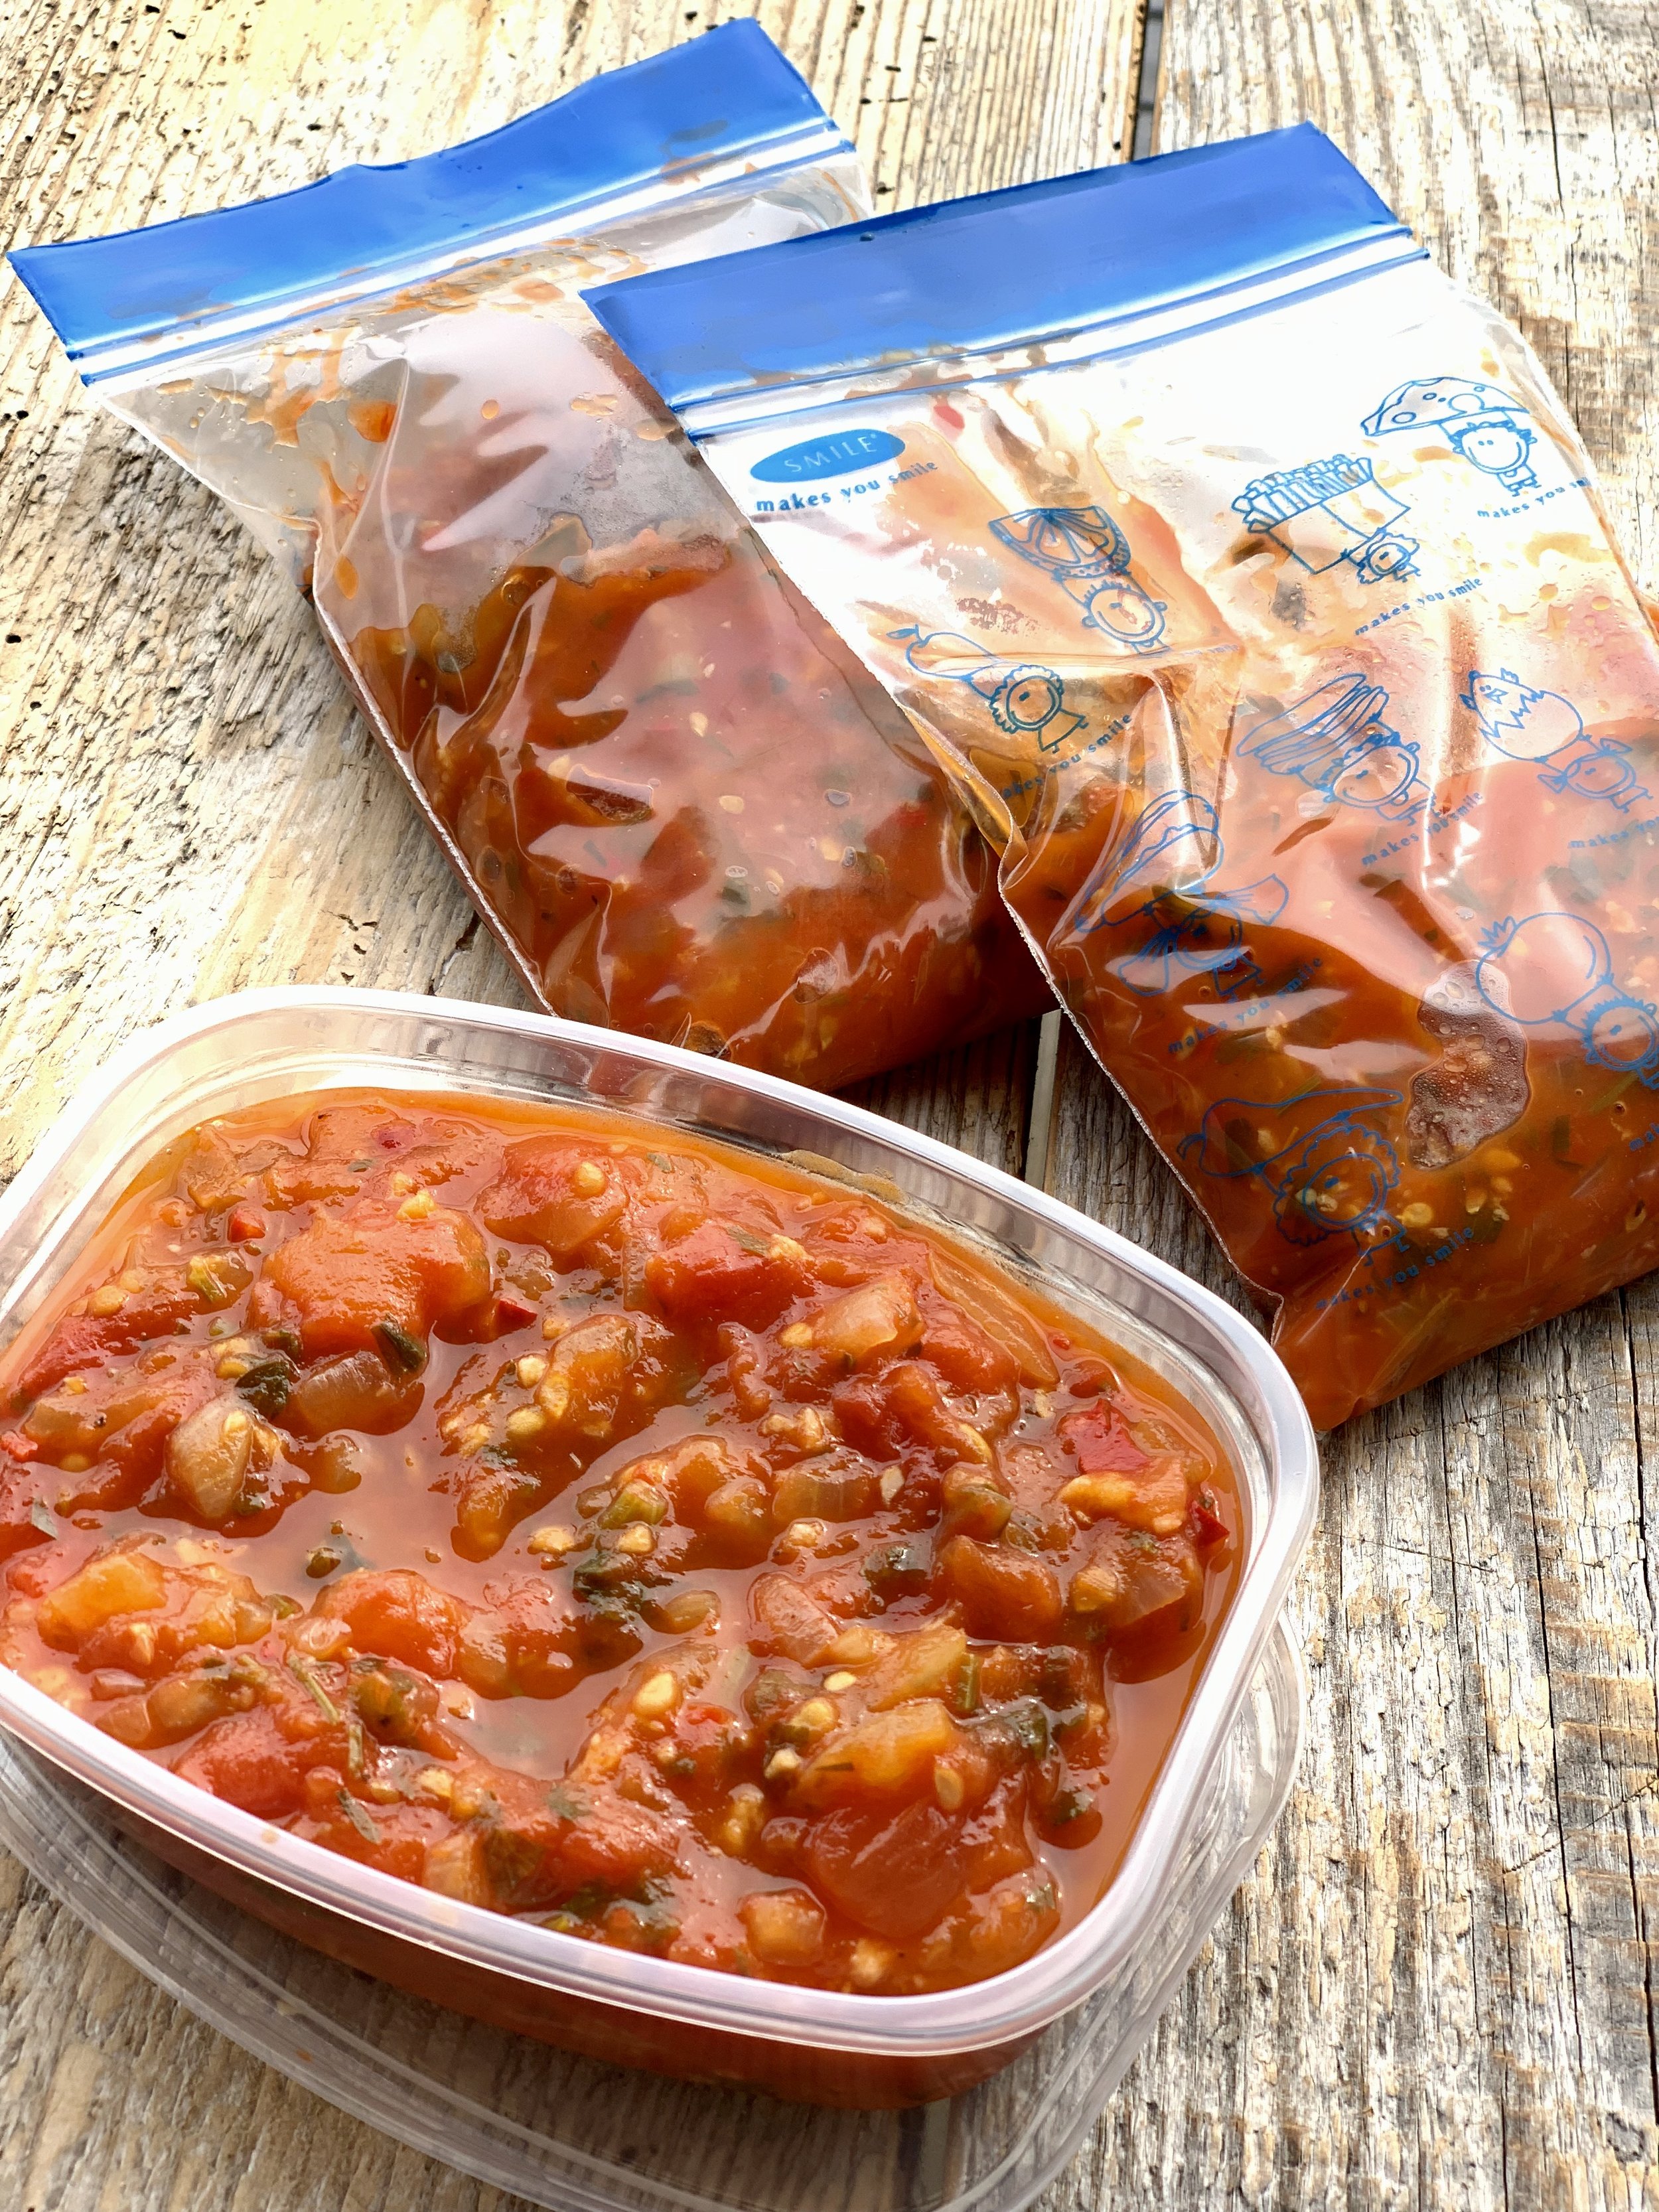
When tomato season is coming to its end- there usually are those last not so pretty tomatoes left over. This Marinara sauce is where you can use those and be super practical. Make a huge batch and freeze the sauce in zip lock bags to be used for any recipe any time. Maybe for Christmas for a special meal? Or maybe for your kids that come home from school super hungry and can get something healthy made very quickly? This is perfect for those who are busy and want a healthy and wholesome meal.
1 kg fresh tomatoes, blanched, cut in large chunks (in winter time you can use canned tomatoes)
2 onions, peeled, chopped
4 garlic cloves, pushed through garlic press
Handful of basil leaves, torn
2 tsp oregano
Salt, pepper and sugar to taste
4 tbsp oil for cooking
Option:
Chili, few tbsp tomato paste or sauce
1. Blanch the tomatoes, pouring over boiling hot water and then after 30 sec cold water. Peel off the skin and cut in large chunks.
2. Peel the onion and chop finely, peel the garlic too.
3. In a deep, large frying pan pour the oil and sautée the onions on low heat until translucent.
4. Press the garlic in the pan and once that gets fragrant, add the tomatoes, basil, oregano and chili.
5. Stir everything and let it reduce for about 20-30 min.
6. Taste and add salt, pepper and sugar. If desired- this is when you add tomato paste or sauce. Cokk a bit longer and remove from heat, set aside to cool.
7. Can be served along with any pasta. Just reheat the sauce in a large pan and then add the boiled pasta, stir and sprinkle with grated Parmesan or Cheddar cheese.
8. Use the sauce immediately or put it in zip lock bags and in the freezer to use later.
Recipe: Ārija Avota
Photo: Ārija Avota

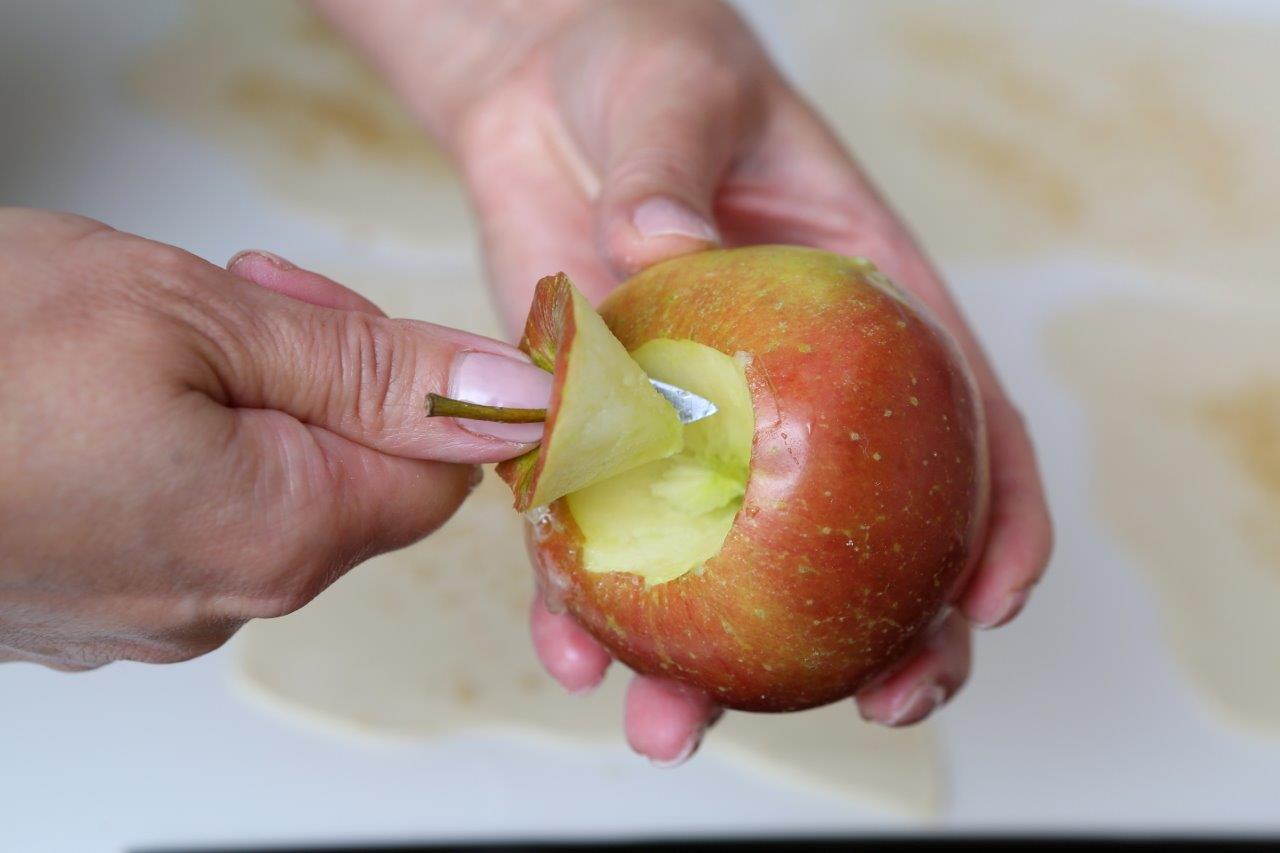
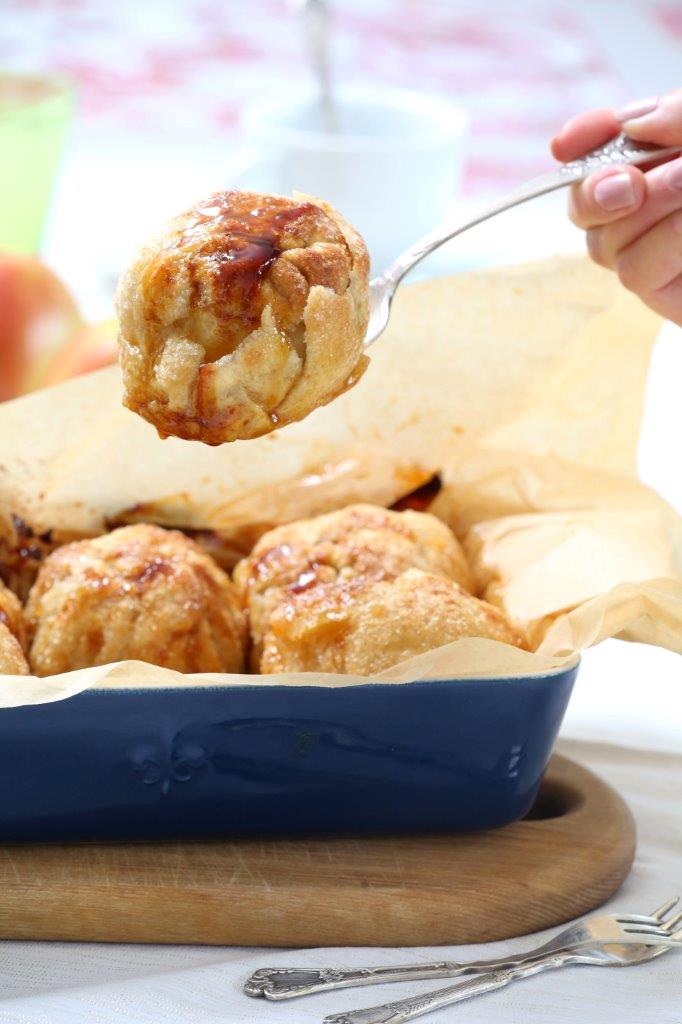
Baked apples in crunchy puff pastry
Another great fall treat with apples!
The puff pastry crust needs to be crunchy and caramelized, the apple in the center- soft and sweetly sour. You can scoop up the caramel from the bottom of the pan and pour it over the apples before serving- super delicious!
I figured out this recipe from a picture my sister in law sent from her trip to Holland. She said this dessert was absolutely amazing and a must-try in Holland. So from just looking at the picture and my sister in laws stories about how it tasted- we came up with this recipe. Sugar is a key ingredient here and you shouldn’t be afraid to use it generously. It is what makes the caramel ooze out at the bottom of the pan and just adds extra crunchiness to the crust.
8 sweet and sour apples, best for baking, peeled
1 pack of frozen puff pastry, should be 4 rectangles cut in half
8+ tbsp brown sugar
Cinnamon, ground
1. Preheat the oven to 180 degrees (celsius), line a deep baking pan with parchment paper.
2. Remove the dough from the freezer and place on the counter that has been covered with flour. After 15-20 minutes they will be ready to be rolled out.
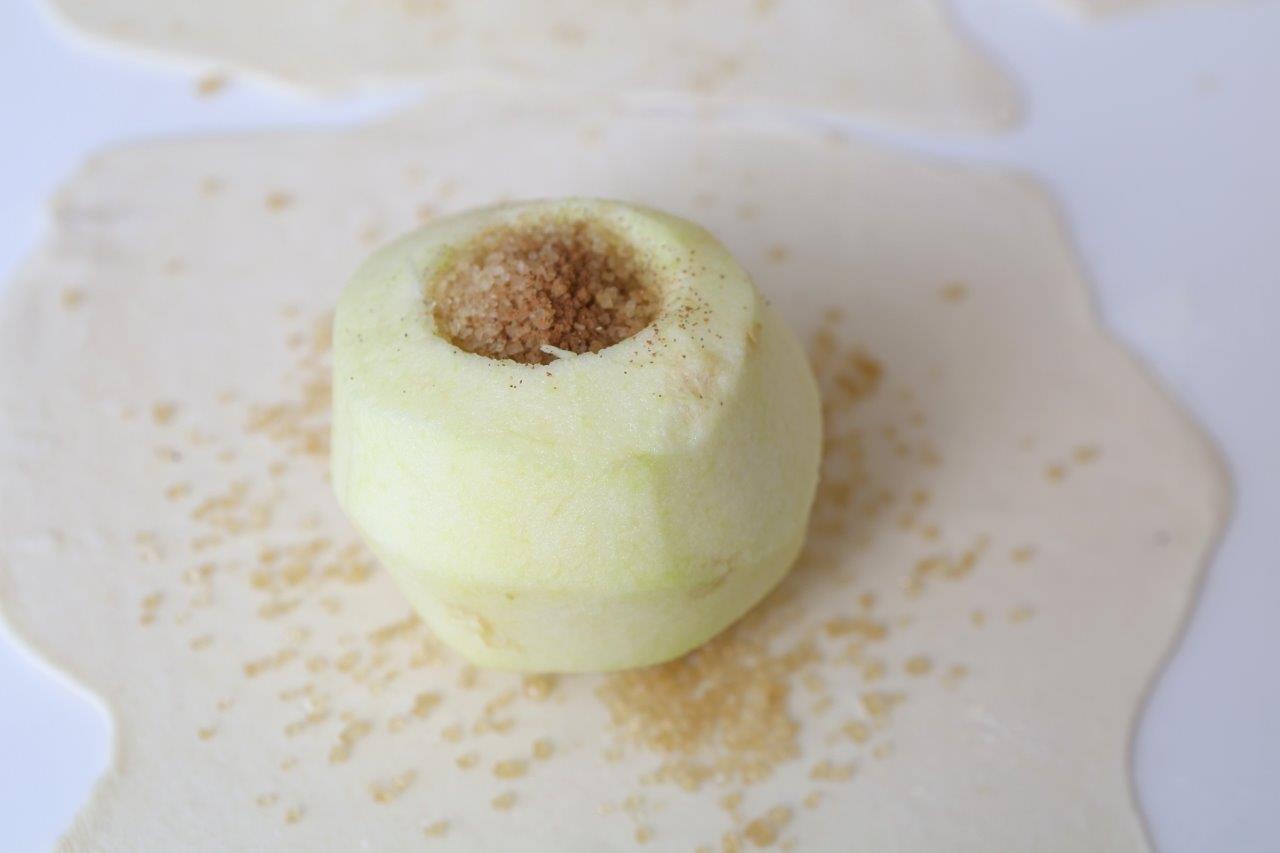
3. Peel the apples and cut out the core like this: you cut a cone shaped hole at both ends of the apple, leaving the center intact so the sugar doesn’t spill through. One cone on the top needs to be bigger- that is where the sugar will be.
4. Once the dough has defrosted, cut the rectangles in half making 8 squares.
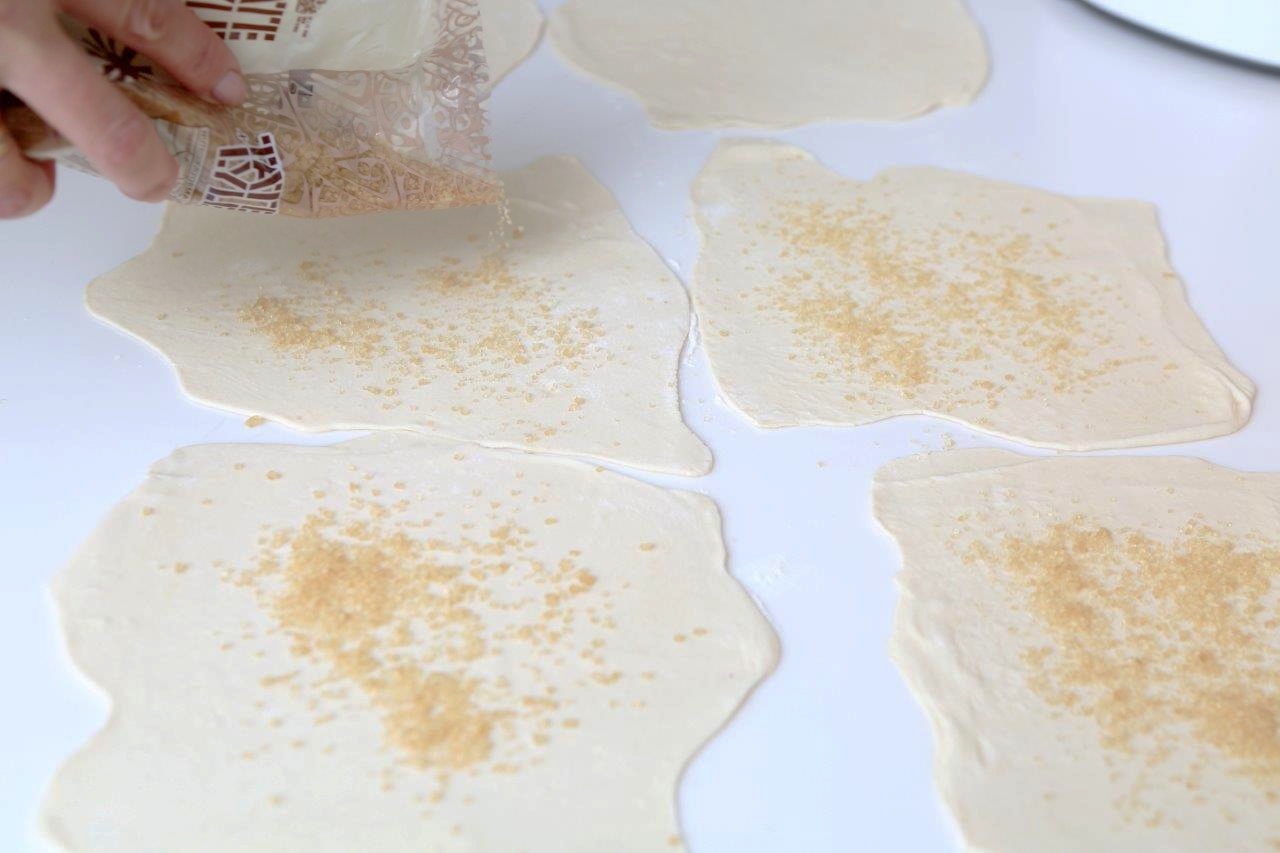
5. Roll out each square as thin and big as you possibly can to cover a whole apple. Sprinkle a tsp of sugar on the dough evenly. Place the apple in the middle and fill up the largest cone with sugar and sprinkle cinnamon on top.
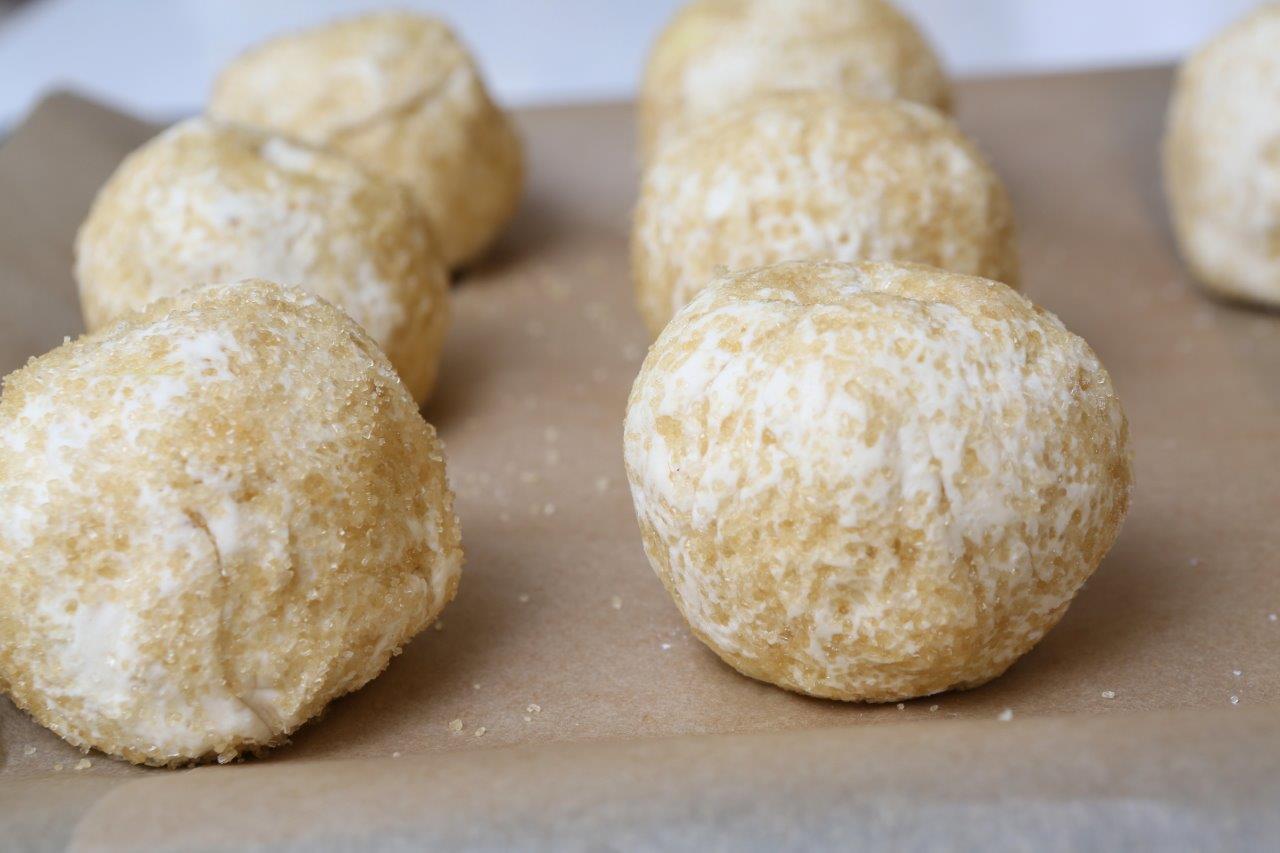
6. Take the corners of the dough square and stick together on top of the apple. Sprinkle sugar on thecounter top and evenly roll the apple in the sugar to be completely covered.
7. Place in the prepared baking pan and bake for 20-30 min until golden brown and caramelized.
8. Serve hot or cooled- with some vanilla ice cream.
Recipe: Ārija Avota
Photo: Ieva Andersone (IG: @photoievaandersone)
Publication: Ievas Receptes

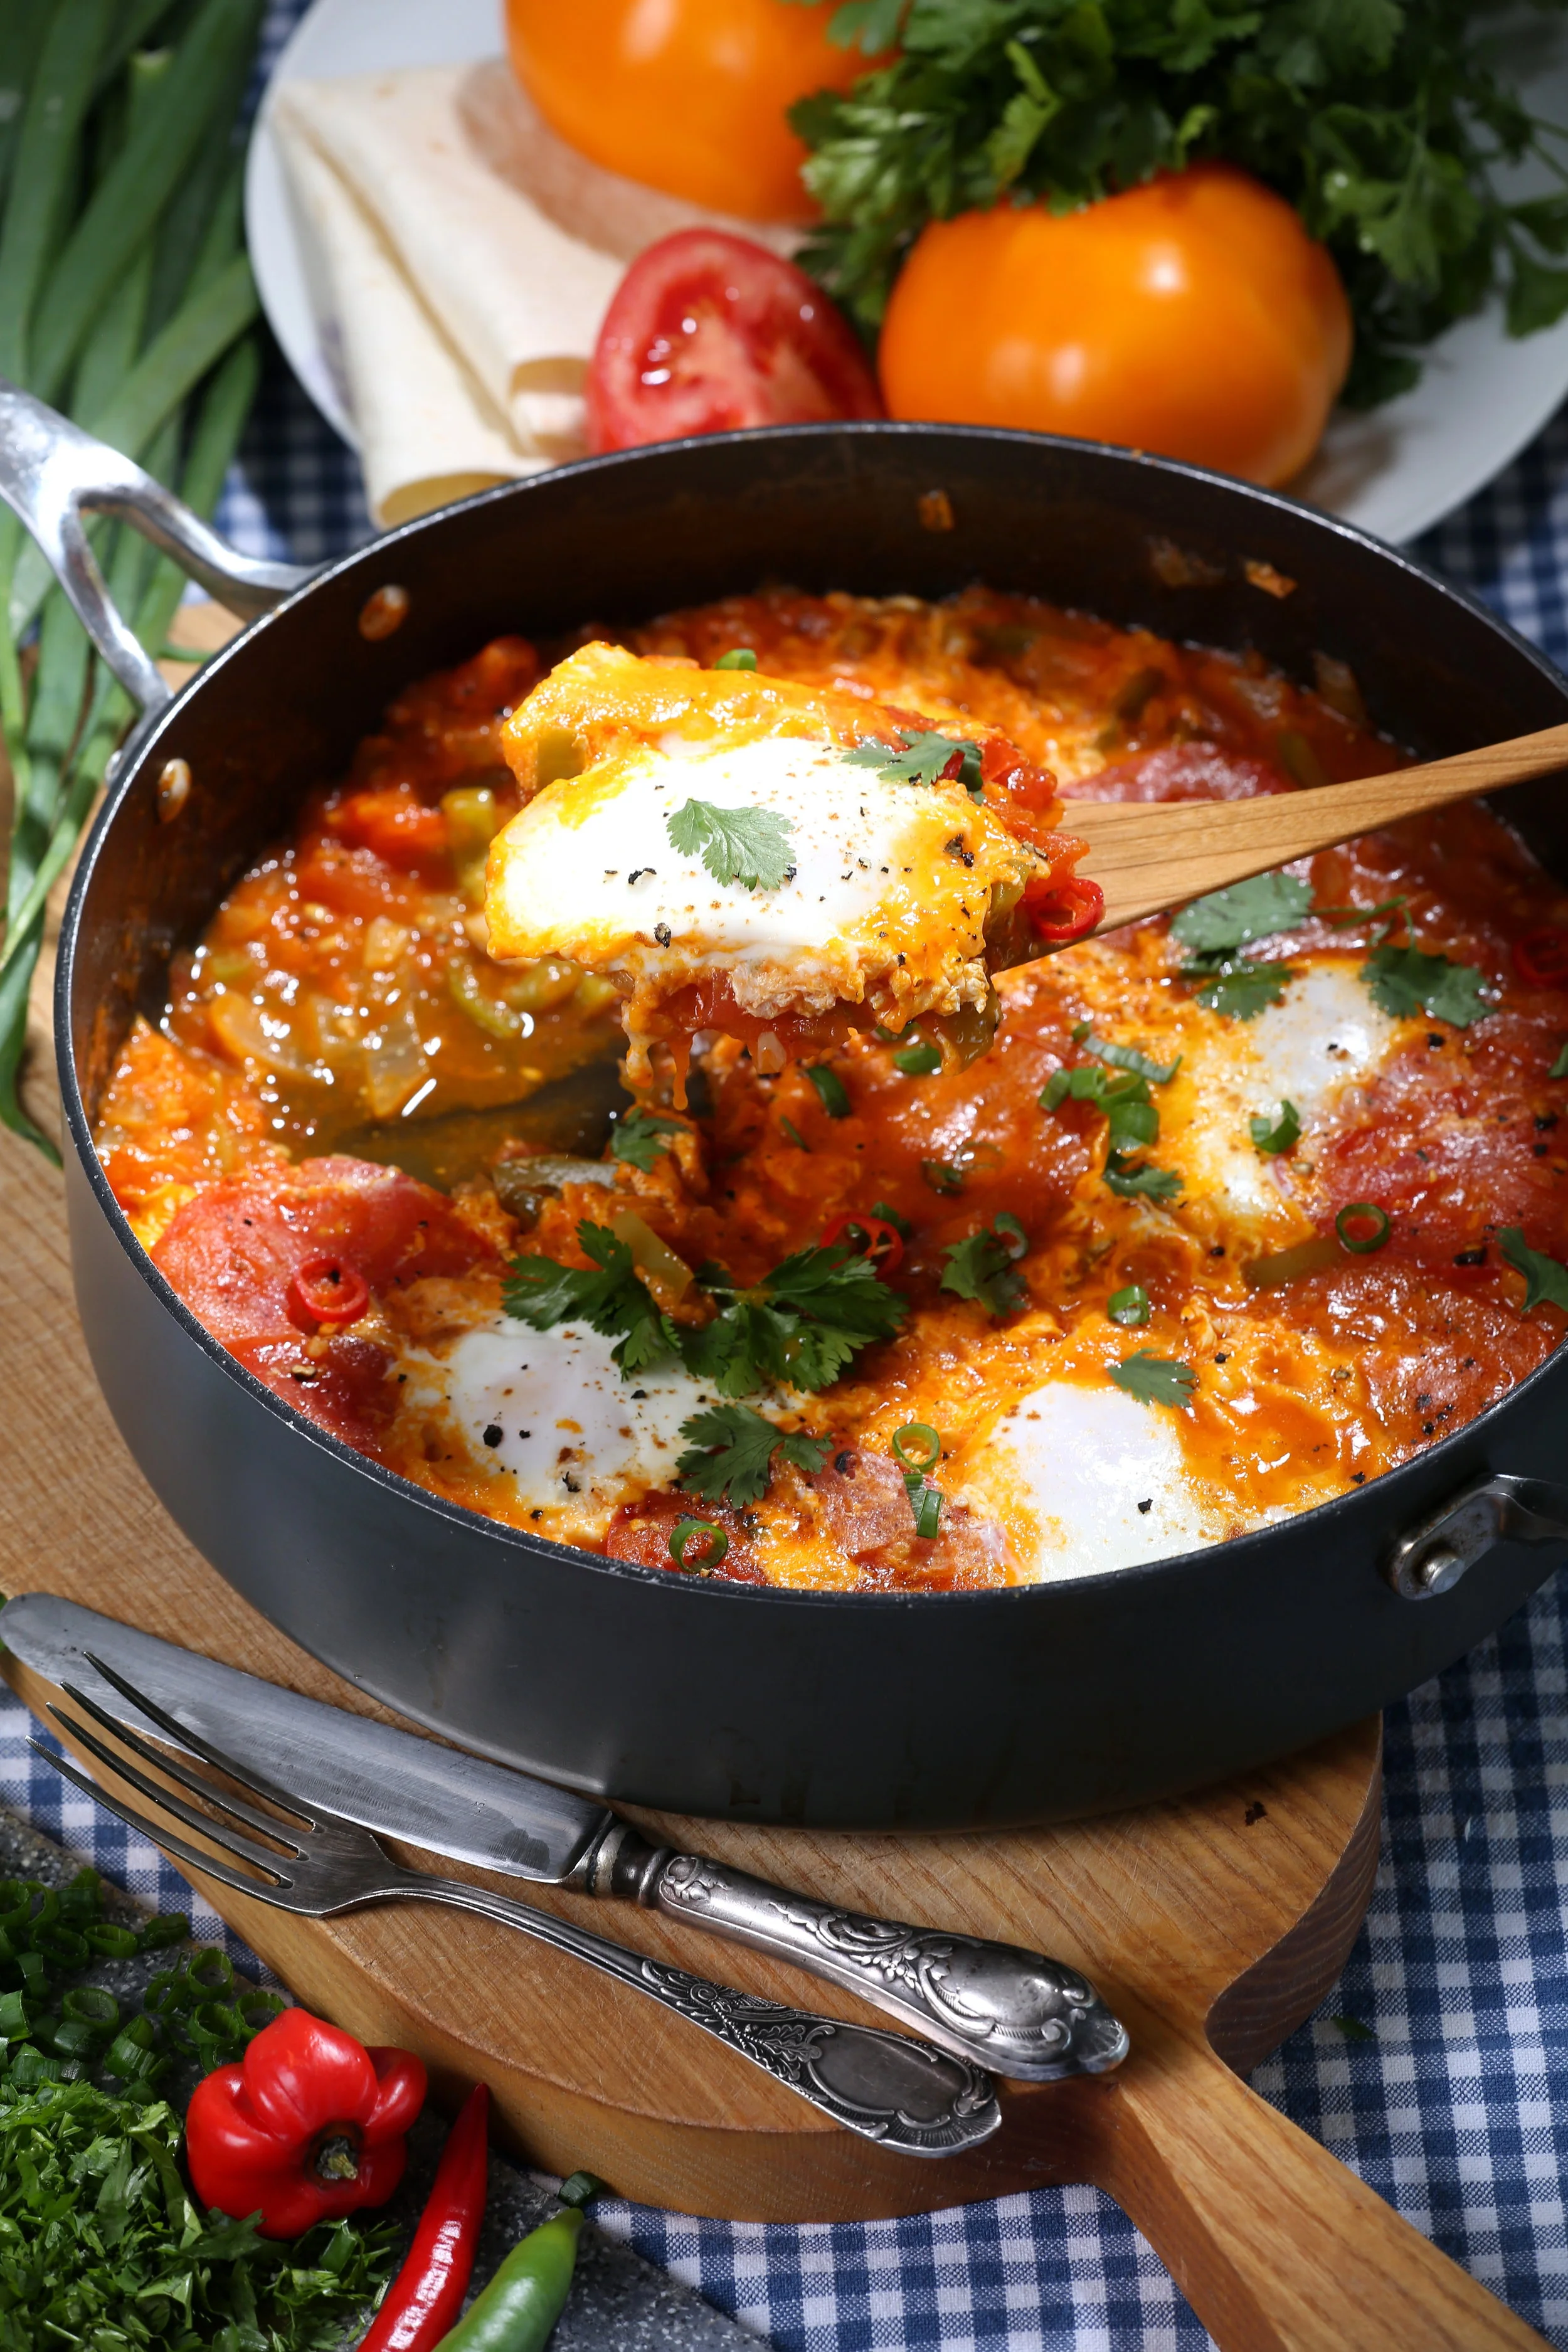
Shakshuka
This is a fantastic option for breakfast in tomato season! Shakshuka is a way of cooking eggs, traveled all the way from the Middle East. This dish plays with all the amazing flavors of tomato and paprika contrasting with the mild taste of eggs and topped off with the spices. This is a fresh and healthy breakfast to enjoy with the whole family.
1 large onion, chopped
2 sweet paprika, cut in straws
6 medium tomatoes, blanched, diced
2 medium tomatoes, blanched, sliced
1 chili, chopped
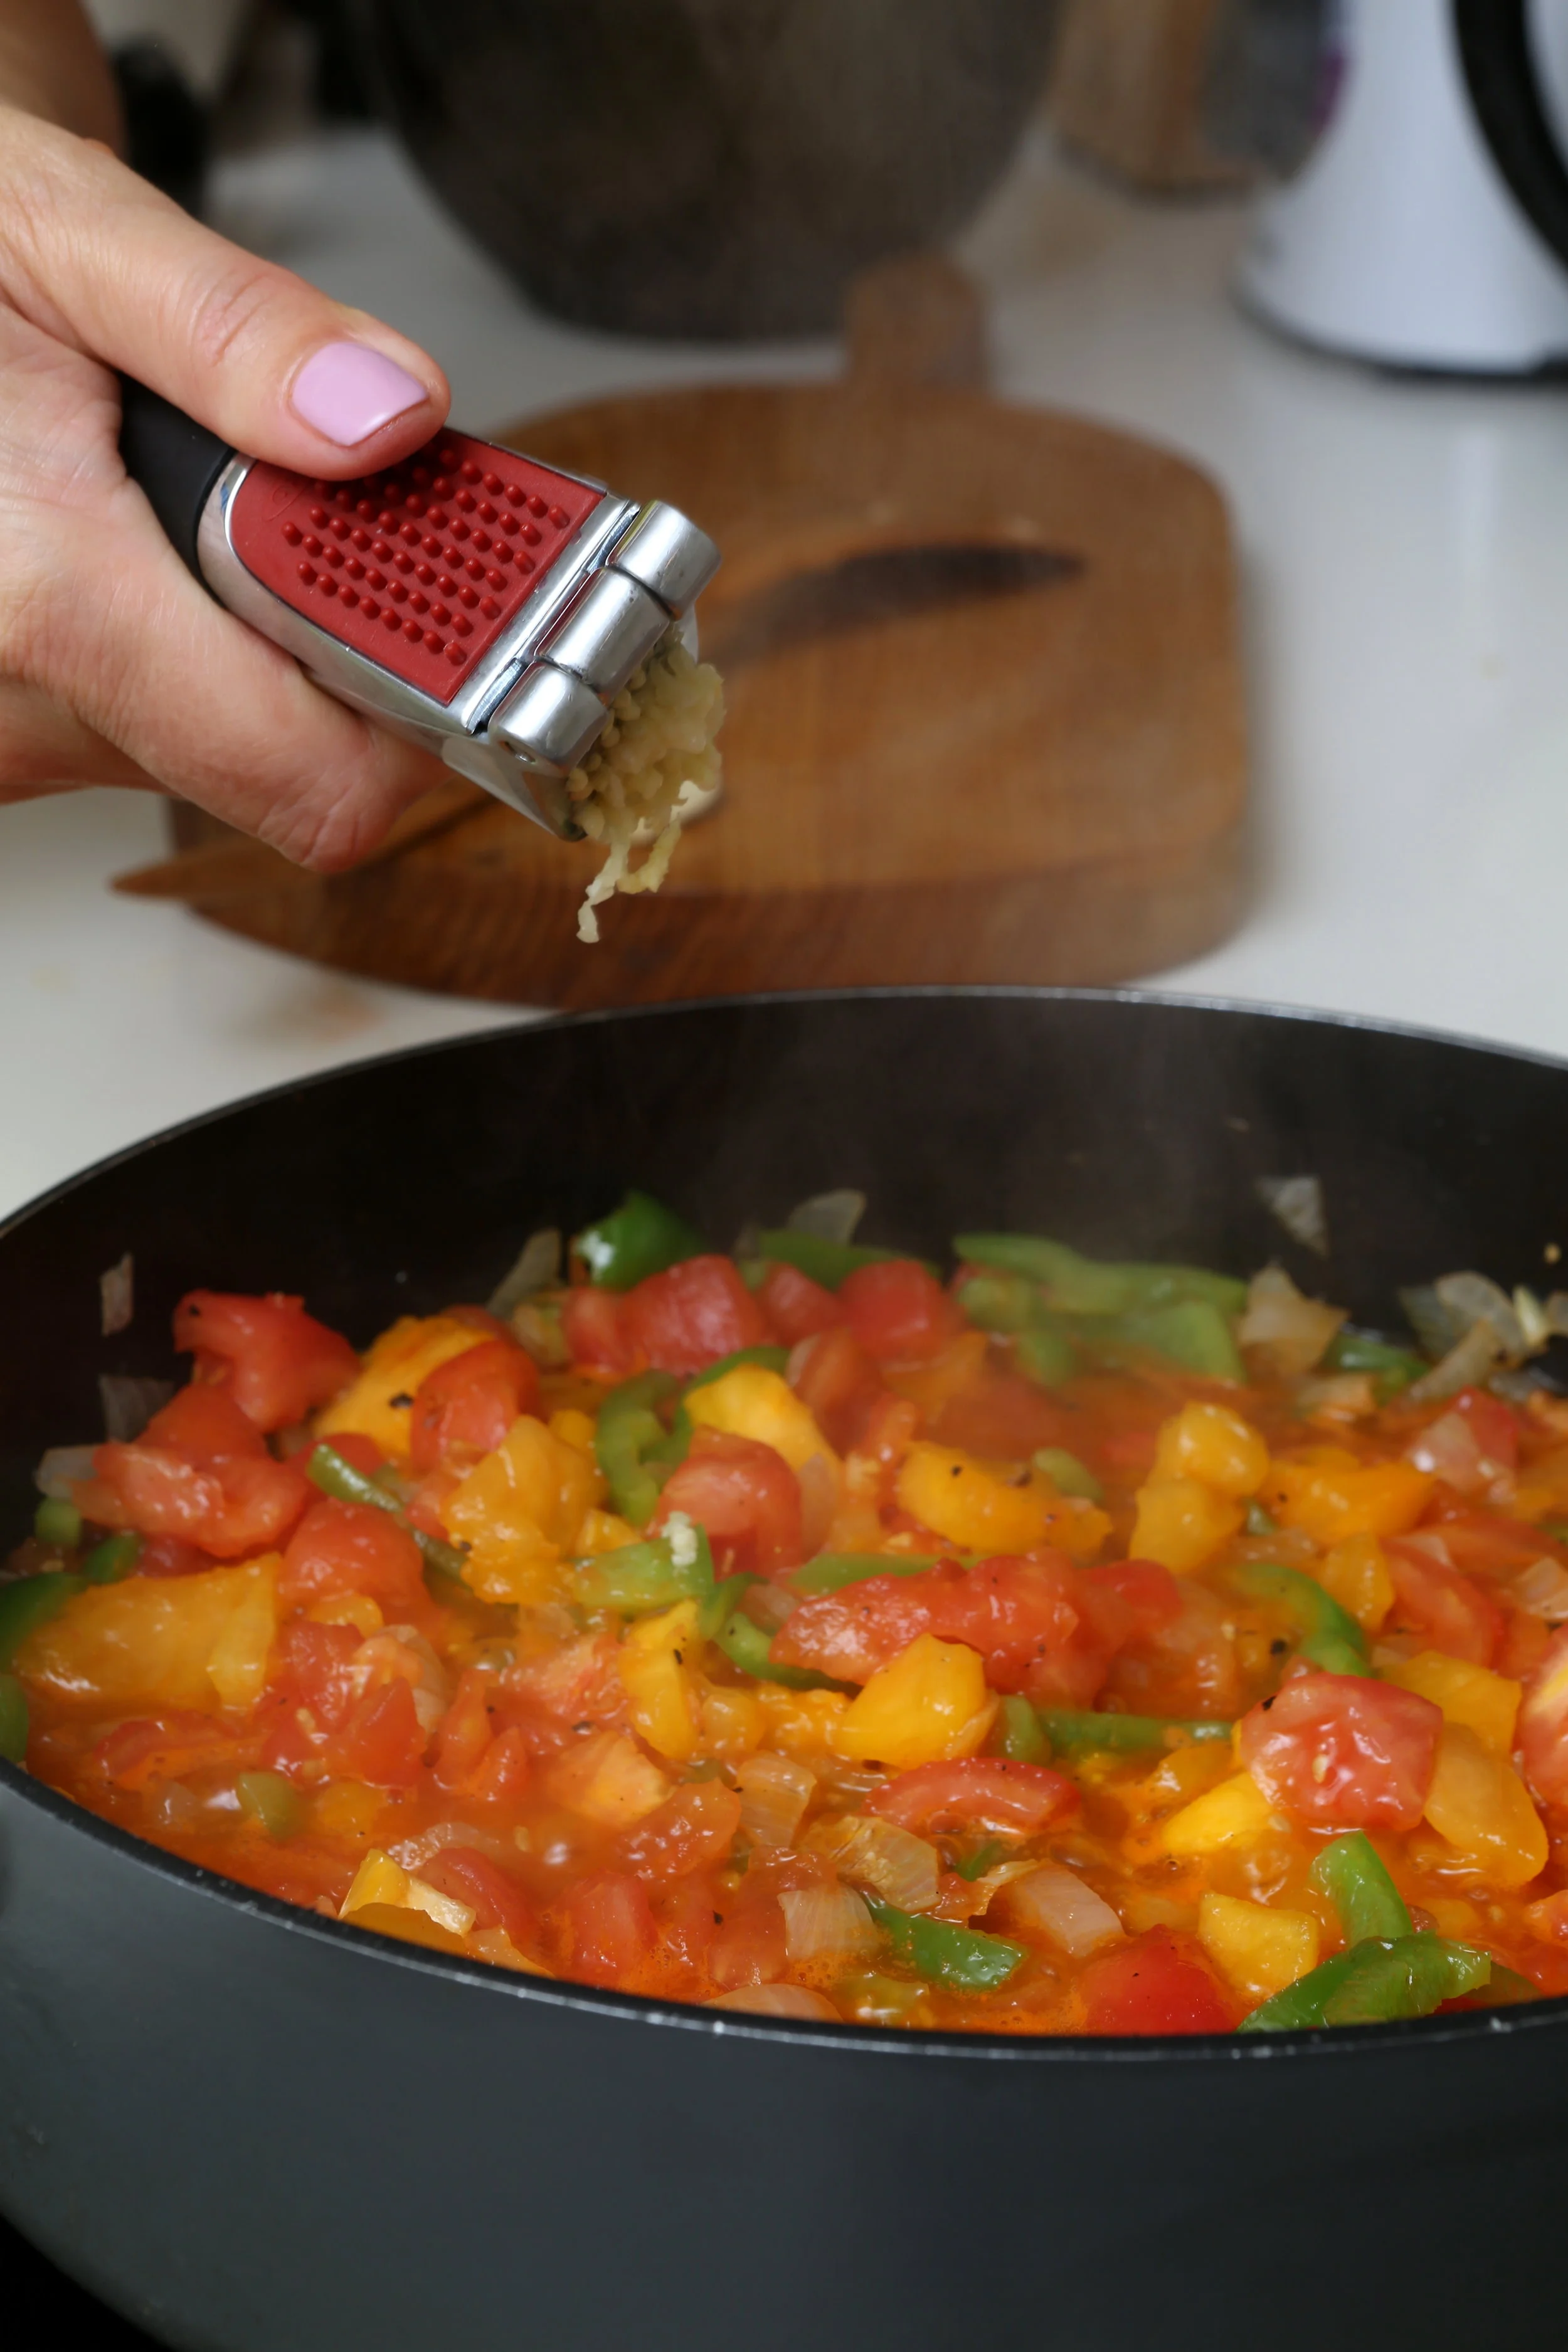
3 garlic cloves, peeled, pushed through garlic press
2 tsp ground cumin
2 tsp sweet paprika powder
Salt, pepper, sugar to taste
Handful of greens- parsley or coriander, chopped
6 eggs, room temp
Olive oil for cooking
1. In a large frying pan with a lid, heat the oil and cook the onion and chili until fragrant and translucent.
2. Add paprika and cook for a few more minutes.
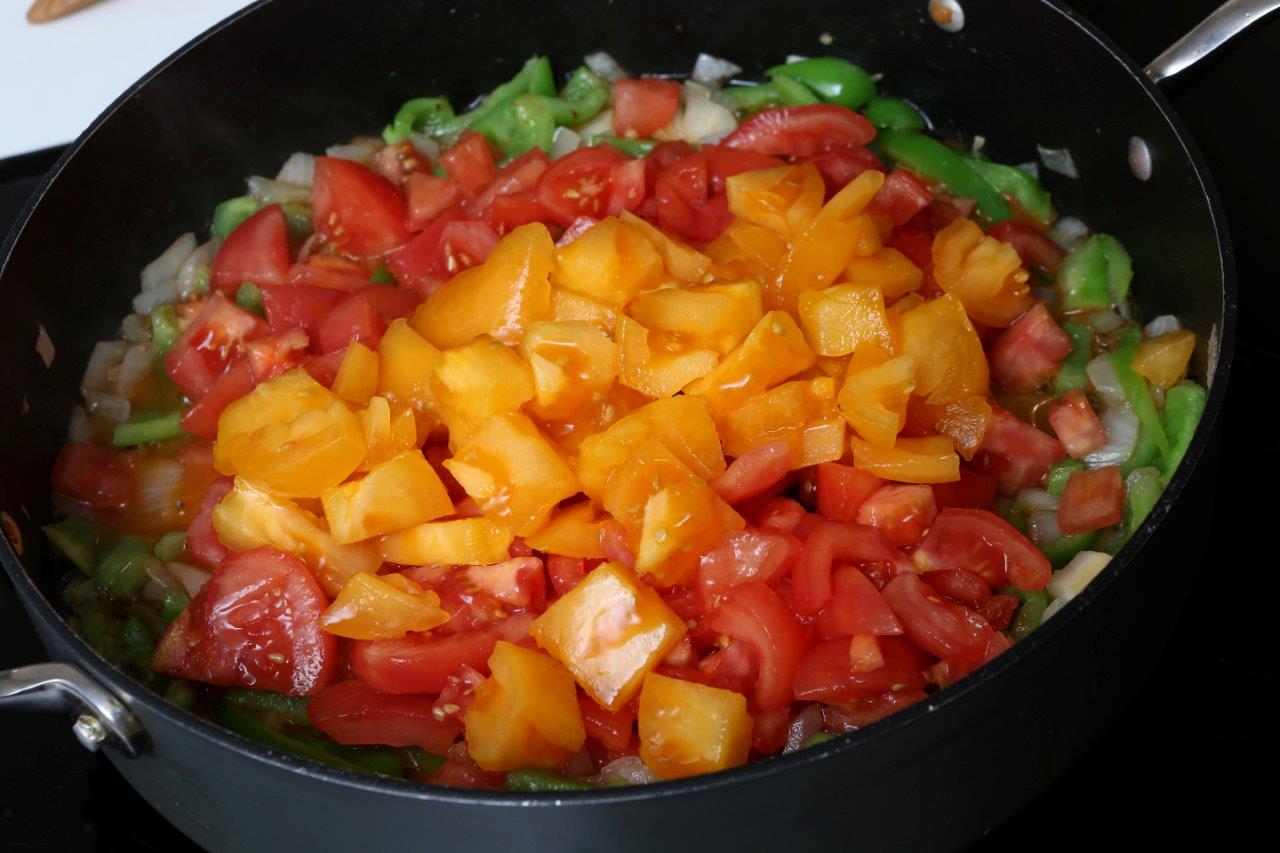
3. Then add the spices, tomatoes, greens, pressed garlic and stir. Place lid on the pan, lower the heat and sautée for about 10 min until veggies become soft but not mushy.
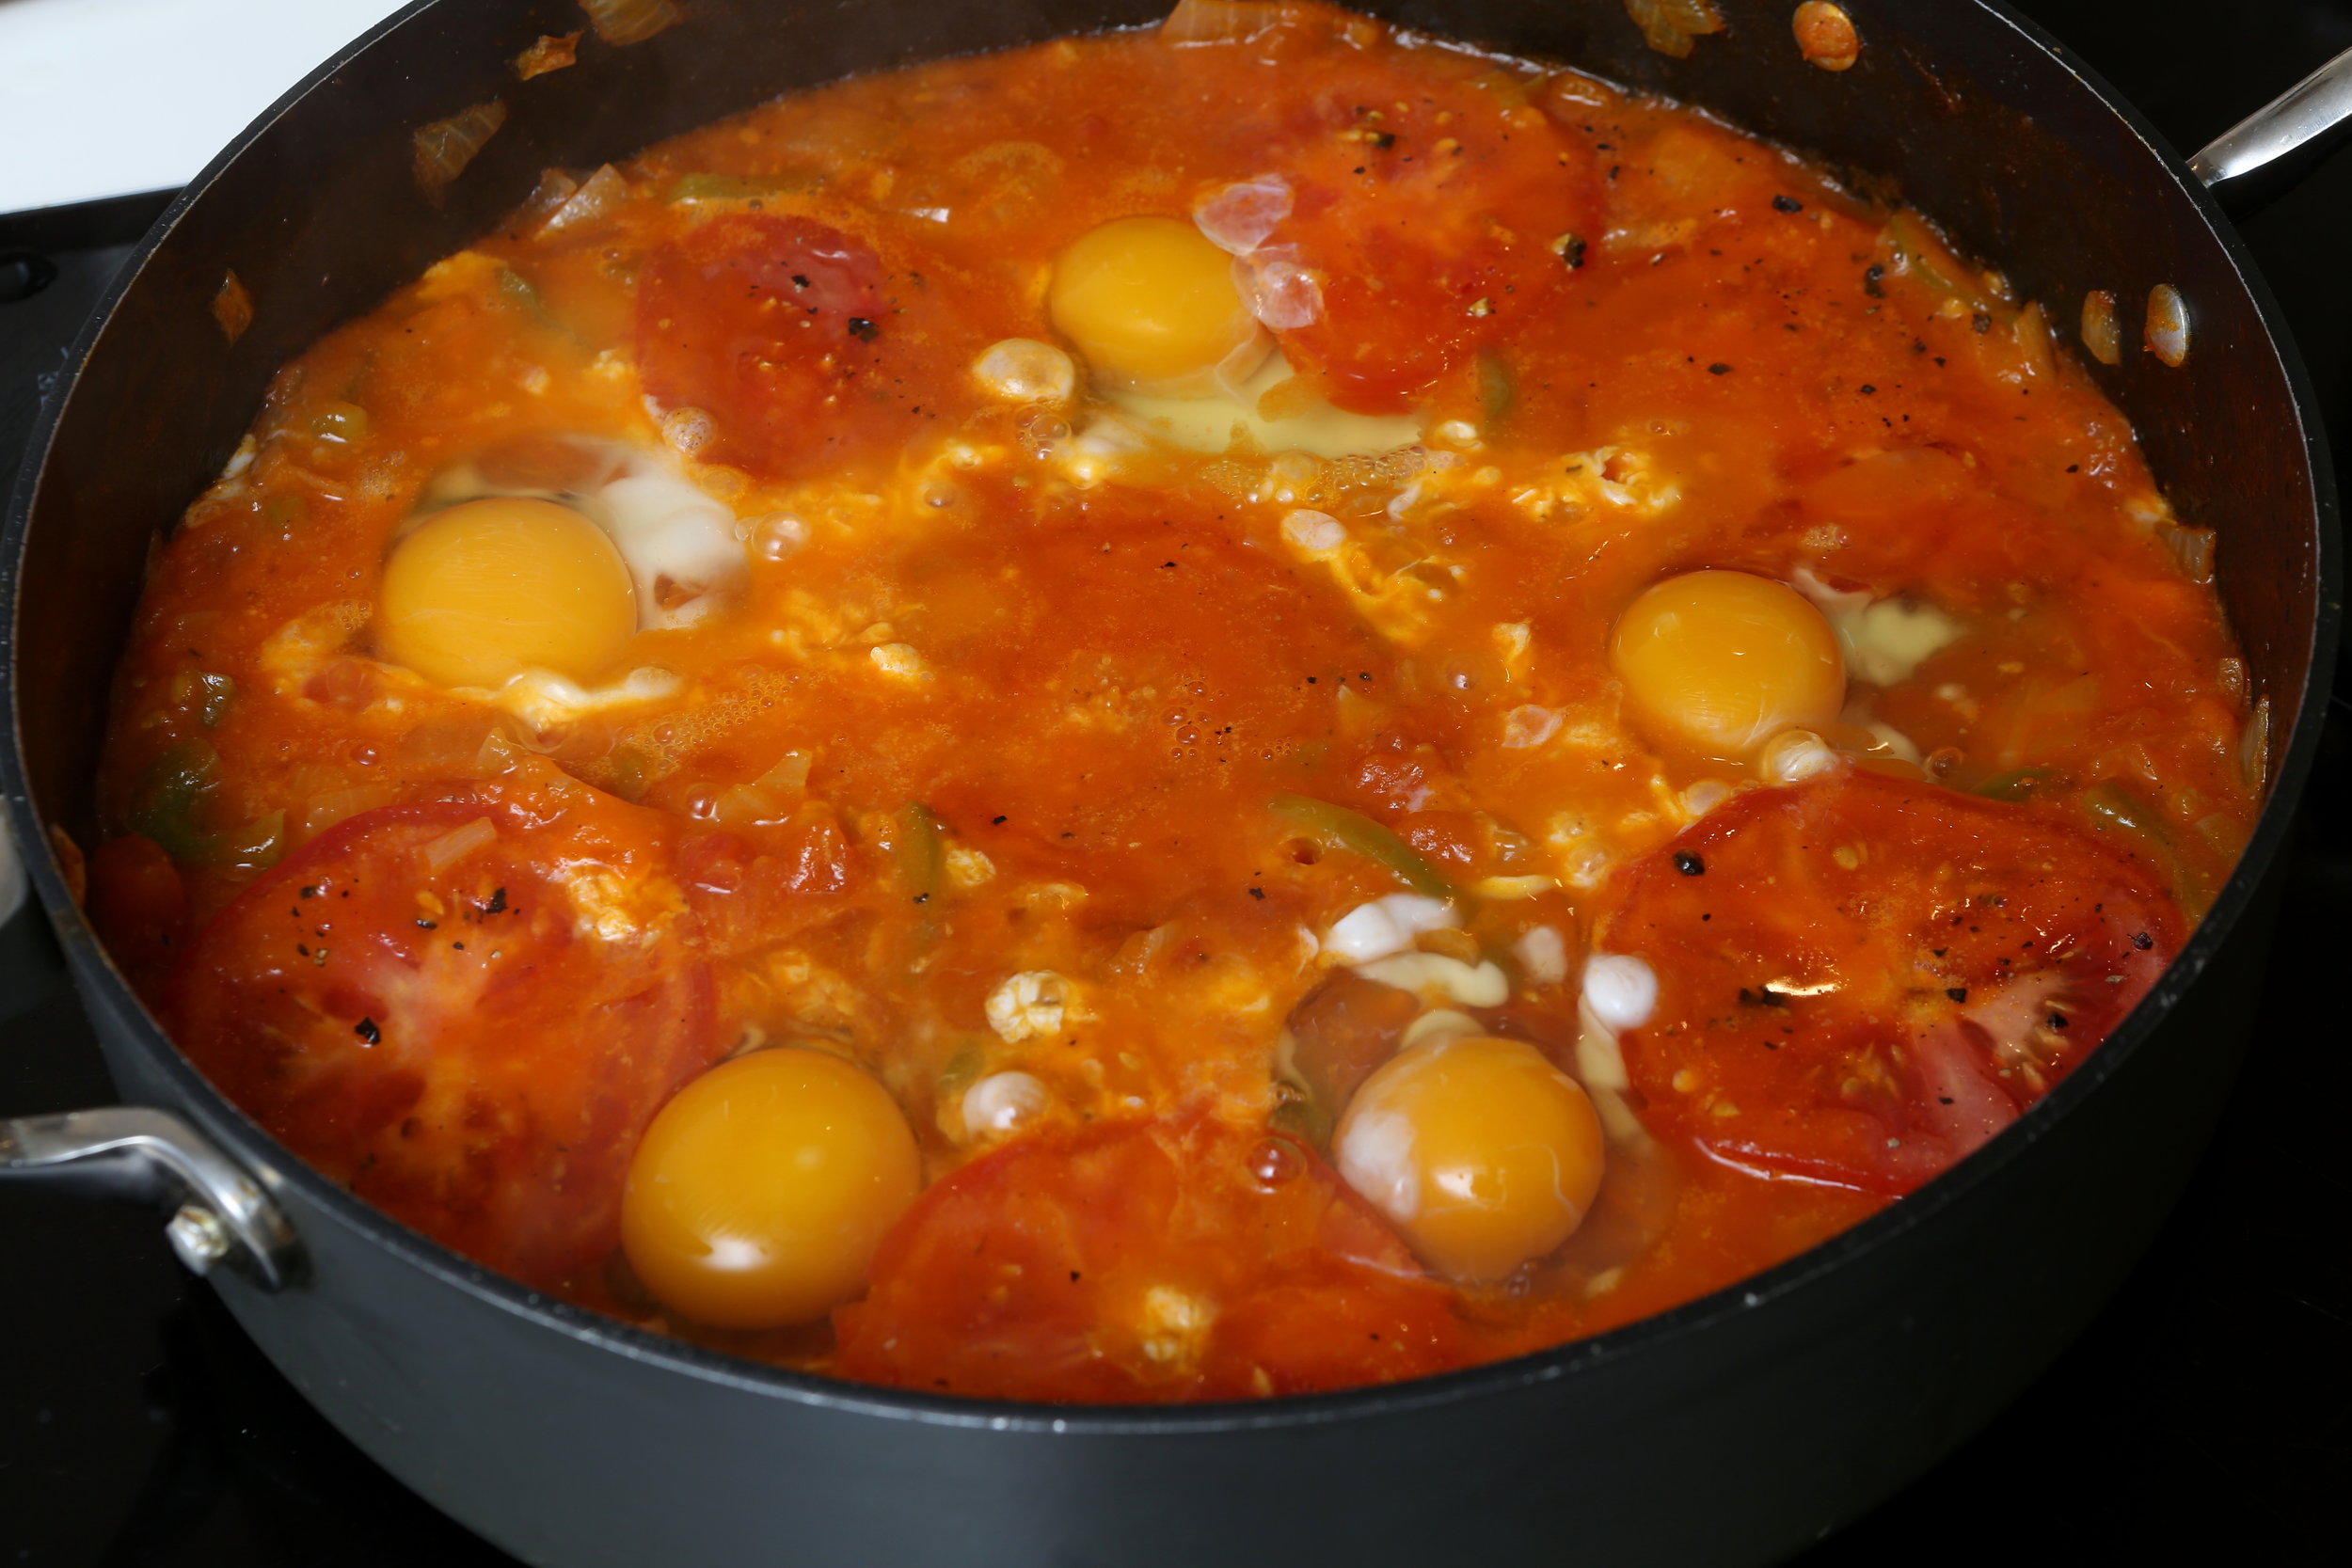
4. Taste and add salt, pepper and a tsp of sugar. Evenly cover everything in the pan with the tomato slices and sprinkle salt and pepper again. Put the lid back on and sautée for 2-3 more min.
5. Create 6 holes in the cooked veggies around the whole pan and crack an egg in each hole, add salt and put the lid back on.
6. Sautée for 3 min until the egg whites are firm, but the yolks are still soft and a bit runny. Remove from heat immediately.
7. Serve with greens on top and with a slice of fresh bread.
Recipe: Ārija Avota
Photo: Ieva Andersone

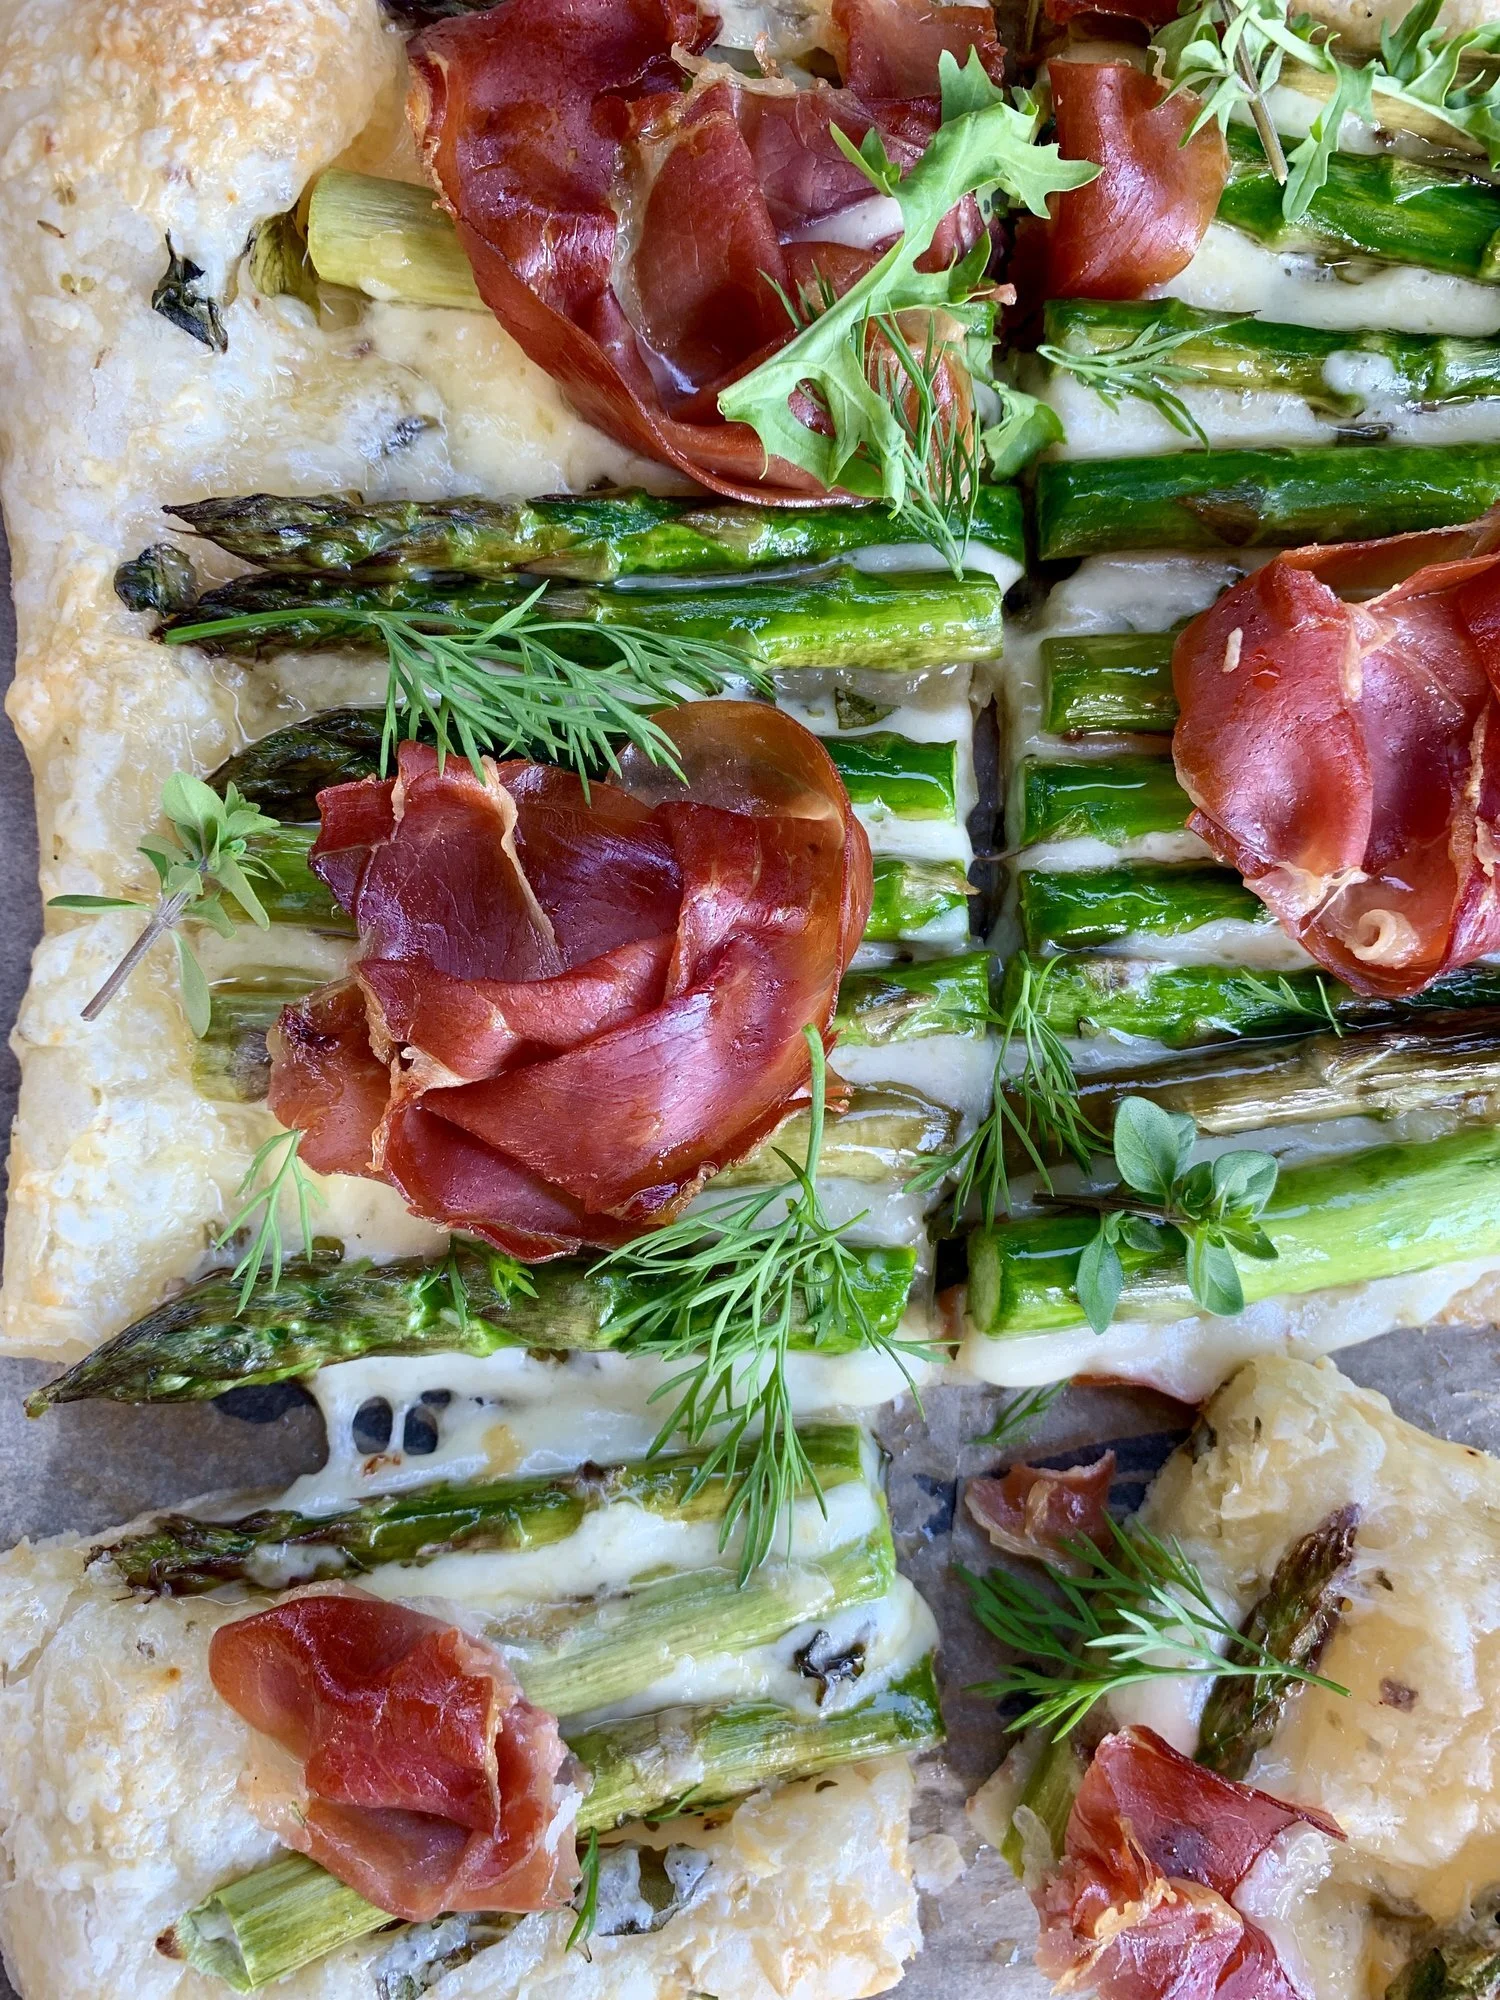
Artichoke and Parma ham galette
A great breakfast or snack idea! You can add and combine any flavors over the cheese- asparagus, tomatoes, squash, eggplant, salmon, sun dried tomatoes, olives, etc. My favorite combos are with artichoke (as in the top picture) and asparagus in the spring. What will be your favorite combination?
400 g puff pastry, if using frozen type- remove from freezer 20-30 min before baking to let defrost in room temp
200 g Cheddar cheese, grated
A few tbsp extra virgin olive oil
Oregano
100-150 g canned artichokes in oil
1 small tomatoe, sliced
5-6 slices Parma ham
Basil, torn in pieces
Salt to taste
For serving
Arugula, soft boiled eggs, olive oil
1. Preheat the oven to 190 degrees (celsius).
2. Create a 20x40 cm base either rolling out the pastry or sticking the defrosted squares together. Place on a baking sheet.
3. Use a brush to evenly distribute olive oil all over the pastry.
4. Sprinkle the torn basil and other spices- oregano, salt and cheese.
5. Drain the canned artichokes and cut the biggest ones in half. Slice the tomato.
6. Place the artichokes and tomato slices evenly all over the galette.
7. Roll up the Parma ham in “roses” and place on top of the galette.
8. On a baking pan, place in center of oven to bake for 25-30 min until top and bottom of pastry is nicely browned.
9. If desired, sprinkle the arugula and olive oil over the baked galette. If served for breakfast- then cover with the soft boiled eggs, cut in 4 pieces.
Recipe: Ārija Avota
Photo: Ārija Avota

Variation for spring, when it is asparagus season:
5. Wash and pat dry the asparagus, if not using baby asparagus, then cut off 2 cm from the ends.
6. Toss the asparagus with olive oil in a bowl and place on top of the cheese on the galette.

Lingonberry/apple jam
The lingonberry jam is my absolute favorite! The berries have so many health benefits upon being very delicious- something like a cranberry, but with a little more variety. It goes perfectly with hash browns, pork roast, or any type of pancakes. That is why this is the only jam I try and make every year.
2 kg lingonberries, washed
1 kg sour apples, peeled and diced
600 g + jam sugar
100 ml water
Makes 6 0.5l jars
1. Wash the berries through a sift, drain water and let dry.
2. In the meantime, peel and dice the apples.
3. In a large pot, put the berries and diced apples in water and simmer on medium heat. Stir occasionally and let it simmer until you see the juices coming up.
4. Lower the heat and let it cook for 15 more minutes, stirring and removing the foam from the top occasionally.
5. Add the sugar and keep cooking until the jam thickens.
6. Taste the jam and add more sugar if necessary.
7. In total the cooking time is about 50 min, but you can keep cooking for an extra 10 min if you want it thicker.
8. Pour the jam in jars while still hot, put lids on and set aside to cool. This will help preserve the jam.
9. Store the jars in a cool place.
Recipe: Ārija Avota
Photo: Ārija Avota

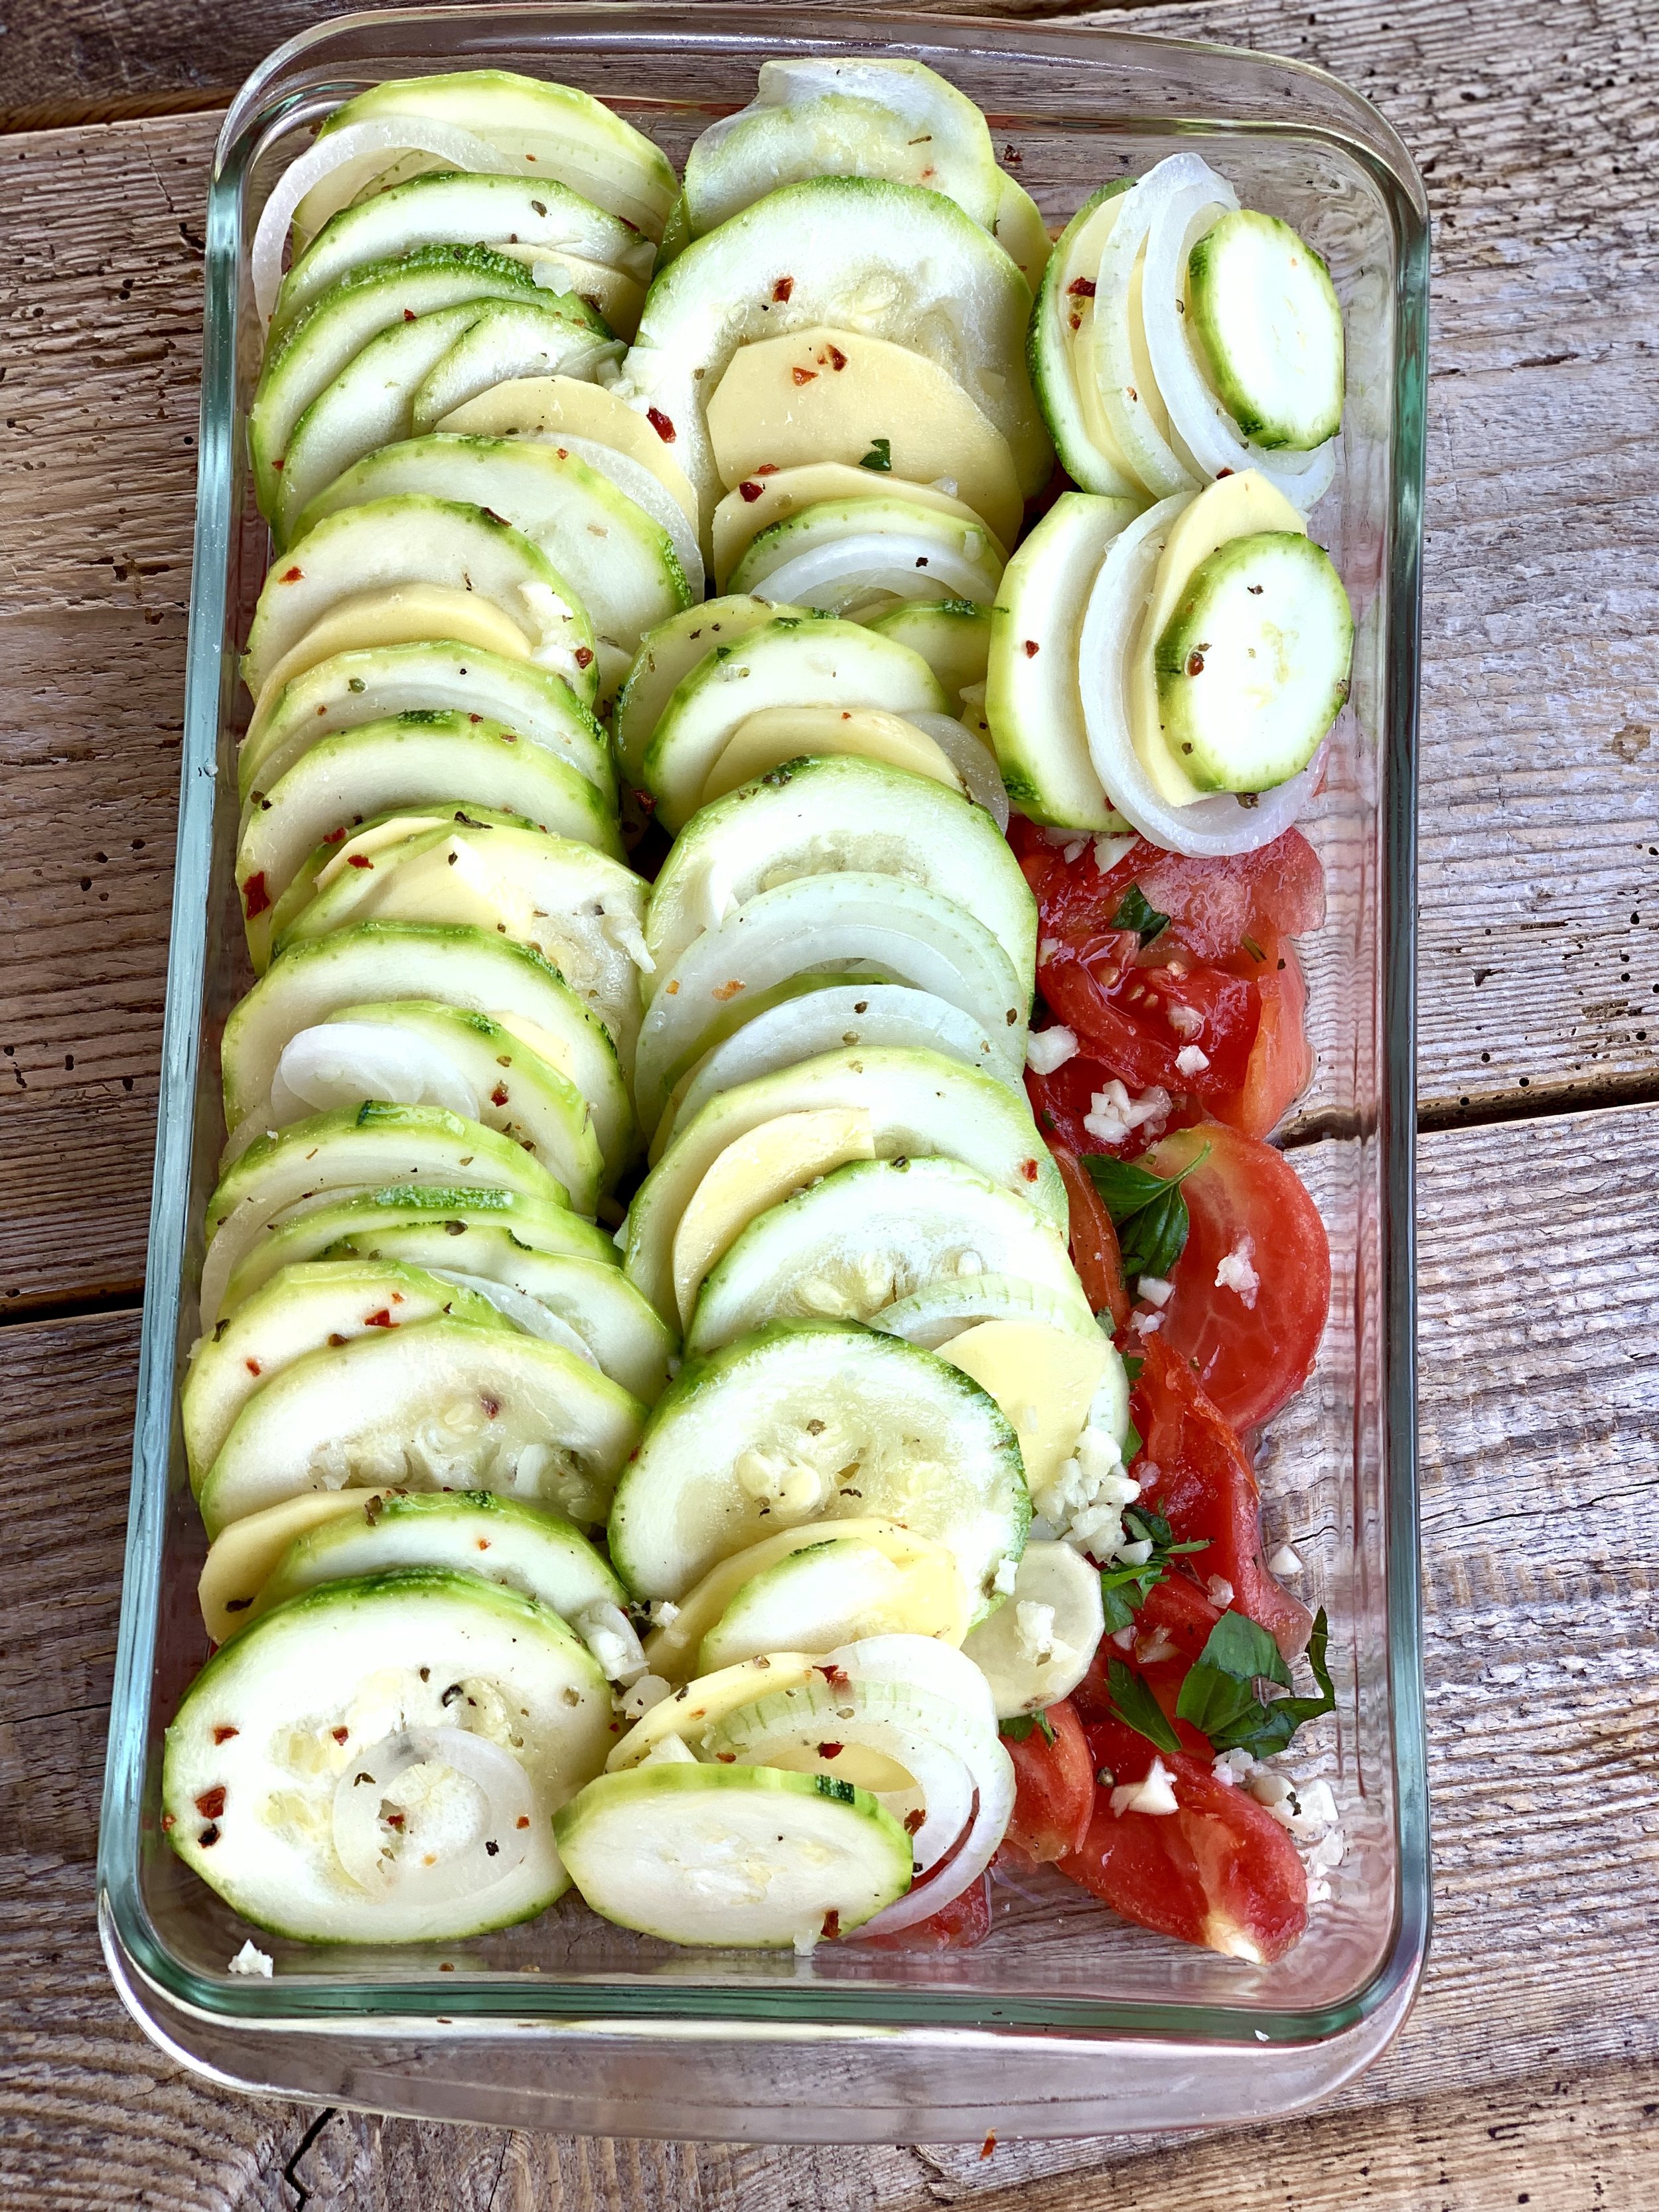
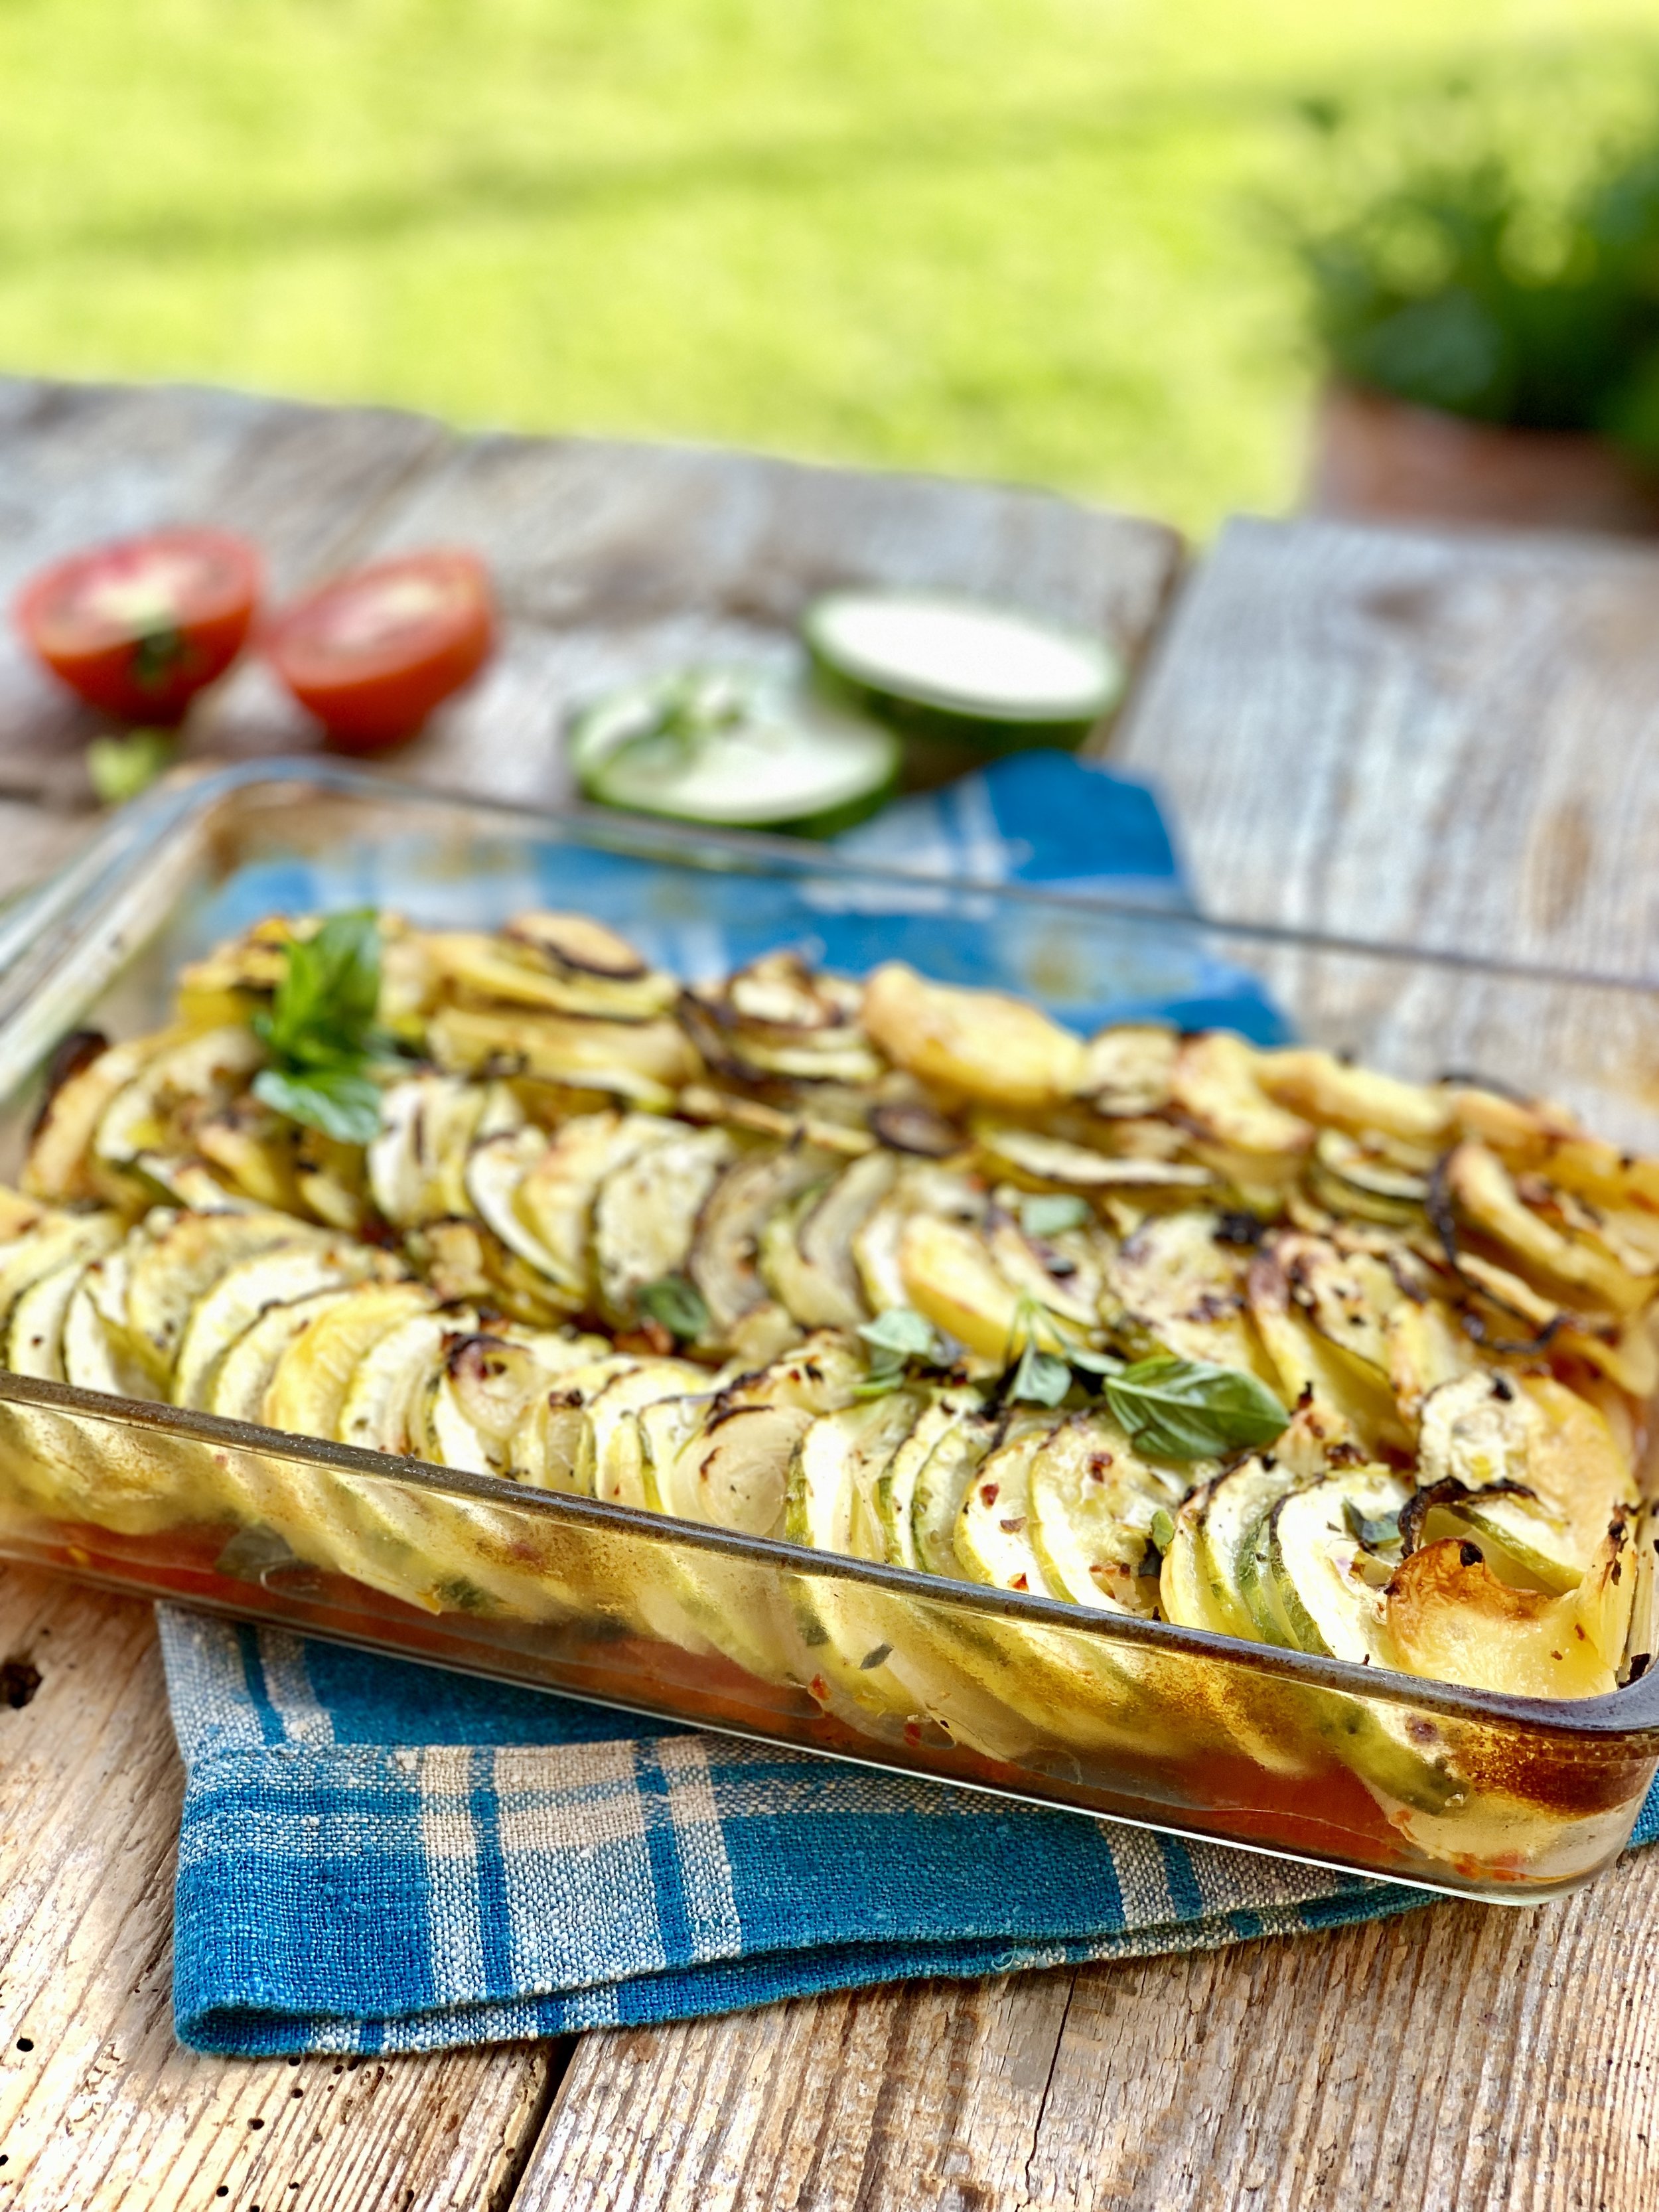
Squash gratin
I have come to this recipe gradually through trial and error and can finally say I am happy with my squash gratin. I put finely sliced tomatoes (can use canned tomatoes too) on the bottom of the pan and then the potatoes and squash go on top. It is key to cut the potatoes and squash in very fine slices so that they cook better, can soak up all the flavors and hold together stronger.
Squash gratin pairs well with fish and meat dishes, but can also be a vegetarian main coarse when necessary.
1 small squash, cut in fine slices, 1-2mm
4 medium potatoes, peeled, sliced in fine slices, 1-2mm
1 large onion, cut in fine slices
4 medium tomatoes, cut in fine slices
Handful of greens- parsley, basil, thyme or rosmary
2 garlic cloves, finely chopped or pushed through garlic press
1 tsp oregano
4 tbsp olive oil
Salt, pepper, sugar to taste
1. Peel and slice the vegetables.
2. Heat the oven to 200 degrees (celsius) preferably on the fan setting (convection).
3. On the bottom of a 20x30 cm baking pan evenly spread out the tomatoes, sprinkle with chopped greens and salt, pepper, sugar.
3. Place the sliced squash, potatoes and onions in a bowl and mix with the spices, garlic, salt and pepper, olive oil.
4. Assemble the gratin- alternately place the potatoes, squash and onion slices on top of the tomatoes, press down gently in the end.
5. Place in the oven (not necessary to cover the pan) and bake for 20-30 min.
6. Let it rest when done and then serve.
Recipe: Ārija Avota
Photo: Ārija Avota
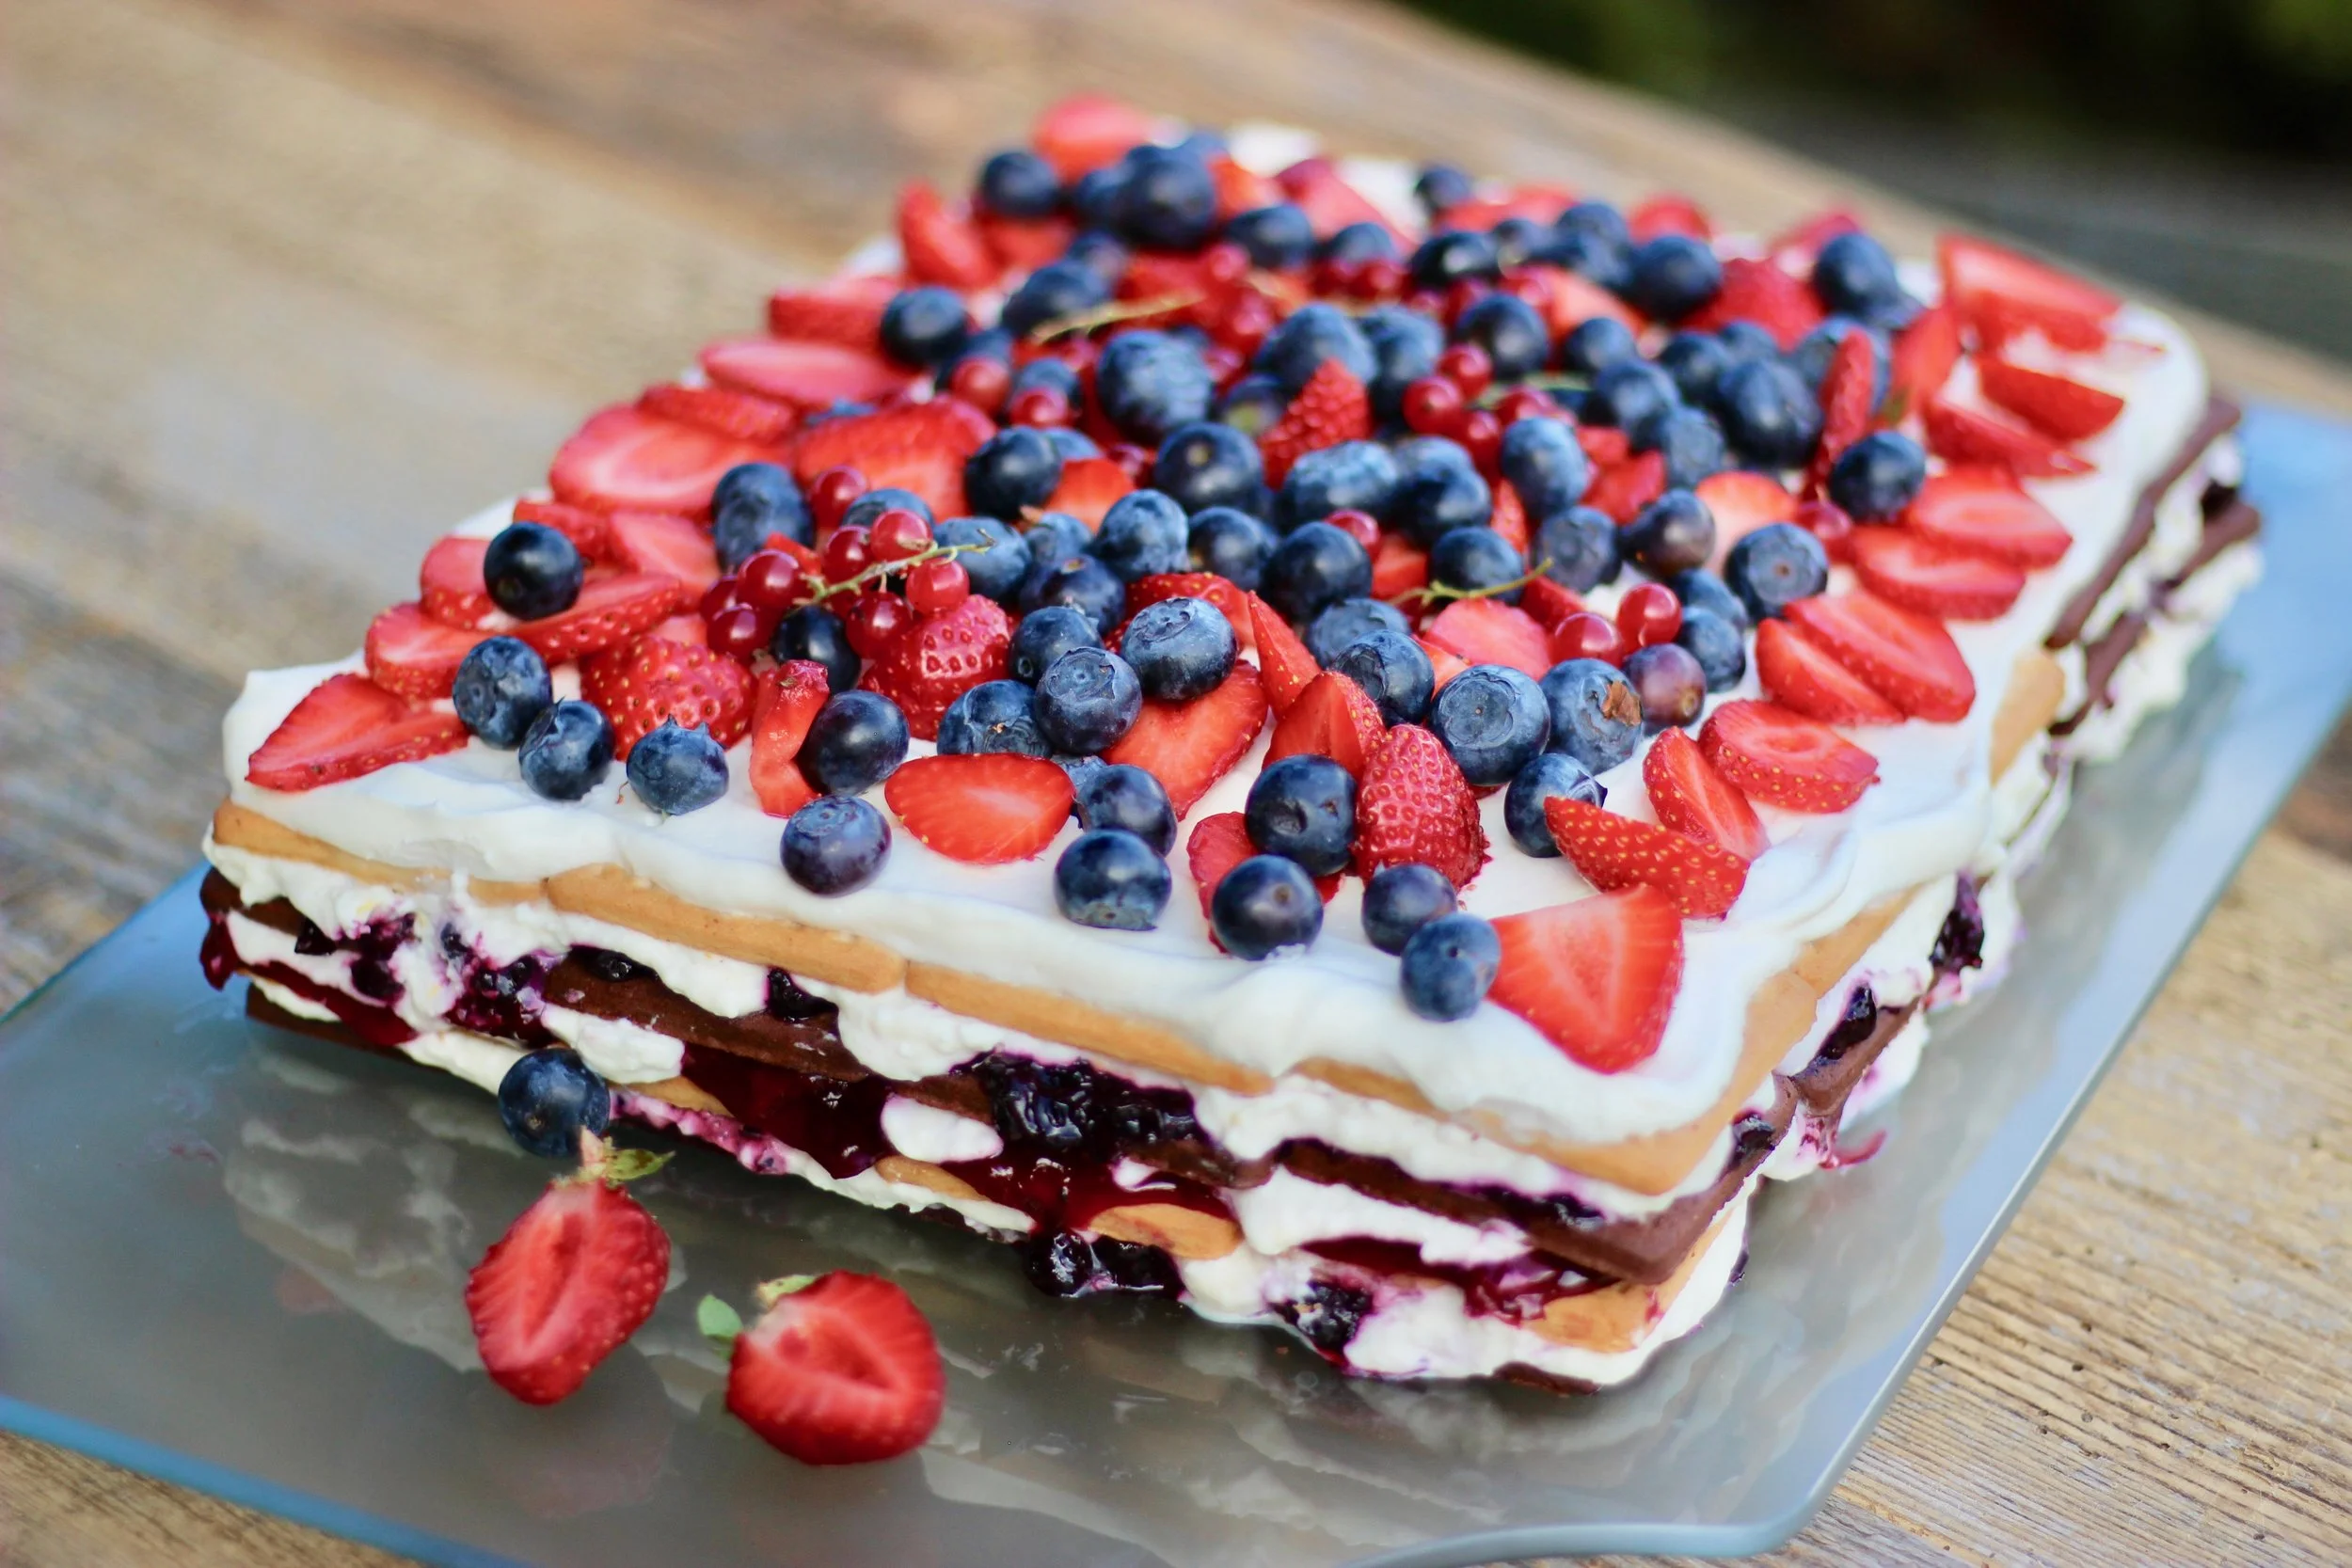
Stacked cookie and condensed milk cake
What an amazing recipe for a quick but super delicious cake- it is sweet and sour and very full of flavor! The only part that takes a bit of time is the stacking and building process, but this is where you can get the kids involved and have a fun time together.
I make a black currant jam just for this recipe, but you can use the ones available in stores too- just make sure to get one that is more sour (black currant, cranberry etc).
64 pieces (or however much it takes to make the shape and size you desire) of Graham crackers or any similar plain cookie
500 g cottage cheese
250 g heavy cream
350-400 g condensed milk (with sugar)
The zest of 1 lemon
400 g sour jam- black currant or cranberry
1 kg assorted fresh berries
2 cups of milk for soaking the crackers
1. Whip the heavy cream to make whipped cream and mix that with the cottage cheese and condensed milk.
2. Pour half the milk in a shallow, wide bowl and add more milk as necessary moving forward. Dip each cookie in the milk and place on a large platter or pan. One layer is 16 cookies, there will be 4 layers total.
3. when the cookie layer is done, spread jam smoothly to cover all the cookies and then do the same with a quarter of the cream.
4. When the top layer is done, decorate very generously with the fresh seasonal berries.
5. Leave in the fridge to soak for a few hours or even overnight. The longer it refrigerates, the better it will hold together.
Recipe: Ārija Avota
Photo: Ārija Avota

Tomato lentil soup
It took a while to get to this recipe that I find very delicious and that I want to keep making again and again. And most importantly- the whole family loves it too!
Another thing- this soup is very healthy, filling and creamy in taste. You can make it very quickly and it has room for variation in the added spices, diversifying it every time you make it- one night you are in Italy and the next in India or even Mexico.
800 g tomatoes blanched, peeled, diced (can use canned or fresh)
150 g red or green lentils, soaked in water 20-30 min
1 medium carrot, cut in thin slices
1 medium onion, chopped
2 garlic cloves, finely chopped
1 tsp curry
1 tsp ground cumin
½ tsp oregano
1 tbsp tomato paste
800 ml vegetable broth + water if necessary
2 tbsp olive oil for cooking
Salt, pepper and sugar to taste
Optional: 2 handfuls of spinach or kale
1. Soak the lentils in water and in the meantime chop the onion and cut the carrot.
2. In a large pot heat the olive oil and on small heat sautée the onion until transparent, 5-7 min.
3. Add carrots, stir and on medium heat cook for 3 more minutes.
4. Add all the spices, garlic and once the garlic starts to become very fragrant, add the tomato paste and cook for a minute.
5. Stir in the diced tomatoes.
6. Add a tbsp of sugar.
7. Add the lentils and broth, put on the lid and on medium heat simmer for 20-25 min until the lentils get soft but don’t become mushy.
8. Put ¼ of the soup in a blender and blend completely smooth, then add back to the pot.
9. Stir, taste, add salt and pepper. If desired, add a dash of lime or lemon juice to bring out the flavors.
10. Now add the spinach or kale, if you have chosen to.
11. Let the soup rest for 15 min before serving.
Recipe: Ārija Avota
Photo: onemilk

Creamy chickpea curry
This amazing recipe has only recently come in my kitchen. However, the fact that I made it at least 3 times along the course of the last month means it is staying in my recipe book for good. And it seems very unbelievable that such a creamy and filling dish can actually be very healthy! You get energy for your brain and protein for your muscles.
In my personal opinion- it is healthy also because the great balance of the flavors in this curry means you may not even want to have dessert afterwards! For some, this vegetarian dish may even overthrow a meat dish from the TOP of most often used recipes.
300 g tomatoes, blanched, peeled and diced
300-400 g canned chickpeas, drained
2 tbsp tomato paste
1 tsp ginger root, finely chopped
1 handful of parsley, chopped
2 tsp curry, 3 if you want it stronger
1 medium onion, chopped
2 garlic cloves, finely chopped or pushed through garlic press
100+ ml coconut milk
The juice of 1 lime, to taste
Salt and pepper to taste
Olive oil for cooking
For the Basmati rice
1 cup of rice
2 cups water
1 tbsp olive oil
Salt to taste
For serving
Couple tbsp Greek yogurt
1 handful of parsley, chopped
Make the curry
1. Blanche the tomatoes, covering them with boiling hot water and keeping them in that water for 30 s. Drain the water and let cool, then peel and dice, set aside.
2. Chop the onion, garlic, parsley, ginger and set aside.
3. Heat the oil in a pan and on medium heat cook the onion until translucent.
4. Add the ginger, garlic, curry and cook a little, then add tomato paste and also let cook for a bit.
5. Add tomatoes and greens and keep cooking for 2 min. If the tomatoes aren’t juicy enough, add a bit of water to create a sauce.
6. Add the chickpeas and sautée for about 5 min.
7. Add salt and pepper, taste if that is enough to bring out the flavor and then pour in the coconut milk. Lower the heat to very low and sautée until the curry turns creamy, 2-3 min.
8. Taste the curry and squeeze in the lime juice as necessary.
Make the rice
9. Put the rice in a pot and add the water and oil, stir.
10. You can add the salt immediately or when the rice is done, your choice.
11. Put a lid over the pot and leave to simmer on medium heat. You need to check on the rice occasionally, because it may overflow when boiling.
12. Once it starts bubbling, lower the heat and sautée for 20 min without stirring.
13. Remove from heat and use a fork to fluff up the rice carefully.
14. If you need to keep the rice warm before serving, wrap the pot in a blanket.
15. Serve the curry with the rice and add Greek yogurt on top, along with the chopped greens.
Recipe: Ārija Avota
Photo: onemilk

Crispy chicken Parmesan
The special thing about this recipe is the trick of soaking the fillet in Greek yogurt instead of egg before the bread crumbs. The yogurt gives this dish another layer of taste- fresh, tangy and juicy. Of course the Parmesan mixed with the bread crumbs add the crispiness necessary.
While the chicken is baking in the oven, you have time to make a seasonal salad from anything fresh and green available. What elevates the salad is the horseradish and lemon sauce, it gives even more flavor to this amazing dish.
4 small chicken breasts
2 tbsp Greek yogurt
4 tbsp Parmesan cheese, grated
1 tbsp bread crumbs
Salt and pepper to taste
4 tbsp oil for cooking
For the salad
4 handfuls of seasonal salad, torn
1-2 bunches of radish
For the sauce
4 tbsp sour cream or Greek yogurt
2 tsp horseradish
4 tsp lemon juice
Salt to taste
Dill and/or parsley, finely chopped
1. Preheat the oven to 200 degrees (celsius).
2. Grease a deep frying pan with the cooking oil.
3. In a bowl, pour the Greek yogurt and whisk gently using a fork to make it more liquid.
4. Place the chicken breasts on a cutting board and tenderize them using a mallet or your hand.
5. Mix the grated Parmesan and bread crumbs in a bowl.
6. Take the chicken breasts one by one and dip both sides in the Greek yogurt, then in the Parmesan and breadcrumbs and place on the baking pan. Do not stack the chicken breasts on top of each other.
7. Bake in the oven for 25-35 min depending on the size of the chicken breasts.
8. Place the salad and cut radish in a large dish you will be serving in.
9. Make the sauce. Add all the ingredients to the sour cream or Greek yogurt and mix well.
10. Pour the sauce over the salad just before serving.
Recipe: Ārija Avota
Photo: onemilk
Publication: Ēdiens kā zāles

Pear risotto with Gorgonzola cheese
This risotto has a very interesting and sophisticated taste combination- the sweet pear with the tangy Gorgonzola. It may seem weird, but this actually is an amazing marriage of flavors that comes together so fully you can even skip dessert. The recipe is very easy but the flavor is so good it will surprise even the most fancy guests. Everyone always asks me for this recipe after dinner parties so here I finally share the details.
200 g risotto rice
2 medium pears, ripe (e.g. conference)
150 g Gorgonzola cheese
1 medium onion, chopped
150 ml dry white wine
300 ml vegetable broth
Branch of thyme
1 tbsp olive oil
1 tbsp butter
1. Prepare the ingredients. Chop the onion, wash, peel and dice the pears. Make the broth. Open the wine.
2. In a large pan, heat the olive oil and butter and on low heat cook the onion until translucent. Add half the pear, thyme leaves and cook for 2-3 more minutes.
3. Add the rice and raise the heat to medium and cook the rice until fragrant and translucent.
4. Pour in the white wine and let the alcohol evaporate. Add 1/3 of the broth, lower the heat, add the rest of the pears and put the lid on the pan to let it sautée for 20 minutes until the rice is done. Gradually in 3-4 attempts add the rest of the broth and stir the risotto after every addition. Do not flood the risotto, only add more broth when the moisture has evaporated. The rice should be soft, but not mushy, the risotto should be creamy and moist.
5. When the rice is done, stir in the Gorgonzola cheese cut in 2x2 cm cubes, remove the pan from heat with the lid on and let it rest until cheese has melted (5-10 min).
Recipe: Ārija Avota
Photo: Ārija Avota

Chocolate mousse
This mousse is amazing- it has a silky smooth texture, but still is packed full of intense chocolatey flavor! Paired with fresh seasonal berries this is just a summer dessert must-have.
When served in beautiful glasses and decorated with berries this simple dessert can become very fancy and beautiful. If you want to bring the mousse to an event- to work or anywhere else- you can use transparent plastic cups and transport them easily.
For this type of desert you really need to pay attention to what type of chocolate you use- choose one that has a higher cocoa content to achieve a deeper, richer flavor. It also wont create little clumps of fat when chilled, that can happen with lower quality chocolate.
200 g dark chocolate (approx 70% cocoa content)
40 g butter
4 eggs
2 tbsp sugar
300 ml heavy cream
1 tsp vanilla paste or vanilla sugar
Pinch of salt
A few tbsp cocoa powder for sprinkling
For serving: assorted berries- blueberries, raspberries, cut strawberries; in winter- clementine.
Makes 8-10 portions
1. Melt the chocolate with the butter using the over water method and set aside to cool.
2. Separate egg whites from yolks.
3. Using an electric mixer beat the egg whites in a clean bowl with the pinch of salt until foamy. Then add half a tbsp of sugar and keep beating until stiff peaks form and the whites hold in the bowl when turned over.
4. In another bowl beat the egg yolks and gradually add the 1.5 tbsp of sugar and keep beating until it doubles in volume and sugar dissolves.
5. Slowly beat in the heavy cream to the egg yolk mixture just until incorporated.
6. Now gradually mix in the cooled chocolate to the egg yolk and heavy cream mixture in 3-4 portions. Use a whisk for this task and do not mix too strongly, you just want everything mixed well together, but keeping the lightness.
7. Fold in the egg whites very carefully.
8. Now fill the chosen molds or glasses.
9. Place the molds in the fridge overnight or at least 4 hours.
10. Before serving, sift over some cocoa powder and decorate with berries.
Recipe: Ārija Avota
Photo: Ārija Avota

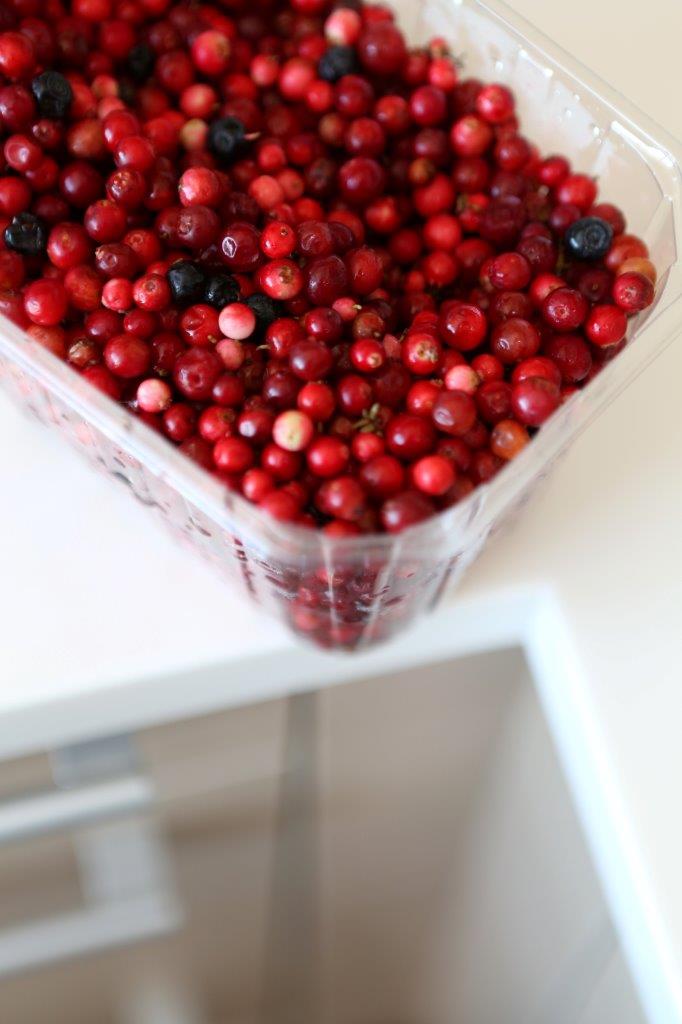
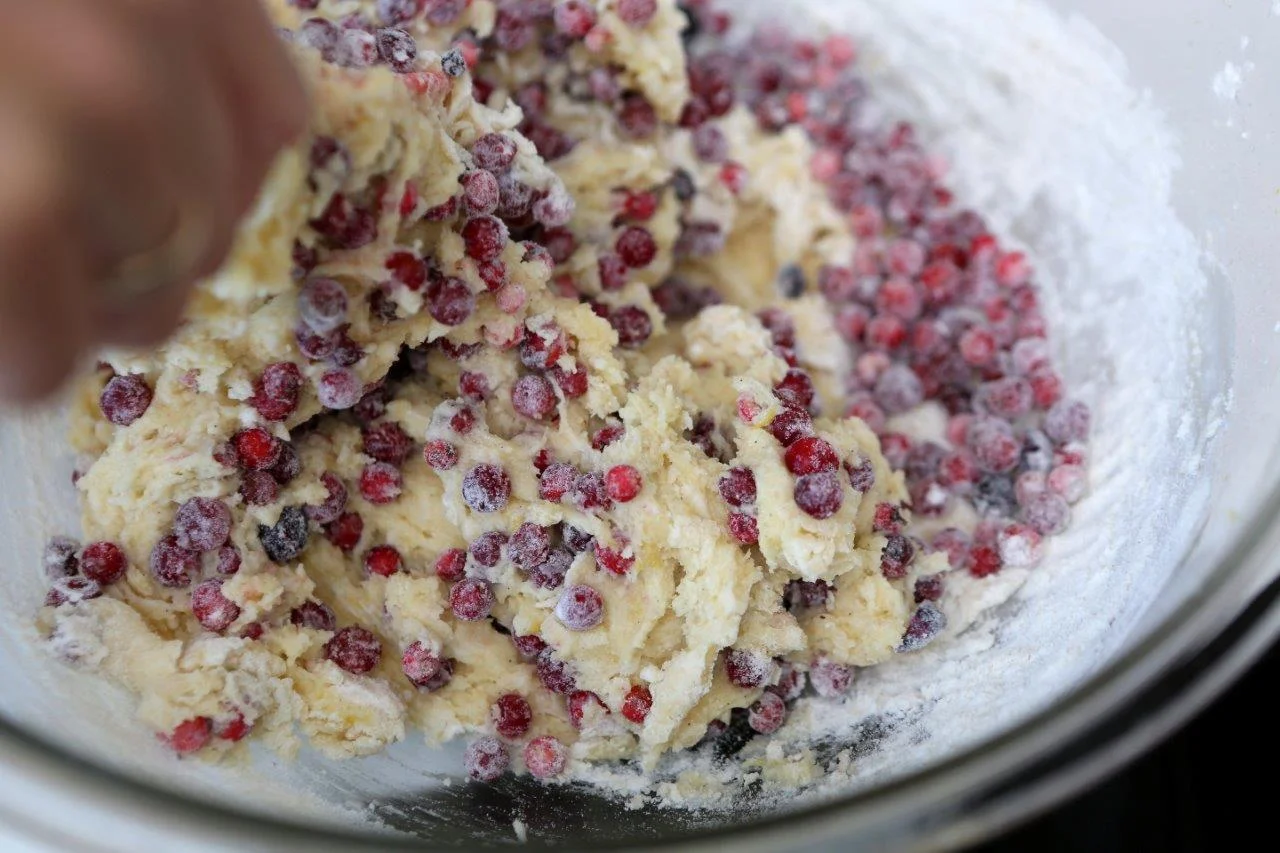
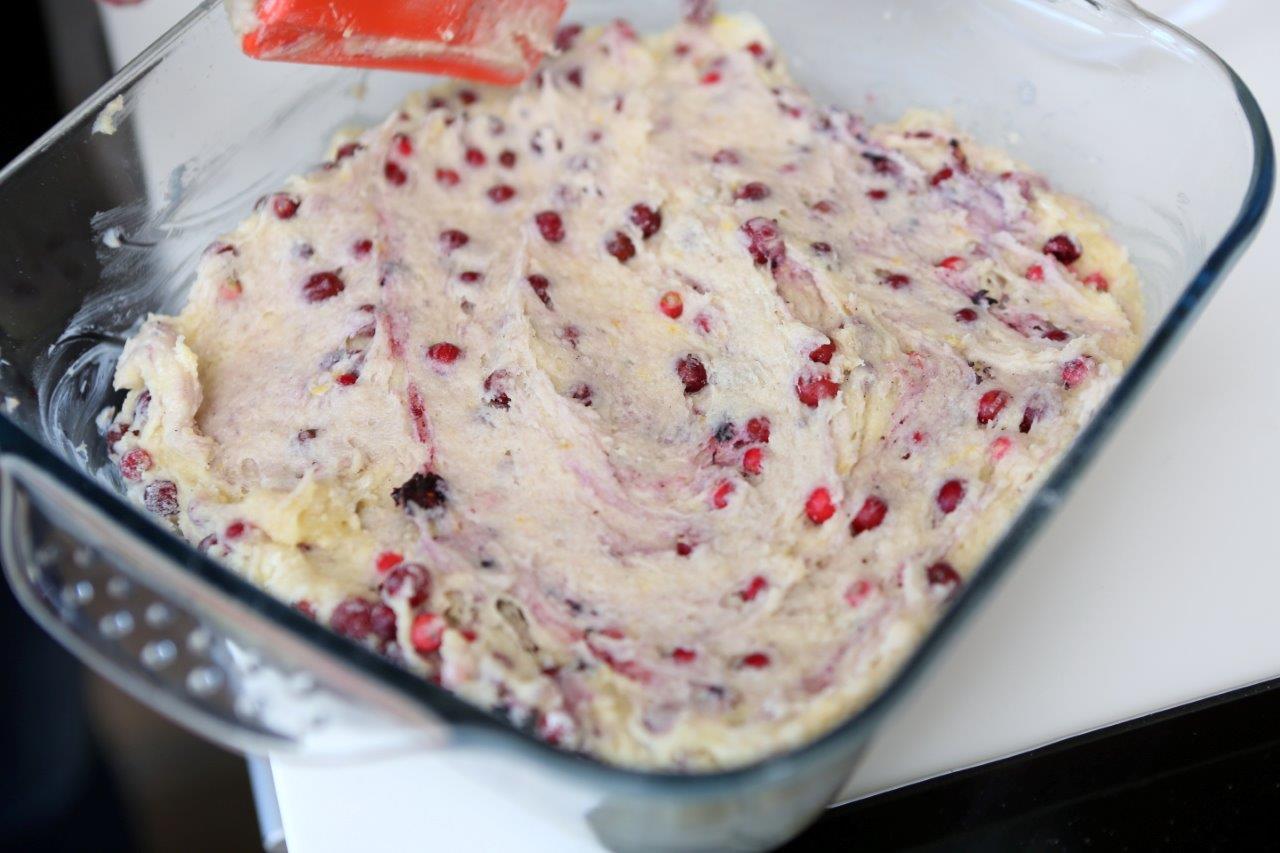
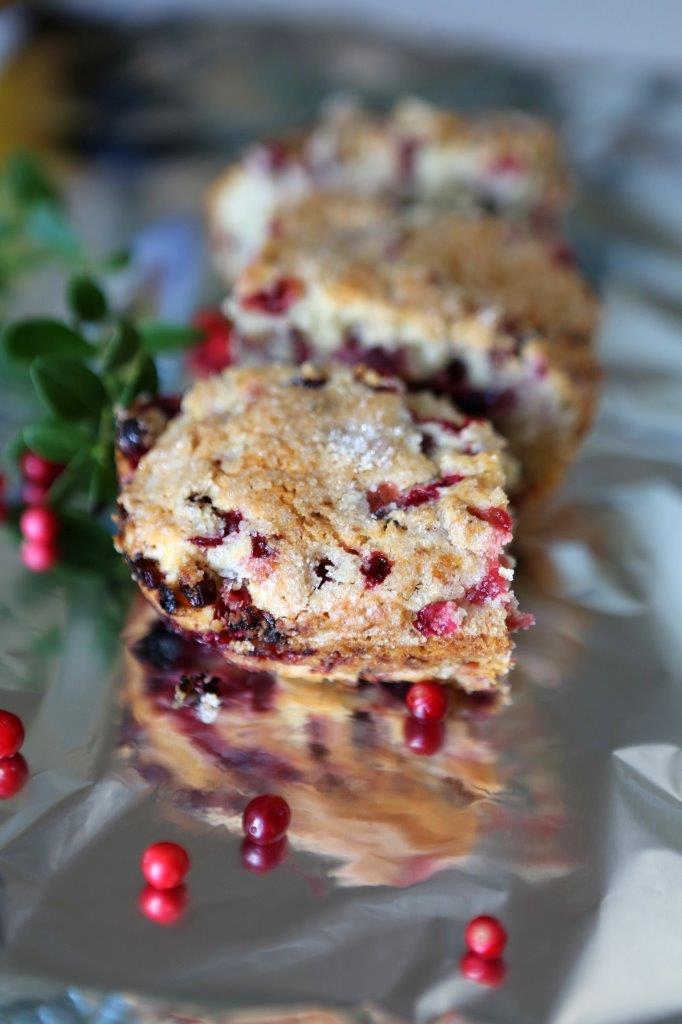
Quick lingonberry and buttermilk cake
This is oh so good- it’s like a huge muffin! The buttermilk makes it very moist and fluffy, the lemon zest adds aroma and the lingonberries give that amazing sour flavor. This can also be made with blueberries.
Maybe you want to make this for someone special this evening?
120 g butter, room temp
200 g sugar + 1 tbsp for sprinkling
1 egg, room temp
The zest of one lemon (only the yellow part)
1 tsp vanilla paste or vanilla sugar
250 g all purpose flour
2 tsp baking powder
Pinch of salt
150 ml buttermilk
1.5-2 cups of lingonberries, cranberries or blueberries
Butter or oil for greasing the pan
1. Grease a 20X22 cm square baking pan.
2. Preheat the oven to 185 degrees (celsius).
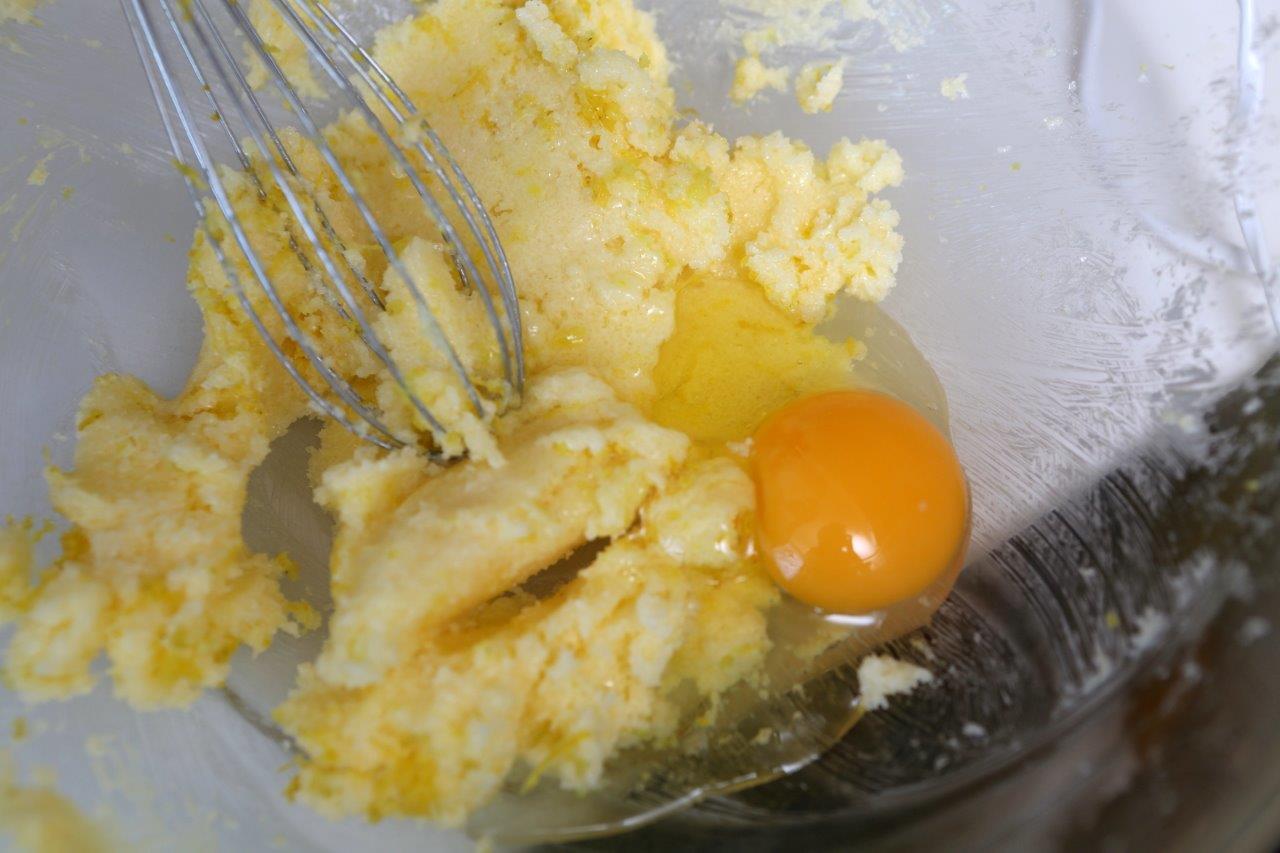
3. In a medium bowl beat together the soft butter with sugar until light and fluffy, add the vanilla, lemon zest and egg, beat until well incorporated.
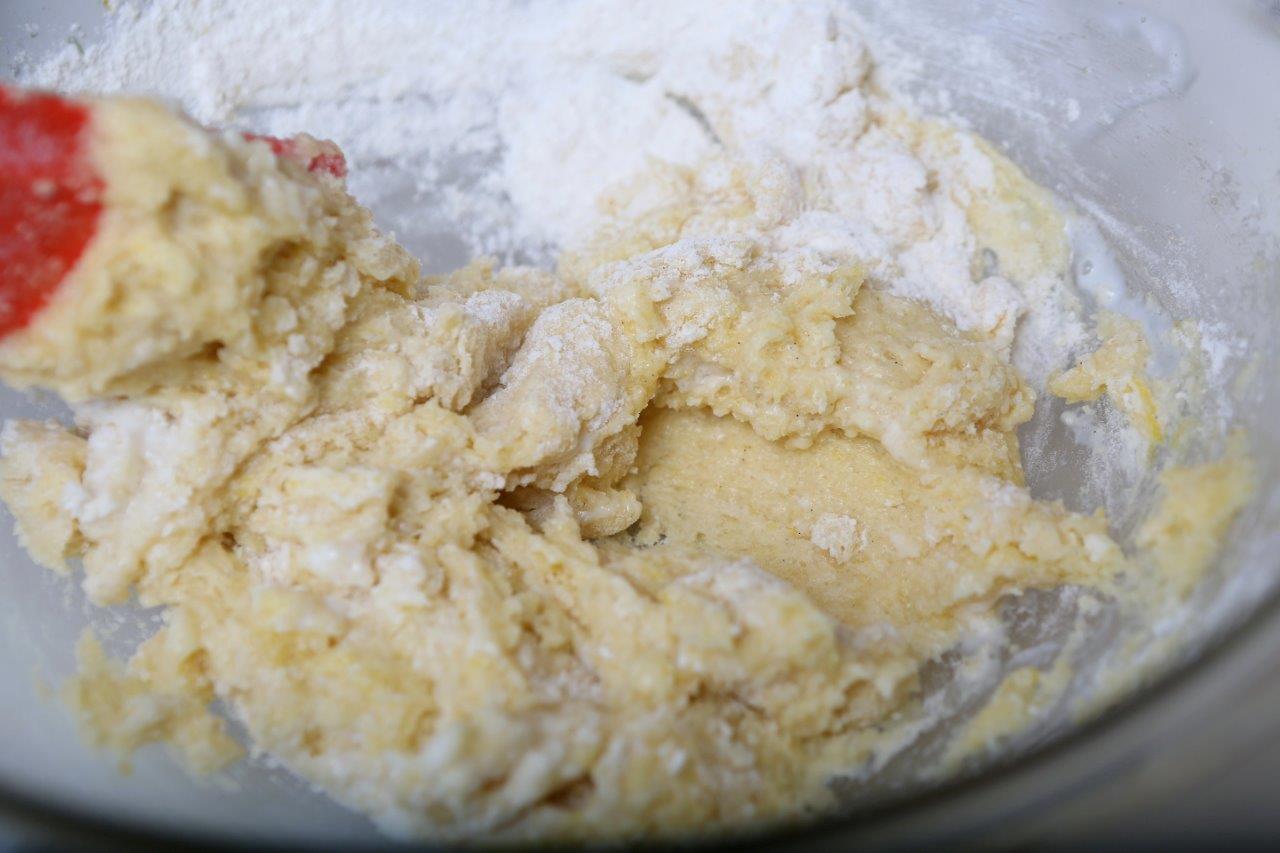
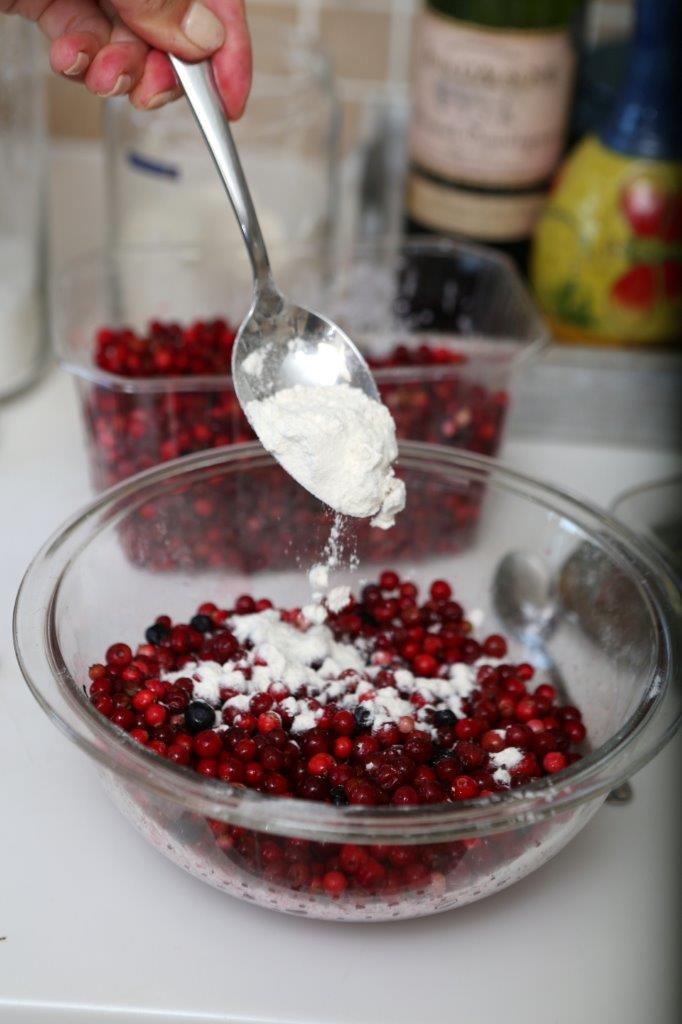
4. In a smaller bowl, whisk together the flour, baking powder, salt and berries.
5. Add the dry ingredients to the butter mixture alternately with the buttermilk (gently stir in a little flour, then buttermilk, then flour and so on). Do not overmix as the dough will not be as fluffy.
6. Pour the dough in the prepared pan and sprinkle with a tbsp of sugar.
7. Bake in the center of the oven for 35-45 min until toothpick comes back clean.
Recipe: Ārija Avota
Photo: Ieva Andersone (IG: @photoievaandersone)